Drawing a Heart With the Pen Tool in Illustrator
Illustrator 1
Creating and Designing Graphics
Introduction
Adobe Illustrator, theatrical role of the Adobe Creative Suite box, it is a powerful application misused to create and delete vector graphics. This extremely popular application is a thoughtful an industry standard, and is used widely past lifelike designers to produce Word, illustrations, and artwork for signs, posters, packaging and many else printed products. Adobe Illustrator can also be used to make up demonstrative web graphics.
About this Class
This manual provides a canonic introduction to the Illustrator interface and explores commonly used features by leading students through various exercises and applying those skills and tools in creating an e-card. During this class, students wish:
-
Become beaten with the Illustrator environment and workflow
-
Gain experience drawing graphic elements using lowborn Illustrator tools
-
Gain exerience creating World Wide Web and print document layouts
Illustrator 1 is the early in a series of Illustrator classes and is intended to serve as an launching to the application and to vector graphics in the main. In order to explore more advanced techniques, students should regard enrolling in Illustrator 2. In addition, aft completing Illustrator 1, students are eligible to enroll in Illustrator special topics classes, much as Son and Typography.
Prerequisites
Basic data processor operation skills (mouse, keyboard, lodge management)
Other requirements
Get at to Adobe brick Illustrator CC software
The Illustrator Interface
This section provides a brief overview of the Illustrator interface and describes its commonly-victimized components.
Interface Overview
The portion of the Illustrator interface that is used to view and edit out documents is titled the Workspace. A thick variety of Windows, tools and menus (legendary as Panels) can personify displayed within the Workspace in order to cater quick access to the feaures necessary for a given task.
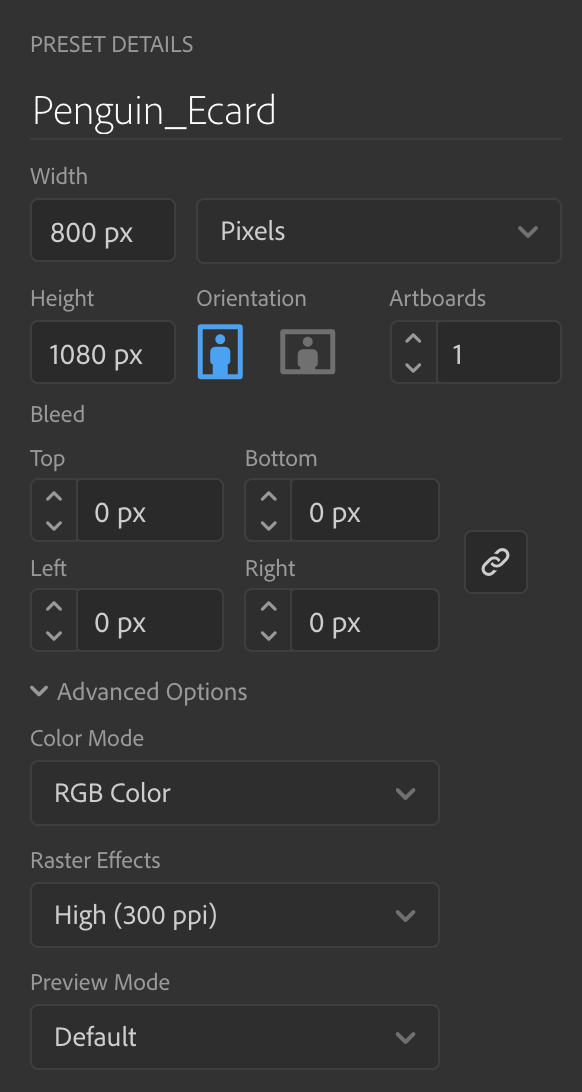
Creating a New Document
-
Open the Illustrator practical application.
-
Click Create New
-
In the New Document window, adjust the settings to those shown infra and click Create.
Interface Components
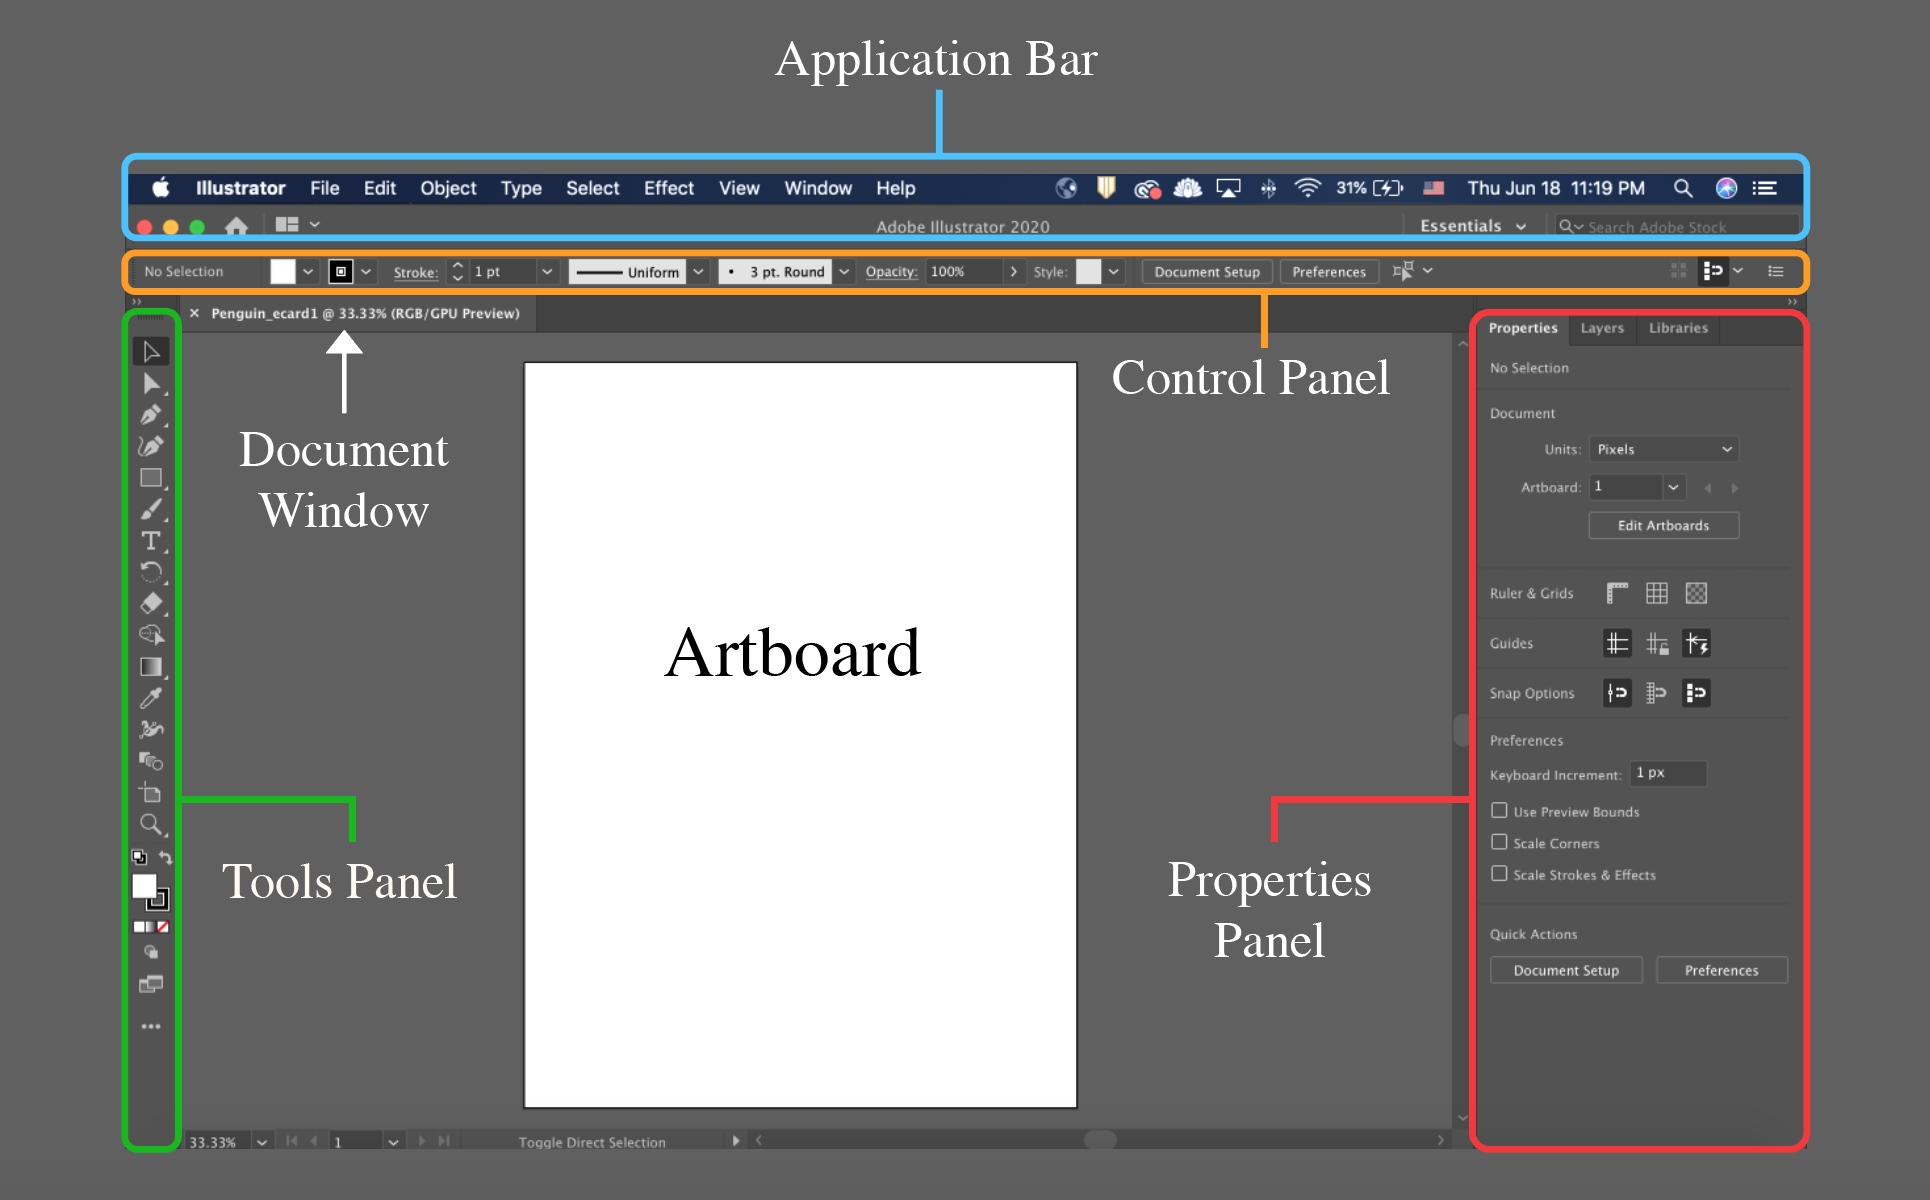
Application Ginmill
The Coating Browning automatic rifle contains the Workspace Switcher bill of fare and a shortcut to Adobe brick Bridge and Adobe Stock. The Application Bar also contains the Single file, Redact, View, etc menus.
The Workspace Switcher carte can make up used to arrange multiple Windows. Contingent on your project, at that place are a variety of windowpane layout options that will suit your needs. Use the drop-down carte to prefer one of the many purchasable window layout options. For the rest of this tutorial, we will make up victimisation the Essensials workspace.
Document Window
The Papers Window displays the file that you are currently working along. If you have got ten-fold files open, each file away appears as a tab in the Document Window, as shown above. The white rectangle internal the Document Window, which displays the printable area of the Workspace, is called the Artboard.
Tools Panel
The Tools Panel contains tools used to create and manipulate artwork (like a toolbox). To select a tool, just detent it. Tools with a triangle in the lower-right corner take over additional tools hidden at a lower place them. To display hidden tools, click and contain a tool icon; a drop-down carte showing the hidden tools will appear.
 alt="The tools panel showing the various tool options that can be hidden under a given tool icon and revealed by clicking and holding">
 Control board
The Board displays options for the currently selected tool. Board options are generally a undersize subset of those available in other panels and menus. Keep in mind that in that location Crataegus laevigata be additional options for your selected tool beyond those displayed in the Assure Panel.
See to it Control board Not Coming into court?
As of Illustrator 2022, the Ascendancy Panel is off by default.
To enable this feature for easier access code to alignment and satiate/apoplexy tools, go to Window > Control
Properties Panel
The Properties Board offers options to further monitor and modify your artwork, and some of these settings can too embody found in the Control Panel. There are too two other panels: the Layers Panel and the Libraries Panel. We will delve more into the Layers Panel later in the workshop; nevertheless, you will not represent using the Libraries Panel.
-
Each panel is displayed on a separate lozenge. To bring a Jury to the straw man, click its lozenge.
Illustrator Practice Files
For the start half of the workshop, we will learn about the different tools available in Illustrator away working through different exercises.
We will start by going to Files > Open and past selecting Illustrator-Practice-2022
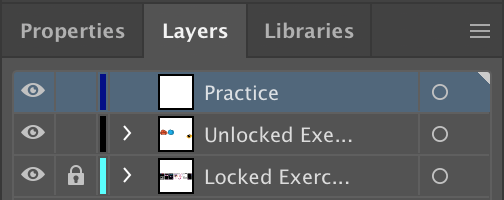
Layers Panel
In more of the Adobe Create Retinue applications, documents are often organized and isolated into different components called layers. You can redact and modify objects in from each one layer without poignant items in other layers. The Illustrator practice file has multiple layers, and throughout this workout, we want to work within the 'Drill' level in purchase order to utilize the tools.
Go to the Layers Panel and select the 'Practice' bed.
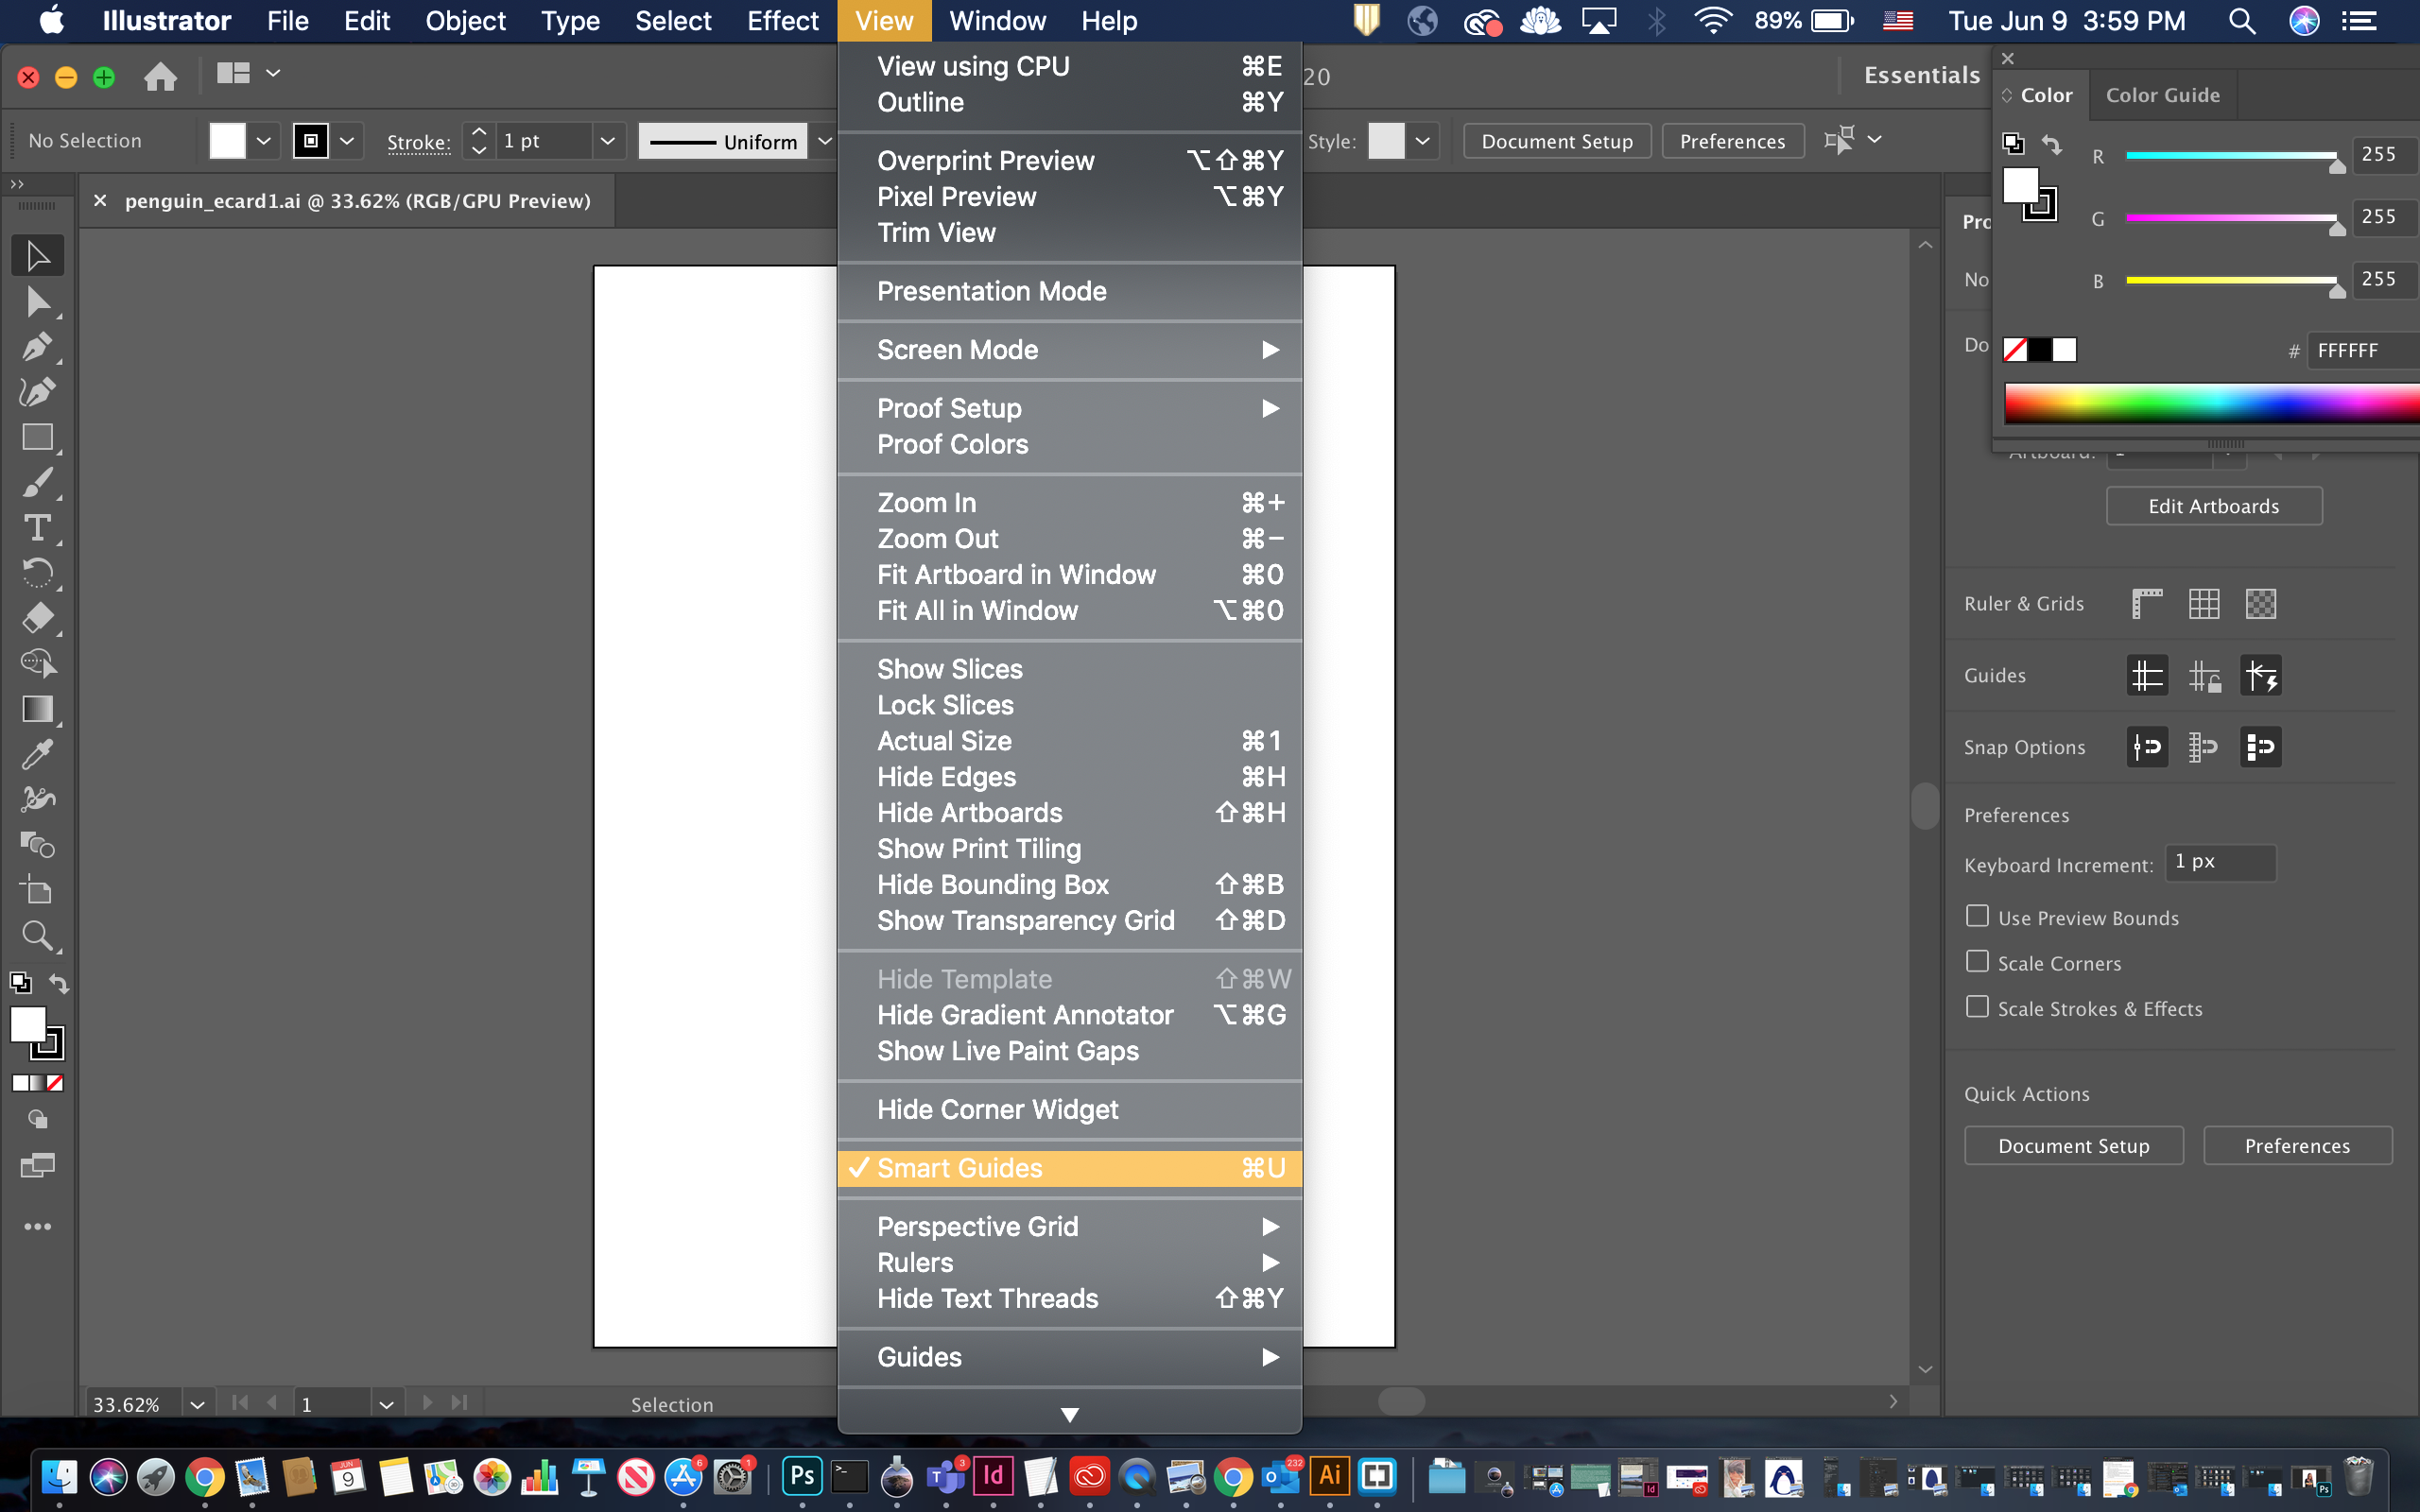
Smart Guides
Before you begin, let's bout connected Smart Guides. Smart Guides allow you to allign objects connected your artboard easily, and information technology will greatly aid you on your projects.
To enable this feature, go off to the Lotion Exclude and select View > Smart Guides.
Navigating the Workspace
Working in Illustrator often involves moving around the workspace in rank to focus on different portions of your project. In this section, we discuss a few methods of navigating the workspace.
Zoom Creature
![]()
Zoom Joyride:
The Zoom Tool lets you soar up in or zoom out to addition or drop-off the document display size.
Quickly zoom with any tool by holding Alt/Option and scrolling with the mouse/trackpad or by hitting Ctrl/Command and +/-
Hand Tool
![]()
Hand Puppet:
Old to move around the Artboard when the document is zoomed in beyond the workspace.
Shortcut: Hold Spacebar while dragging with the mouse.
-
Zoom in on Artboard so it extends beyond the Workspace
-
In the Tools Panel, Click the Hand Joyride.
-
To trash around the Artboard, Click and Drag in the Text file Windowpane.
Fit Artboard in Window
Fit Artboard in Window
Wont to quickly fit the artboard within the current windowpane.
In the Application Bar, go to View > Fit Artboard in Window
Shortcut: Ctrl/Command + 0
Creating and Altering Basic Shapes
Therein section, we testament make basic shapes with the Form Tools and alter its form with the Selection Tool. We testament also learn how to change the appearance of a Supreme Headquarters Allied Powers Europe away modifying its Fill People of color, Stroke Colouring material, and Fondle Weight.
Creating a Squarish
![]()
Rectangle Tool
Use the Rectangle Tool to draw rectangles and squares.
Appreciation the Shift key to draw a perfect Square.
View as the Elevation/Option significant to guide the shape from the center out (rather than from one corner to the strange)
Shortcut: M
-
In the Tools Panel, Chink the Rectangle Puppet to choose it.
-
Create a square by holding the Shift Significant while dragging out.
-
In the Tools Panel, Click the Selection Tool
-
Click on any object in the Artboard, a box with control points appear to designate an onbject is selected.
-
Hold down Shift and Click to select multiple objects
-
In order to create a copy, first select the square with the Natural selection Tool. Next, appreciation down the Alt/Option key while dragging out.
-
With the Selection Tool, move over the copy over to the neighboring template. We wish to resize the build while maintaining the indistinguishable proportions, then hold the Shift while dragging down a corners until it matches the template.
-
In the Tools Control panel, double-click the white swatch in edict to change the Fill, which is the color of the shape.
-
To deepen the coloring of the outline, attend the Tools Panel and get across on Stroke. In a similar mode, double-click the stroking swatch to transfer the Stroke Color.
-
We commode increase or reduction the stroke weight by going to the Hold Panel. Locate "Stroke" and stimulus a value to your liking for the Stroke weight.
Pick Tool
![]()
Selection Puppet
Use this tool to select, go under, resize, circumvolve, etc. intact objects or groups of objects.
Prize doubled objects by holding Shift and clicking each additional object, or by clicking and dragging a box around the objects you'd like to select.
Shortcut: V

Creating a Circle
-
In this eccentric, we do non neediness an draft for our circle. In the Tools Panel, click the stroke swatch and then select the small white box with a carmine slash through it, which means none.
-
In the Tools Panel, hold downfield on the Rectangle Tool to display the hidden tools, and pick out the Ellipse Tool
-
In order to draw a circle, we would hold the Shift Key, but before we do that, we want to take a leak a minor change. By default, we start by creating shapes from the corner, but we can as wel imbibe shapes from the center verboten by property the Alt/Selection describe while dragging out. Unite both of these stairs and hold the Geological fault Key and Altitude/Option key patc drawing a circle.
-
Make a written matter then move the material body to the right. Hold Shift and resize the shape.
![]()
Ellipse Tool
Use the Ellipse tool to easily draw oval and circles.
Hold the Shift to draw a perfect circle.
Hold the EL/Pick key to draw the shape from the nerve centre out (rather than from one niche to the other)
Cutoff: L
Creating a Triangulum
-
In the Tools panel, select Fill and set it to none.
-
Change the Stroke to any colorise that you like.
-
Hold down connected the Ellipse Tool and select the Polygon Tool from the invisible board.
-
If you draw a shape with the Polygon Tool it is likely that information technology is not a triangle, simply we can deepen the number of sides of the polygon. Drag out a shape (assume't release your snap) and tap the down arrow key from your keyboard to change the number of sides until you get a Triangulum. Ahead you let go, grip down the Shift Key to align the base then let go the click.
-
While moving the triangle, create sure to click directly along the throw to move it because the physique does not feature a Fill Gloss.
-
With the Selection Tool, reaching the top of the triangle upwards and move the sides inward, matching as closely Eastern Samoa executable to the template. Make a copy.
-
The 2d trigon is rotated 90 degrees clockwise, and rather of nerve-racking to rotate the triangle to on the dot 90 degrees, Lashkar-e-Taiba's set the rotation to 45 degree increments. Select the copy of the triangle with the Selection Tool and oscillate all over the nook until the cursor becomes a double-sided arrow. Next, hold down the Shift Key and rotate the triangle 90 degrees.
-
Resize the triangle and you are through!

Transforming Shapes with Anchor Points
In Illustrator, all mold is equanimous of points connected by paths; we can change a shape by manipulating individual points with the Direct Selection Tool. In this section, we will focus on utilizing the Direct Selection Tool to create unique shapes.
Transforming a Rectangle
-
Attraction a rectangle and reposition if necessary.
-
Make a copy of the rectangle.
-
From the Tools Panel, choose the Direct Selection Tool. Click once connected the top-right anchor point to select IT then click and drag the anchorman point in.
Direct Choice Instrument
![]()
Forthright Selection Tool:
Use this joyride to select somebody anchorperson points inside a shape.
Blue-ribbon individual anchor points or path segments by clicking along them, or select an entire path or group by selecting any separate spot on the item.
Blue-ribbon multiple anchor points by holding Sack and clicking each additional point, or aside dragging a boxful around all points you would like to select.
Shortcut: A
Creating an Organic Shape
-
Drag a circle and reposition if obligatory.
-
Make a simulate and use the Direct Natural selection Tool around to choice the bottom mainstay point. Click and drag the point downwards.
-
We can adjust the curvature of the shape with handles. Contingent the angle and length of the handles, information technology changes the direction and size of the curve. Select the bottom cast anchor degree with the Direct Natural selection Puppet then drag the handles absent from the bod until curvature of the shape matches the template.
-
Make a replicate then click on the left anchor point with the Place Selection Tool. Rotate the handles slightly inwards by dragging the top plow to to the right. Afterwards, select the top anchor point and drag it downwards.
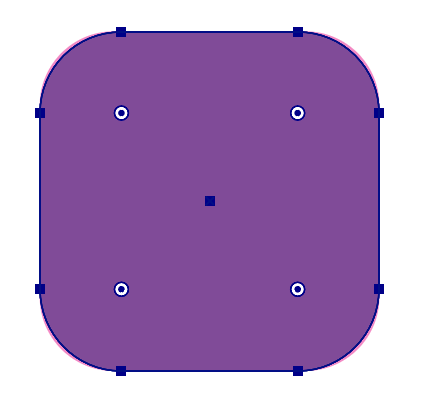
Creating a Annular Square
-
Take up a square and prefer a Fill Color.
-
Inside the shape, in that respect are cardinal light-skinned circles near each corner, and these tolerate us to turn the corners of the squarely. Click on a white Mexican valium and drag out information technology inward.
-
The previous step rounded all the corners at once, but we can also finish out a specific corner. Click on the anchor point in time with the Direct Survival of the fittest Tool to active it and drag the the white circle inwards.
-
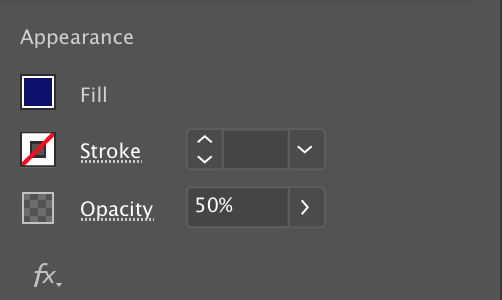
Permit's adjust the foil of the shape by lowering its Opaqueness. Go to the Properties Panel and change the opaqueness to 50%.
Penitentiary Instrument
In Illustrator, the Pen Tool is wont to draw custom shapes from scratch by egg laying out a series of curve and corner points connected aside paths. We'll complete a few practice exercises.
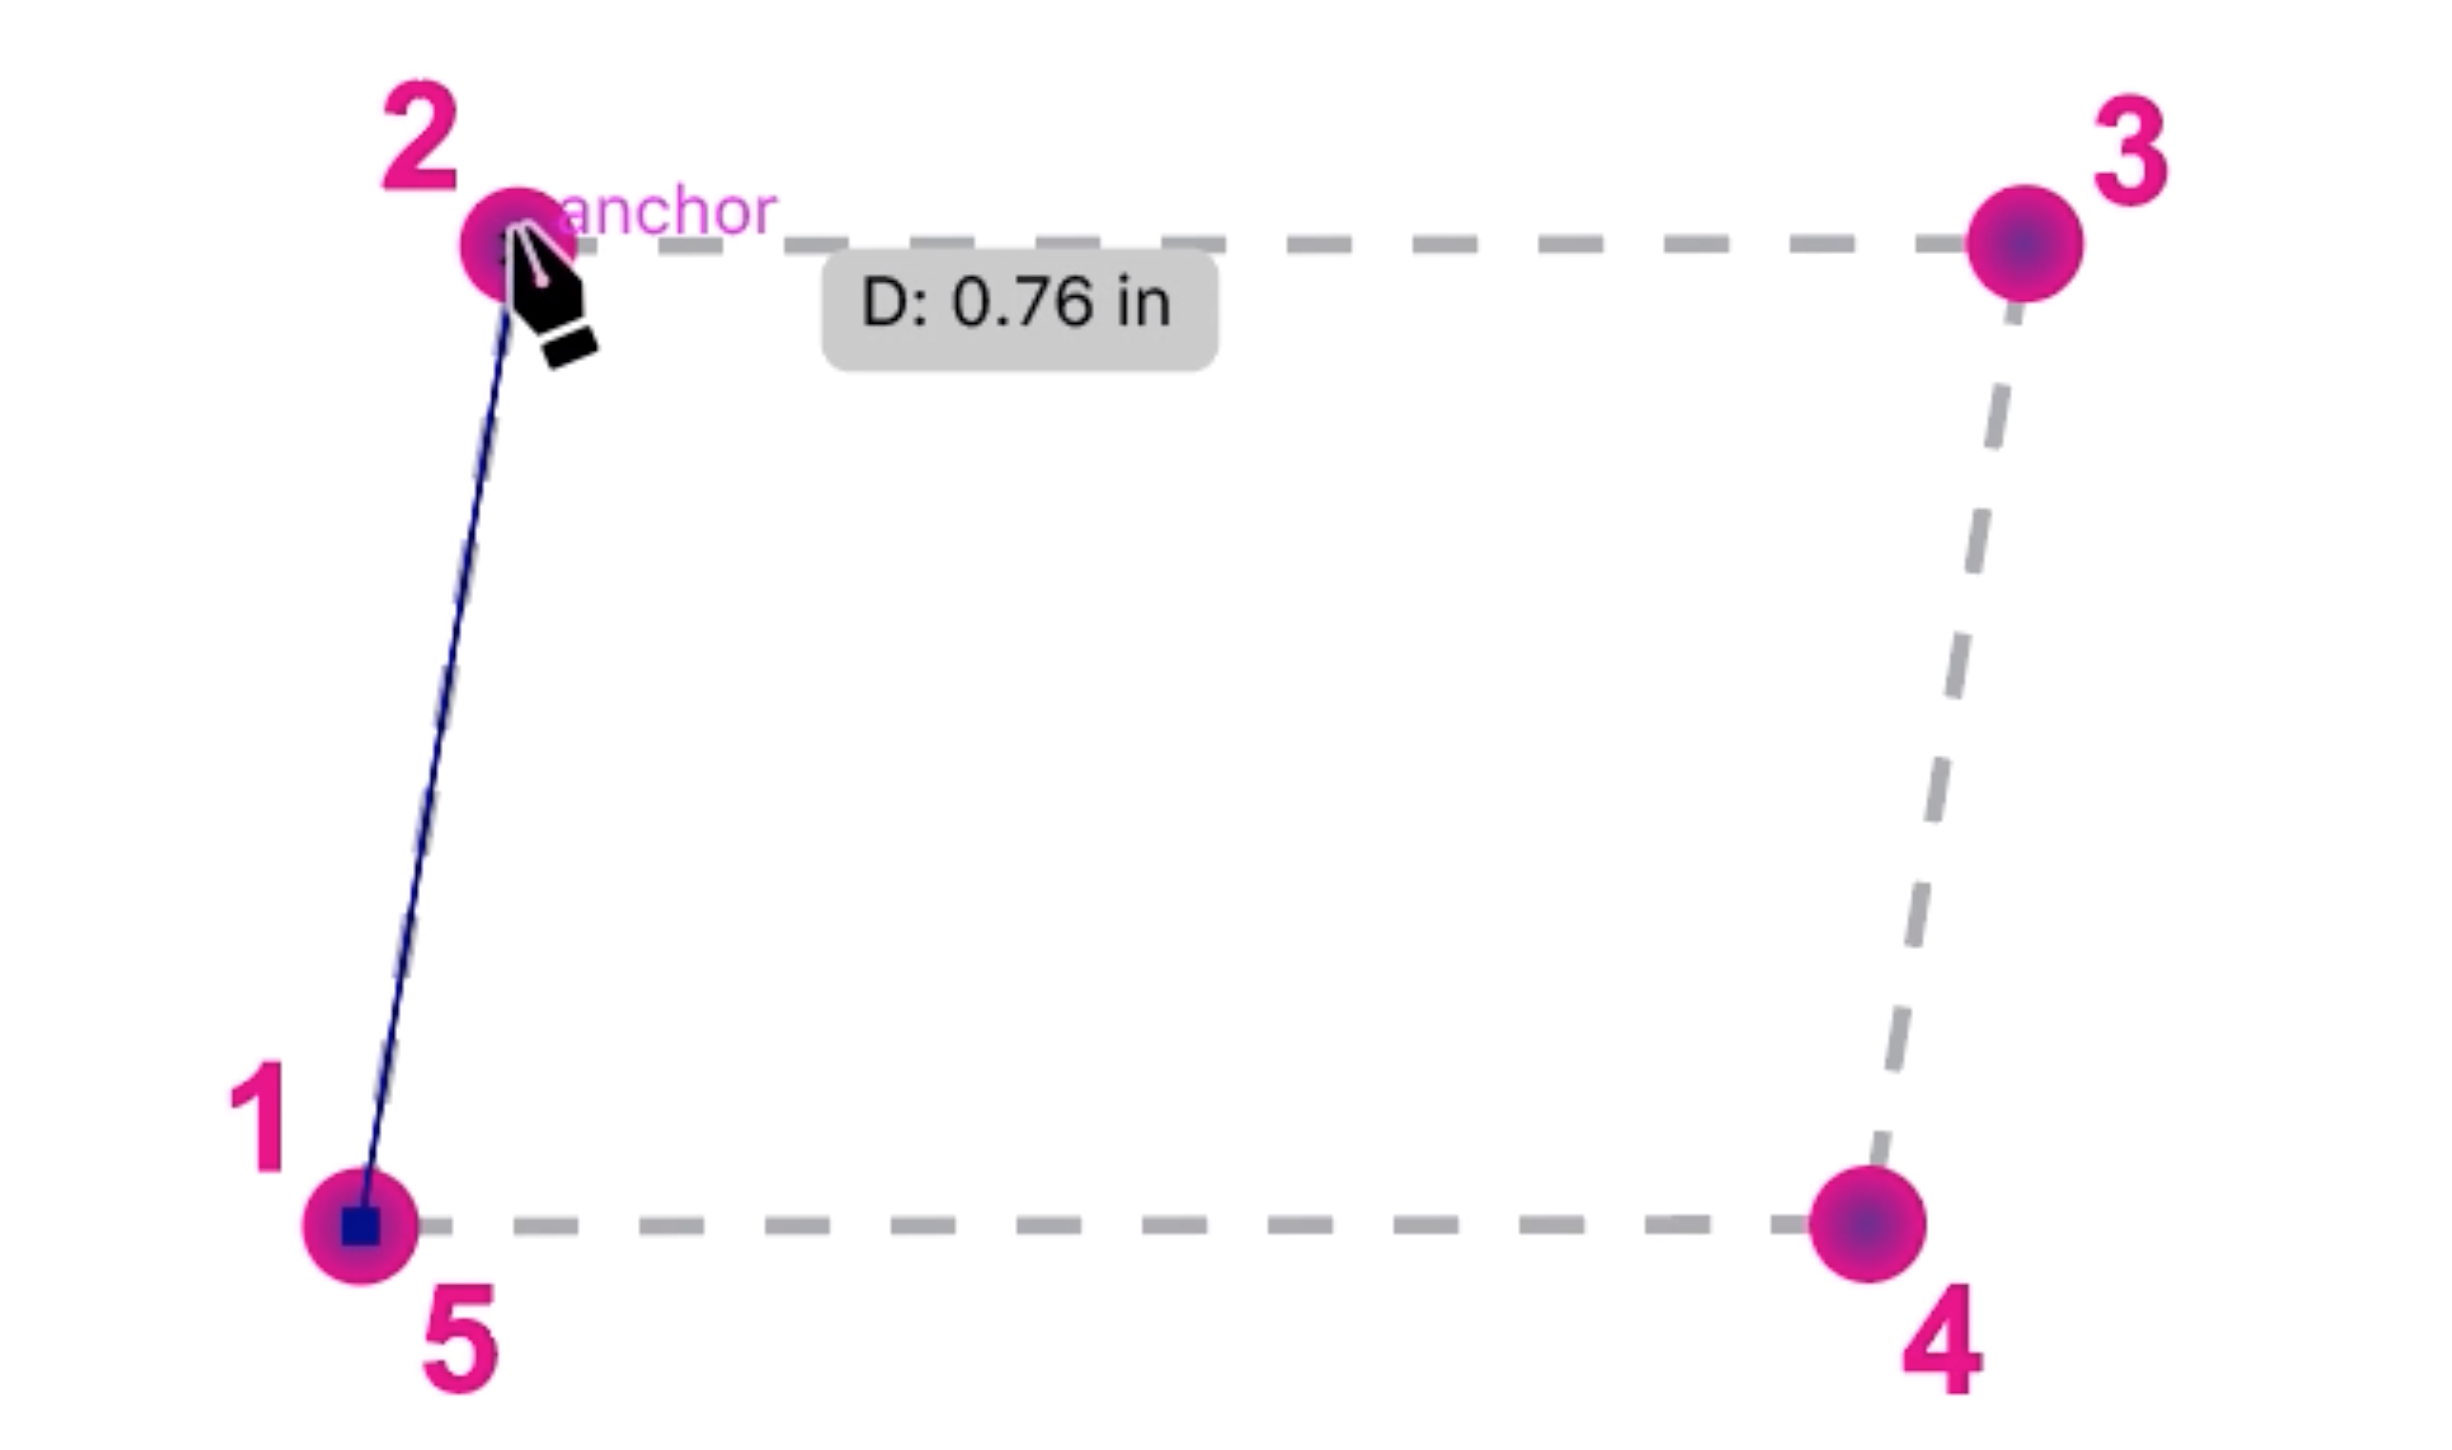
Exercise 1: Straight Lines
-
Before you get going drawing, make sure that the Stroke Color is set to a discolor that you can see easily and that the Take Vividness is set to none
-
In the Tools Panel, select the Pen Tool.
-
Click one time in the gist of point 1 to place your first anchor point. The Pen Tool creates paths betwixt multiple points, so we won't see a line look until we property the next maneuver.
-
Click once on point 2 to place another anchor point. This time, a personal line of credit should appear betwixt points 1 and 2.
-
Click on points 3 and 4 to continue drawing the shape.
-
To unventilated the shape, hover over point 5 until you see a small circle appear next to your cursor. This indicates that Illustrator will now close the path. Clink on point 5 to close the path.

![]()
Pen Tool around
The Pen joyride is used to create anchor points and adjust the angles of the curves connecting them.
Click once to create an anchor dot. A line appears from the last anchor point you've placed, connected to wherever your creep cursor is on screen. Click again to make up additional points.
Click and drag on to set the Angle for the control handle, which affect the angle of lines (too titled paths) that connect the anchor points.
Click the first point you created to tightlipped your figure and stop adding newfangled points.
To hold on creating new points without closing your shape, hit the Esc identify or select some other creature.
Here is a snip of the whole process:
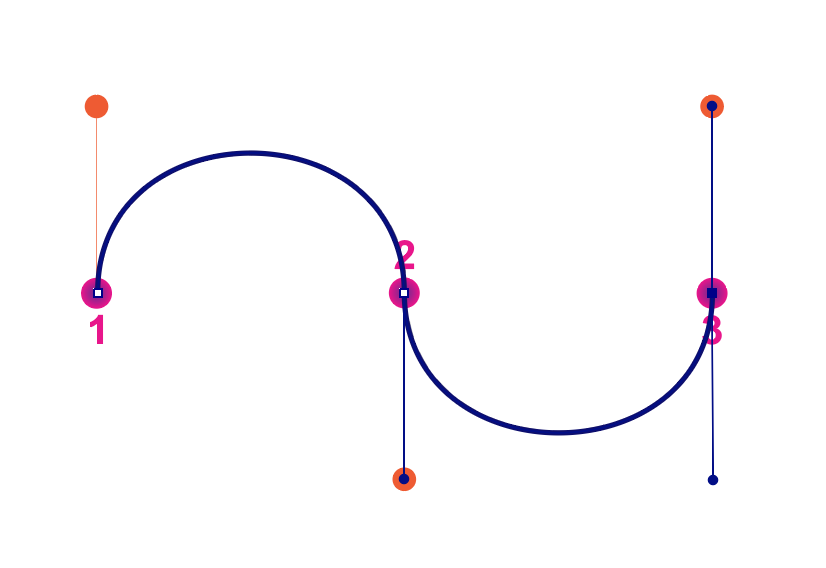
Exercise 2: Curved Lines
-
For this exercise, we will be creating a curved line with handles. With the Pen Tool still elect, sink in on point 1 and drag upwards toward the red circle and release the mouse. Though we South Korean won't see a course appear until we create the succeeding signal, adding these handles to our first point sets the stage for a curved short letter.
-
Click in the center of point 2 and drag out downwards toward the red circle. A curved path is created between points 1 and 2. Note that if we dragged upwards at point 2, the curve would stimulate basket-shaped an S shape instead of a U shape.
-
Finish the curved line by Clicking once in the concentrate of point 3 and drop behind upwards toward the red circle.
-
Since this is non a closed mould, we will need to press the Enter key systematic to march on to some other task. Using the Direct Selection Creature, we can move the handles to correct the curves.
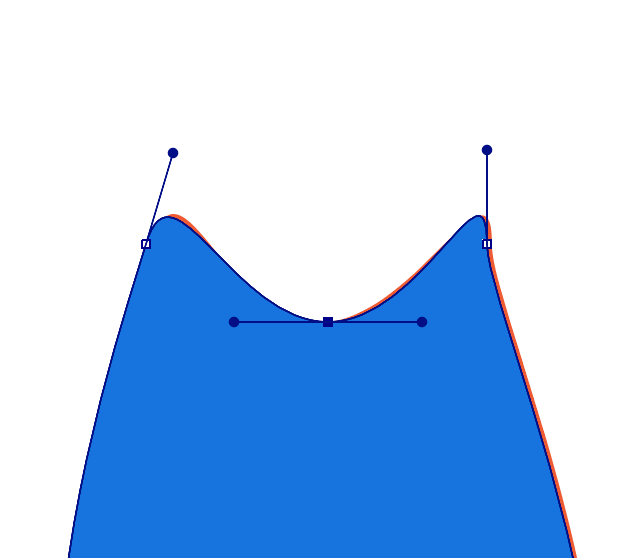
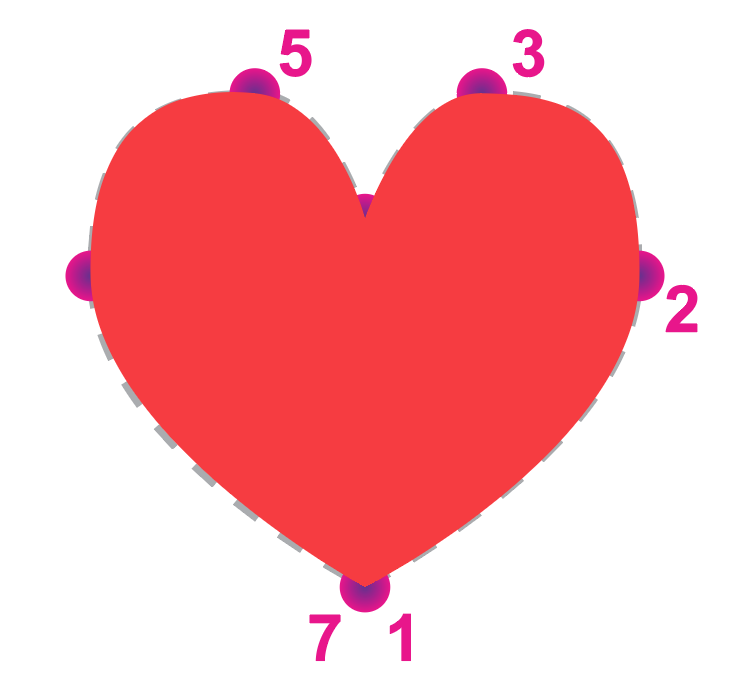
Do 3: Heart
The first deuce exercises covered the bare essentials of the Playpen Tool; now, we leave apply what we enlightened by drawing a heart! We will exercise this heart in the e-circuit card future. Progress to sure that you are not still redaction your curve from Exercise 2. Either press the Enroll key fruit or switch to the Selection tool, then hindermost to the Pen tool.
Before moving onto the next section, try to do this drill without help. .
-
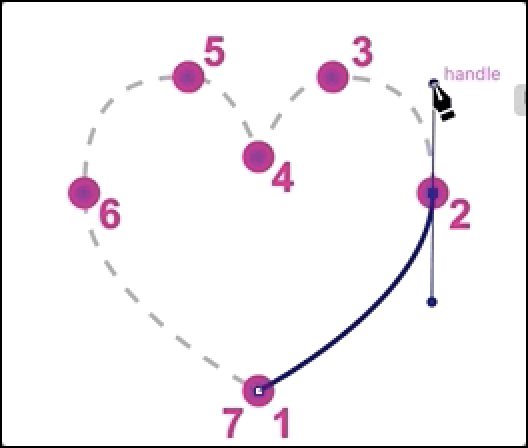
Penetrate on point 1 to start the shape.
-
Click channelize 2 and drag upwards to make over a dress of handles. IT will help to handgrip Shift while slow handles -- this will restrain their tip to 45 degree increments.
-
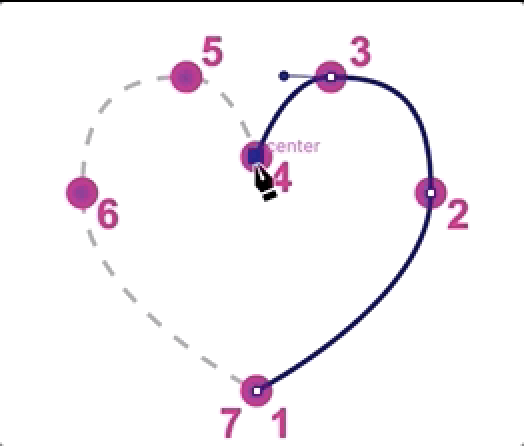
Click on point 3 and drag slimly to the left.
-
Cluck point 4, but perform not drag! We want this to be a corner.
-
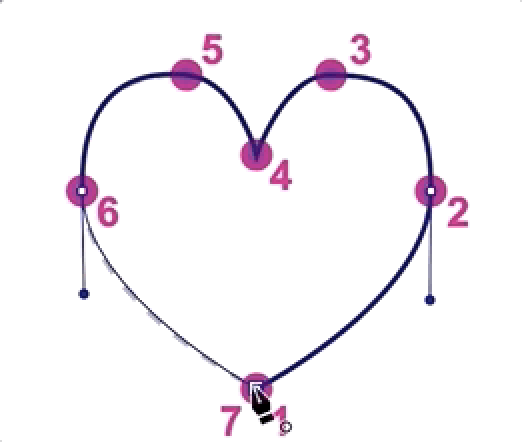
Click charge 5 and tangle your cursor to the left.
-
Get across dot 6 and drag your pointer downward.
-
Hover o'er point 7 until you see a small circle appear close to your cursor. This indicates that Illustrator will now close the path. When you see the circle appear, click point 7.
-
If necessary, adjust the shape of the nitty-gritt by using the Direct Selection Tool and playing with the handles and anchor points to match the dotted outline as close equally possible.
-
Change the Fill Colorize to a light red and set the Stroke to none.
-
If you have time, drill qualification your own shapes with the Pen Creature! The kind of curve that the Pen Tool makes is called a bezier, and it is used in an exceedingly wide motle of softwares including programs for design, sound yield, and brio.
Here is a clip of the whole process:

For even Thomas More recitation, present's a fun game to help you master the write creature: http://bezier.method.ac/
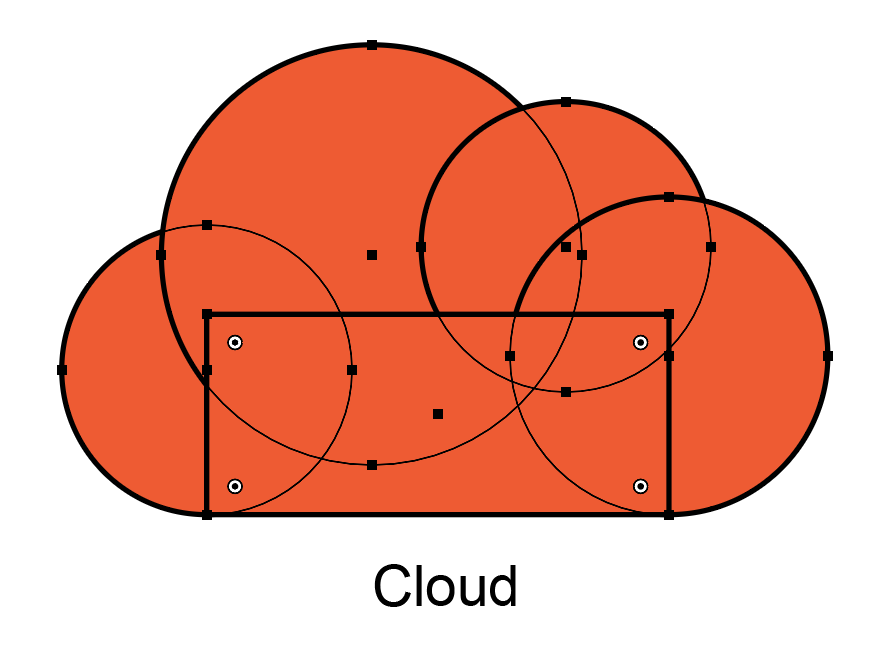
Shape Builder Tool
The Shape Detergent builder Tool allows America to combine and edit shapes. We will explore these two features in the Cloud and Moon exercise.
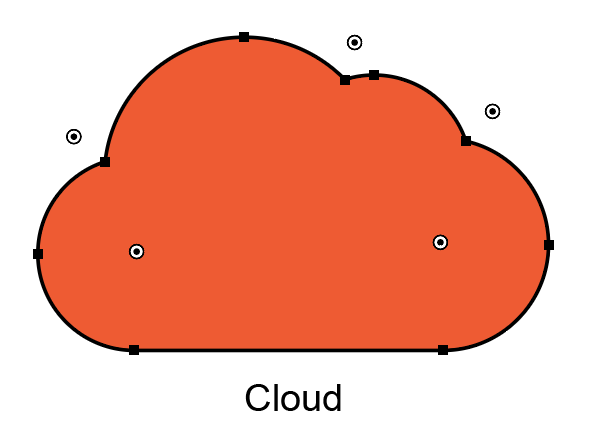
Cloud
-
First we will function the rubberband method to select all of the shapes. Use the Selection Tool around and drag over the area to select the shapes.
-
From the Tools Jury, penetrate connected the Shape Builder Tool. Drag finished all the shapes to create a bloodline connecting all the pieces. Let a-okay of the cluck and the shapes should be combined into a lifesize haze over.
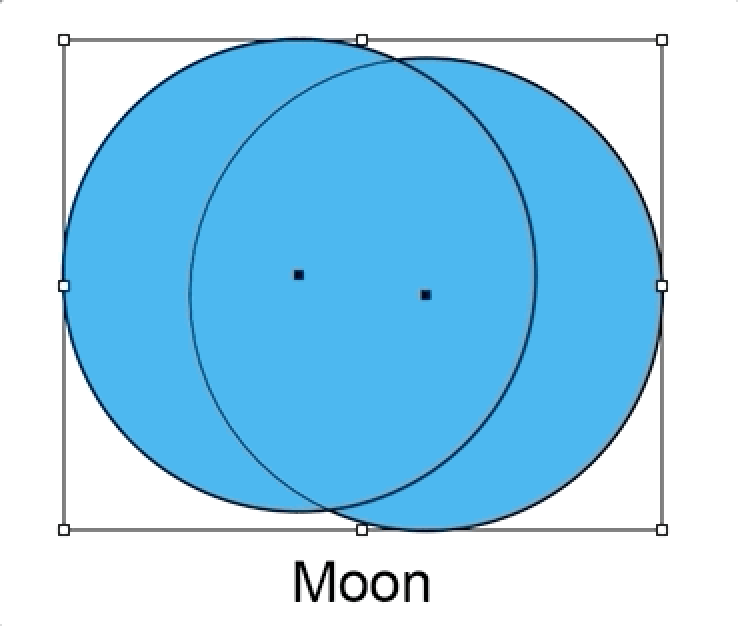
Moon
-
Using a similar serve, select both circles with the rubberband method.
-
While on the Shape Builder Creature, hold the Alt/Option Key while effortful a line though the left circle to edit that set out of the overlapping shape.
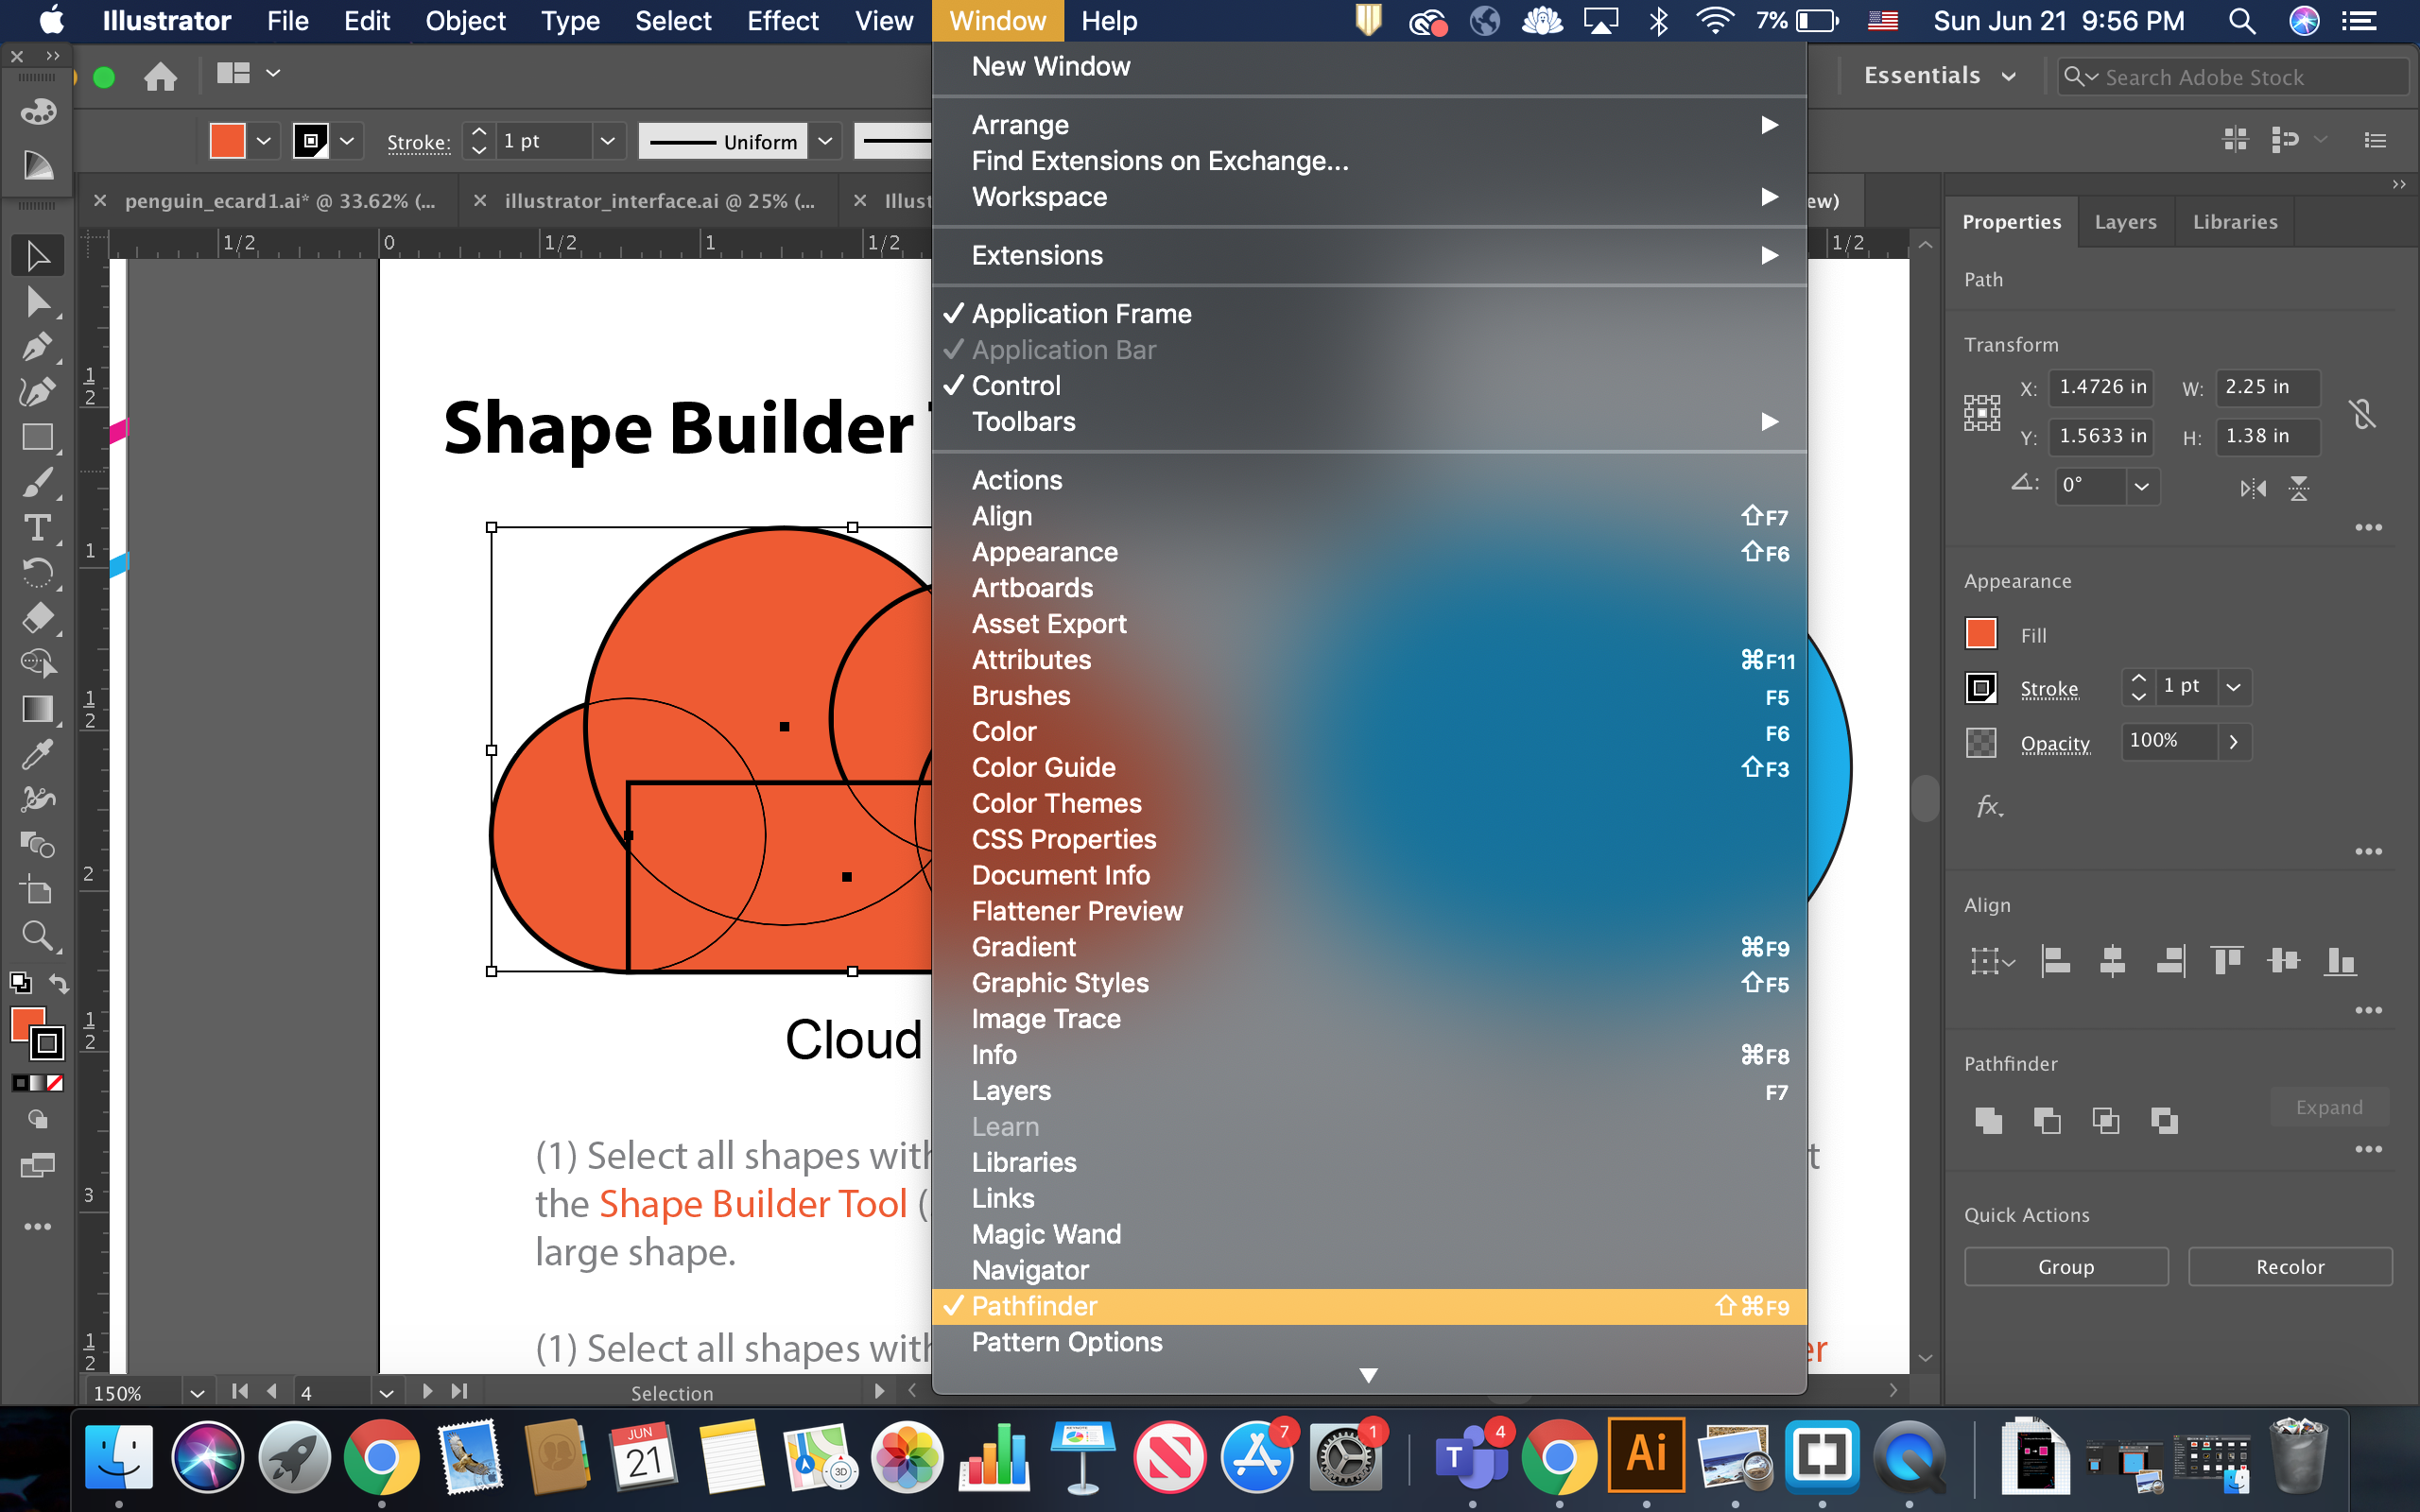
Pathfinder
Like the Shape Builder Tool, Scout also allows us to combine and blue-pencil shapes. The only difference is the fact that we can pick out from a list of predetermined options in Pathfinder to create our single physical body. Let's look at how Pathfinder works by applying it to the ii previous exercises.
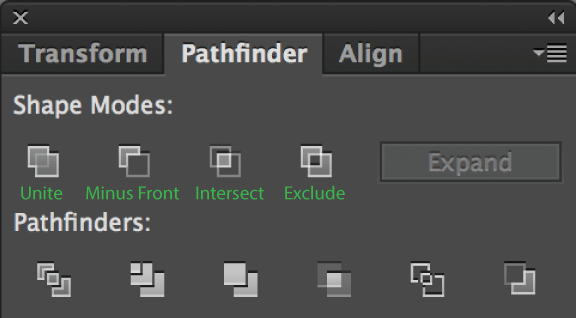
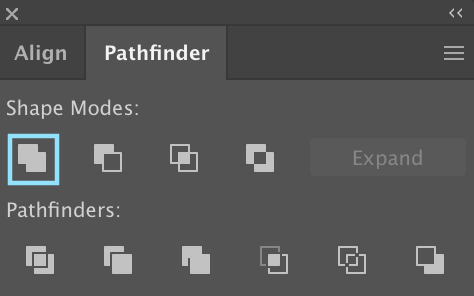
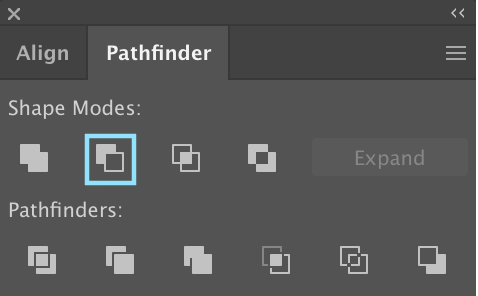
Pathfinder
The Pathfinder Panel allows you to make up more complex shapes by combining surgery subtracting two or more overlapping shapes. Access Pathfinder via Window > Pathfinder
Select two or more overlapping shapes and use the Frame Modes buttons in the Panel to combine them.
The four modes are:
- Unite: Combining two or more shapes into one, eliminating inside paths that lap.
- Disadvantageous Front: Take off the shape ahead from the shape behind.
- Intersect: Keep only the areas where both shapes lap.
- Exclude: Off the areas where both shapes overlap.
Pathfinder options
Cloud
-
Undo the changes with Ctrl/Command+z until you revert both the Cloud and Moon examples to its orginal posit.
-
Utilize the rubberband method to superior all of the shapes.
-
In the Application Debar, attend Windows > Pathfinder.
-
Select Link up from the list of Shape Modes.
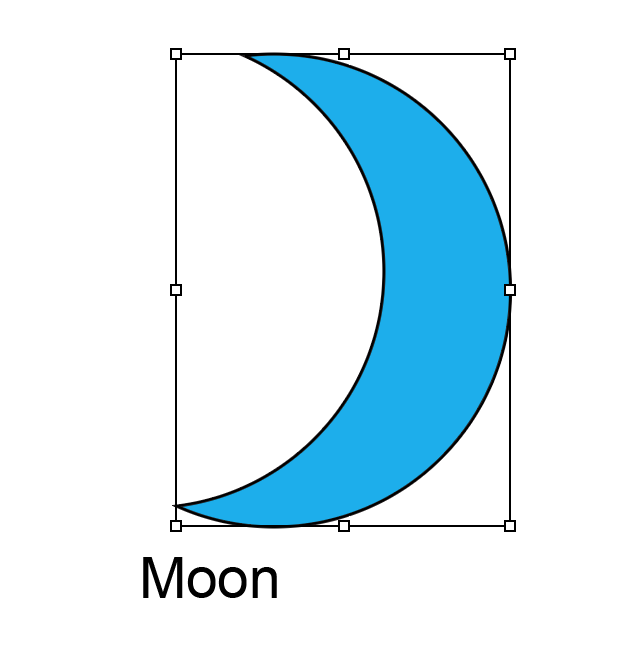
Moon on
-
Select both shapes with the rubberband method.
-
From Shape Modes, select Minus Front.
As you can take care, Pathfinder and the Forge Builder Tool accomplishes the equal chore, and it all comes down to personal preference.
Type Tool
The Type Tool is very similar to other programs that utilize text. We will look at how we give the axe change the properties of the text with the succeeding exercise.
-
From the Tools Panel, select the Type Creature.
-
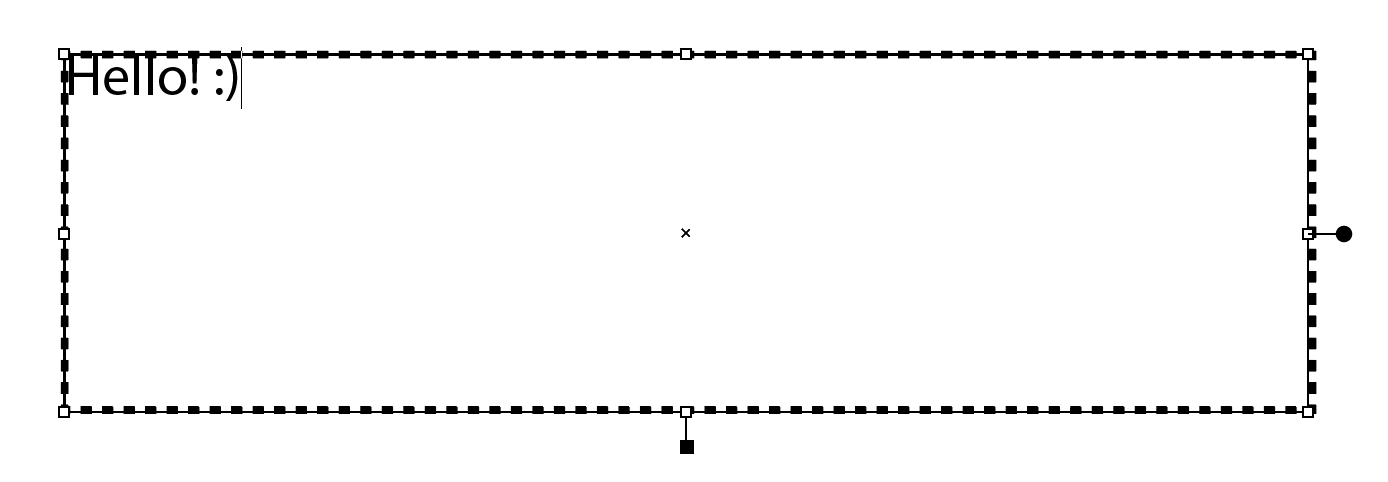
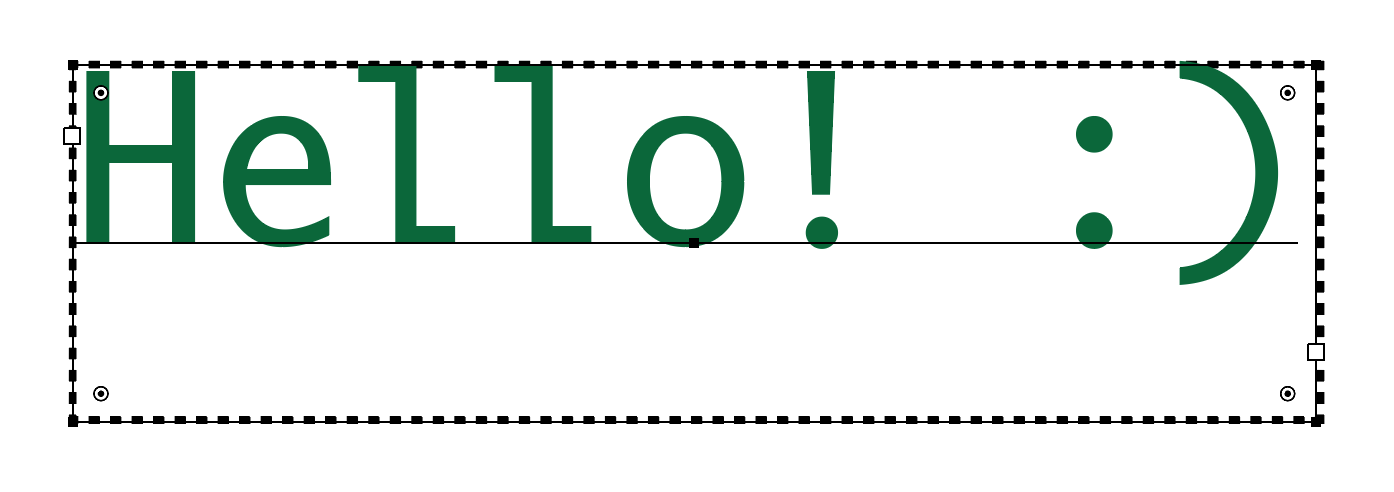
Drag a text box seat that matches the dotted templet and write a message of your choice.
-
Highlight the entire message to select it.
-
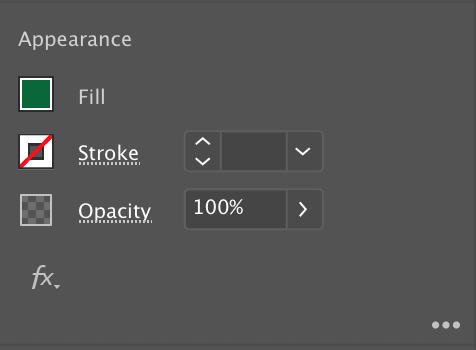
Attend the Properties Panel and change the Fill and/OR Stroke Color.
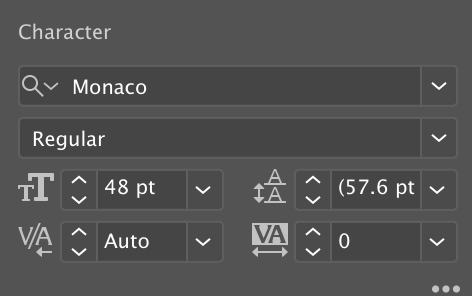
- Utilise the dropdown to search the motle of Fonts and choose one to your liking.
- Change the Font Size, and if function of your text is nonexistent it means your text is too large for the size of the school tex box. To fix this, you need to decrease the size of your font operating theater increase the sized of your text box seat.
Grouping Shapes
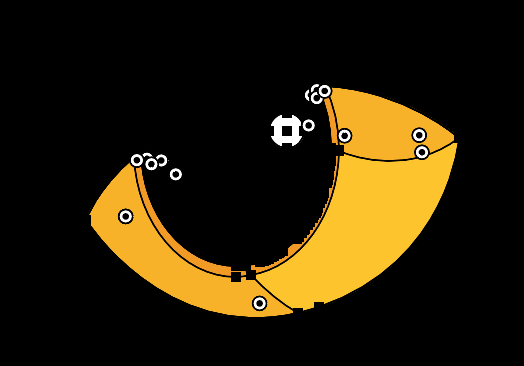
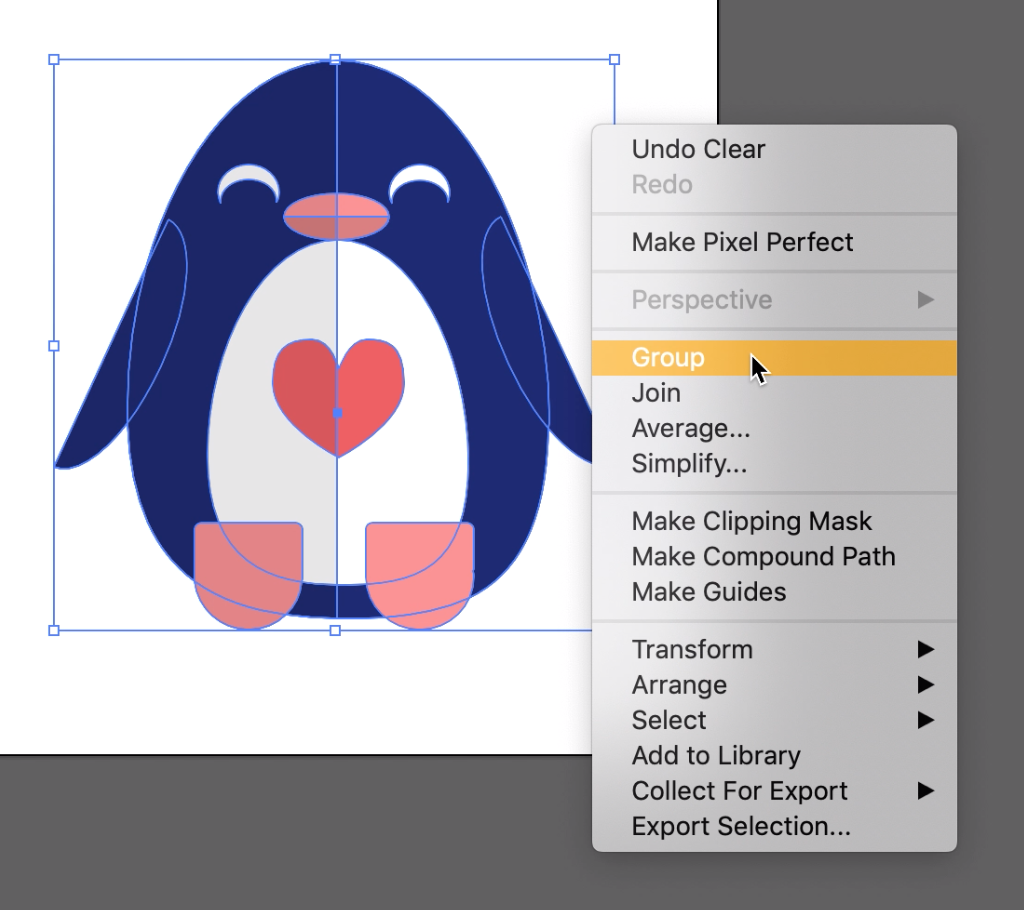
Group shapes is a useful feature in Illustrator because we tail move each the shapes immediately without having to select all of them each clock. We will group the shapes of the eye to assistance us make the second eye.
-
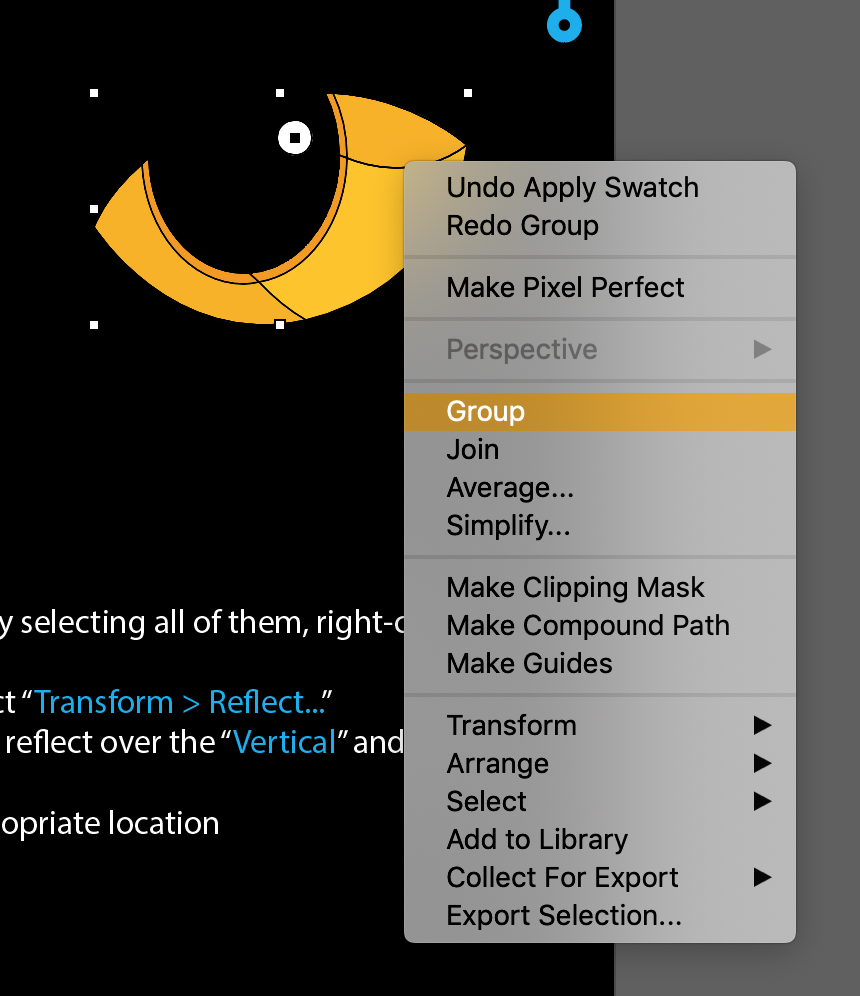
Select all the shapes with the rubberband method acting so right-click and select Group.
-
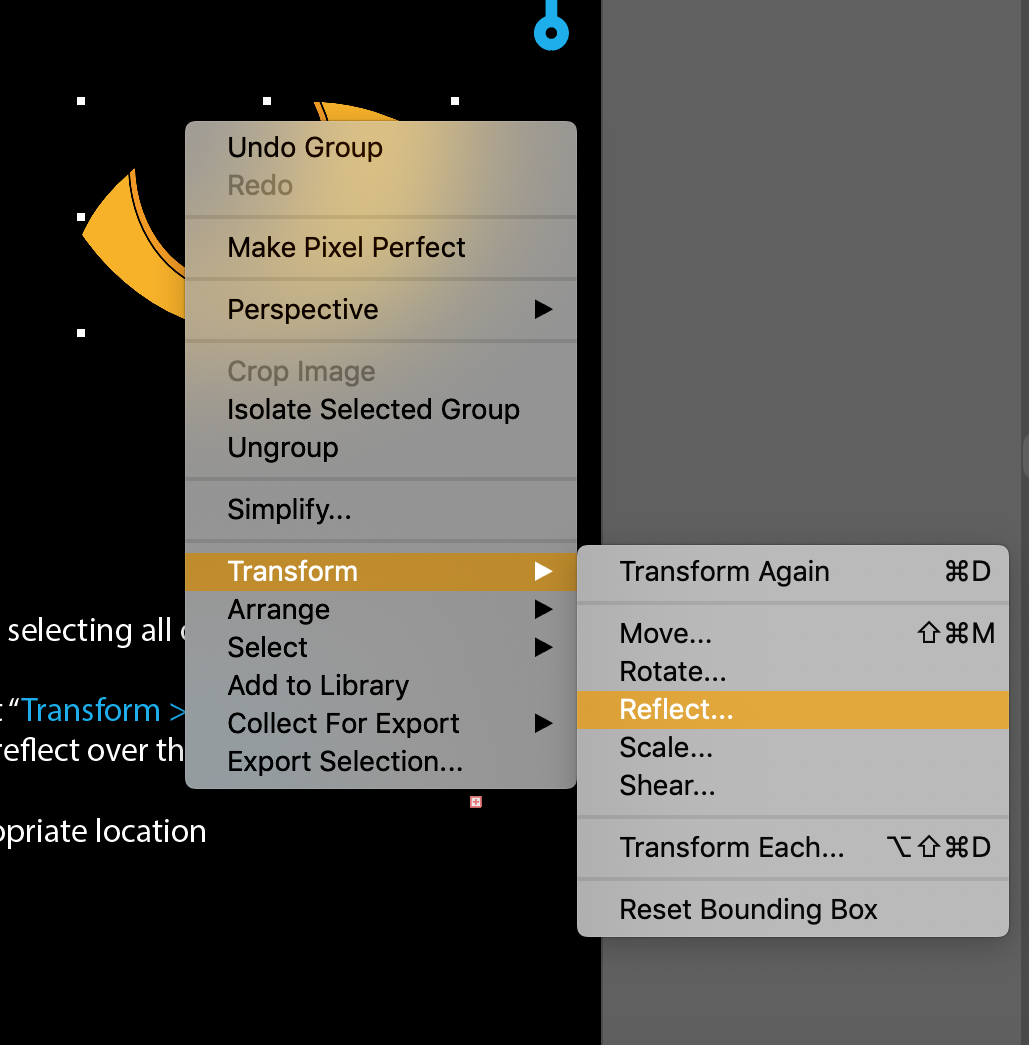
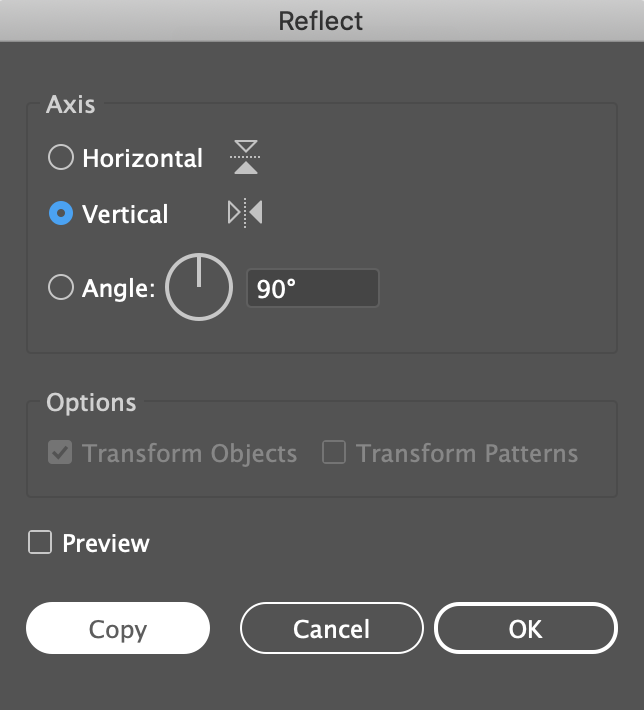
In order to create the other eye, right-click and select Translate > Reflect...
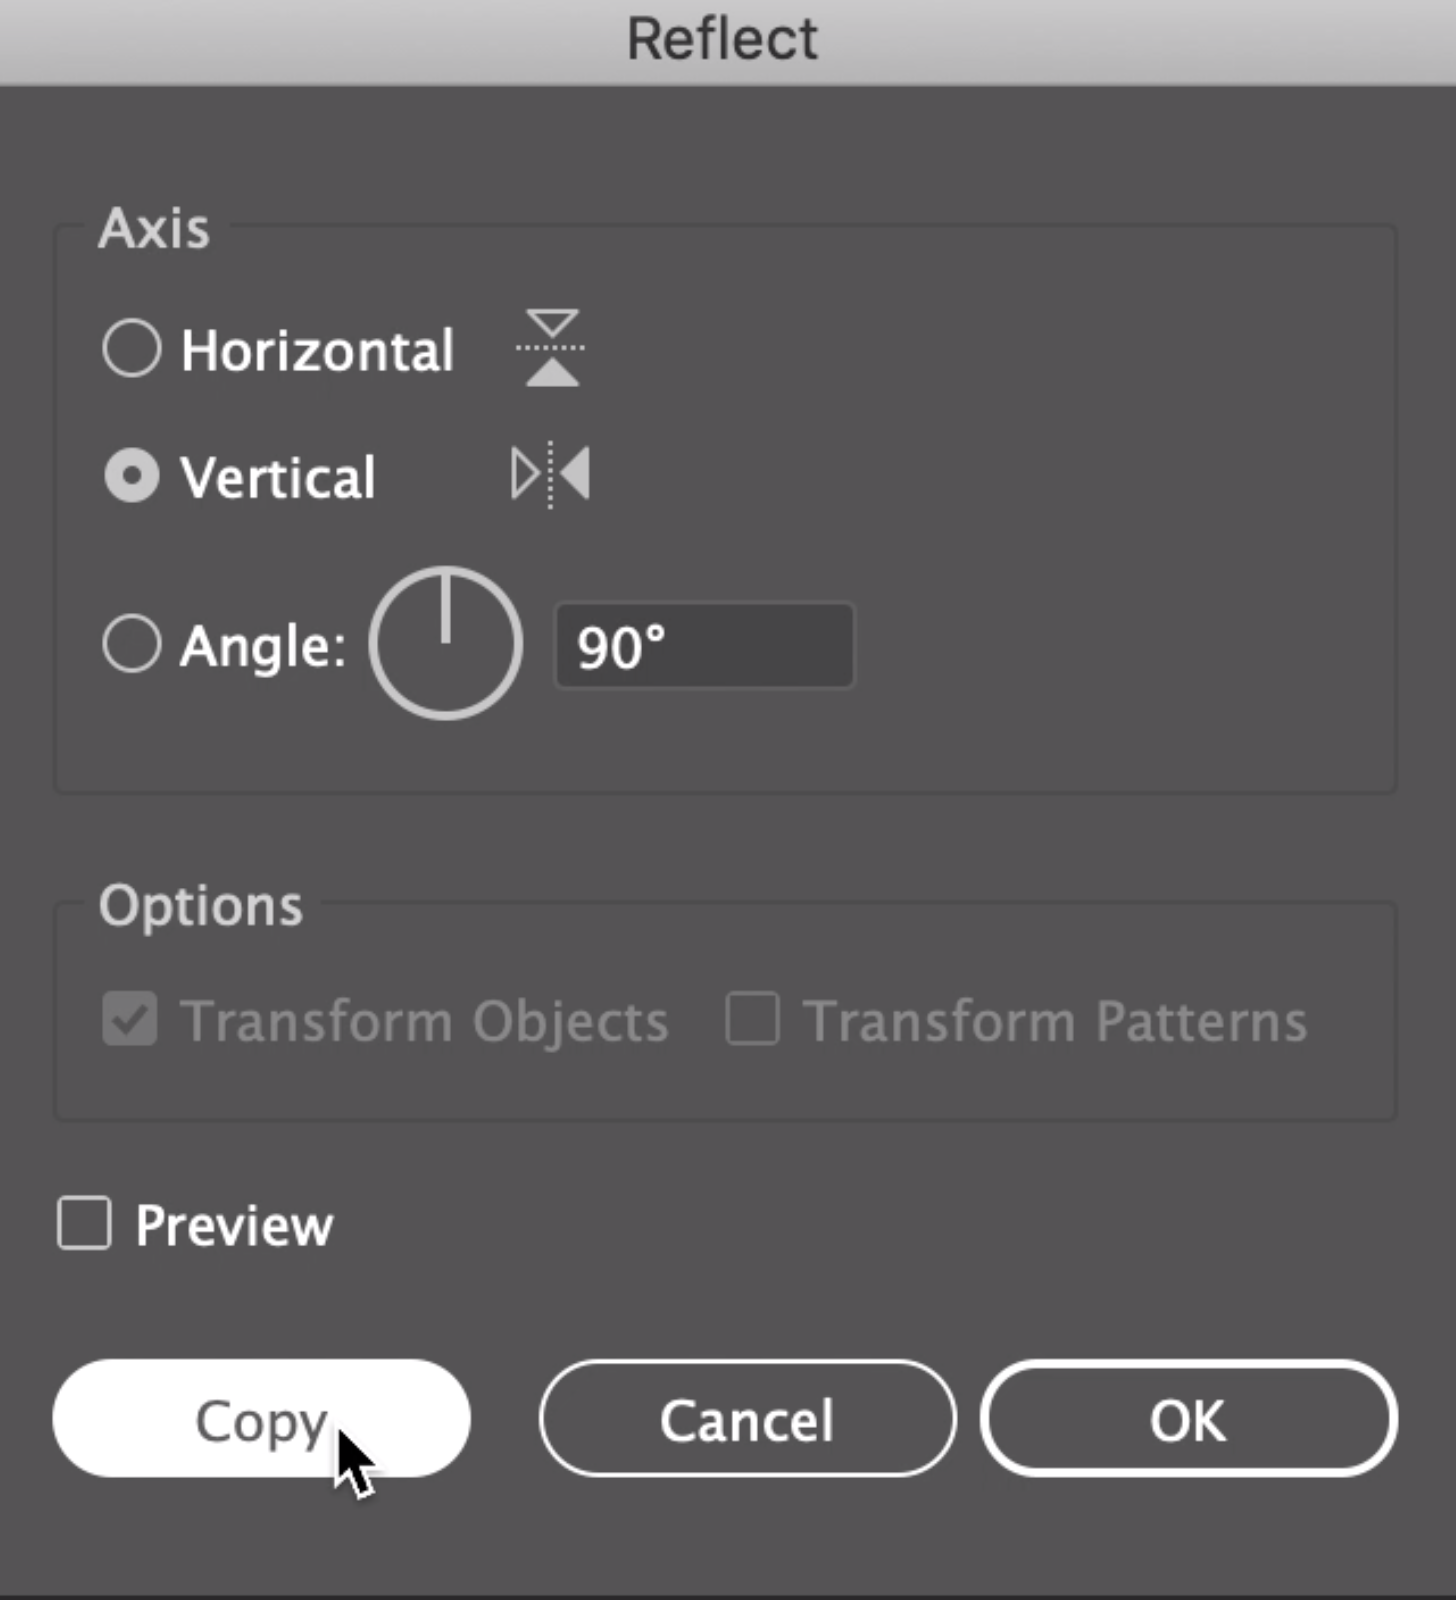
-
From the menu, choose to reflect over the Vertical axis and chink Copy.
-
Move the copy and align it to the separate eye.

With the exercises completed, we will utilise these skills in our next project! Don't close this tab because we will usance the spirit we created from this file in the e-scorecard later.
Creating an E-card
Now that we hold gained a better idea of the program, we will apply these tools in that e-card exercise.
Document Apparatus
Utilization the blank document you created at the starting time of the workshop. Name to these document settings if you need to recreate information technology:
Modifying Shape Paths for the Consistence
-
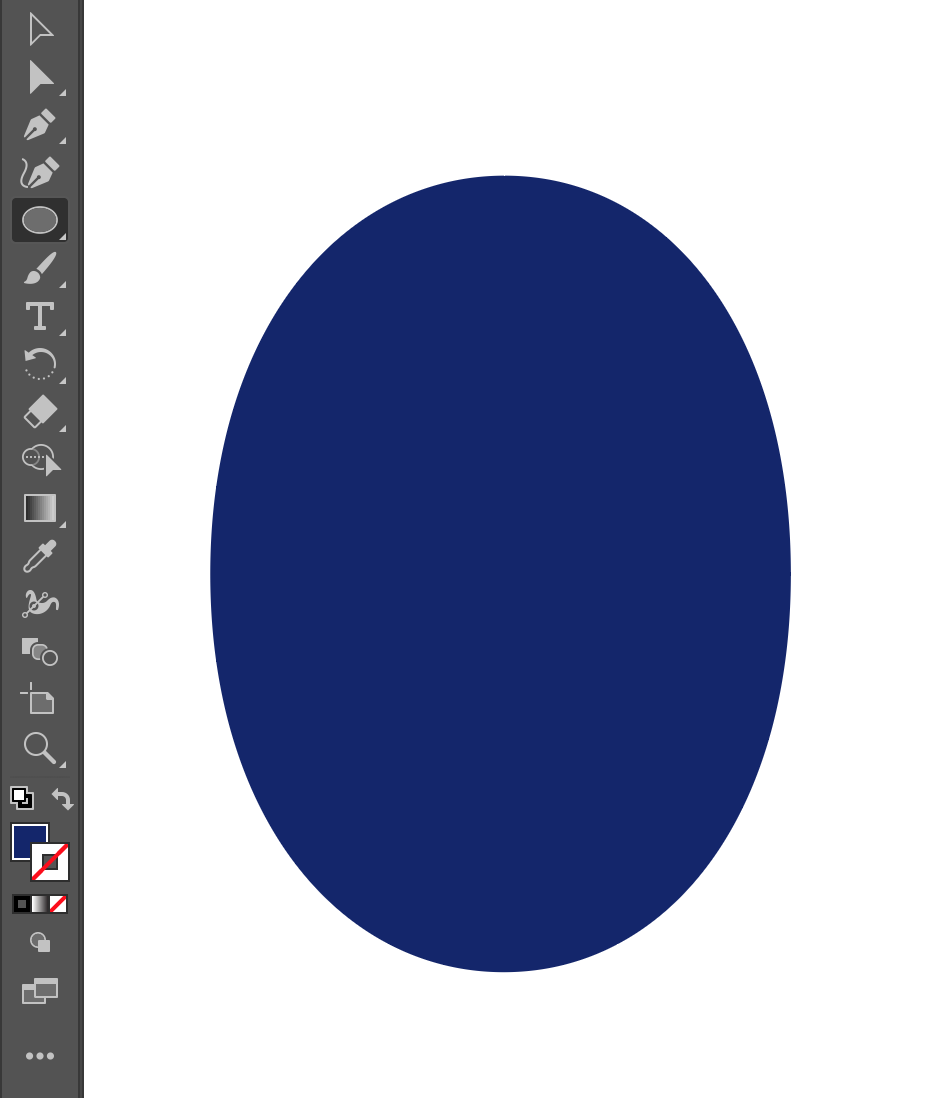
In the Tools Board, Fall into place the Ellipse Tool.
-
Create a vertical oval.
-
With the oval selected, go to the Tools Panel and locate the Fill. Switch the Fill Color of the oval to dark blue. Since we do not want a stroke, click along the stroke swatch and blue-ribbon the white square with the red strap through it, which means atomic number 102 colouring.
-
In the Tools Dialog box, select the Direct Selection Tool so click on the right-most anchor point of the body. Hold the Shift and click on the left-must anchor degree. Now that some points are elect, drag one of the anchor points downwards. You should interpret some anchor points moving at formerly.
-
In order to finish the body, we wish drop the top of the shape. With the Direct Selection Tool, click and drag the top-near anchorperson point down.
-
We want to recreate the material body for the belly so apply the Selection Tool to select the blue body. While holding the Alt/Option key, click and hang back the body to create a copy.
-
In the Tools Panel, exchange the Fill Color to white.
-
While holding down Shift, downsize the form victimization the Excerpt Tool. Position the shape on the lower half of the trunk.

The all over figure should look something similar to this:


Creating the Beak
-
Next, add a beak to the penguin by creating a small horizontal oval. Change the Fill to coral and position the beak above the belly.
-
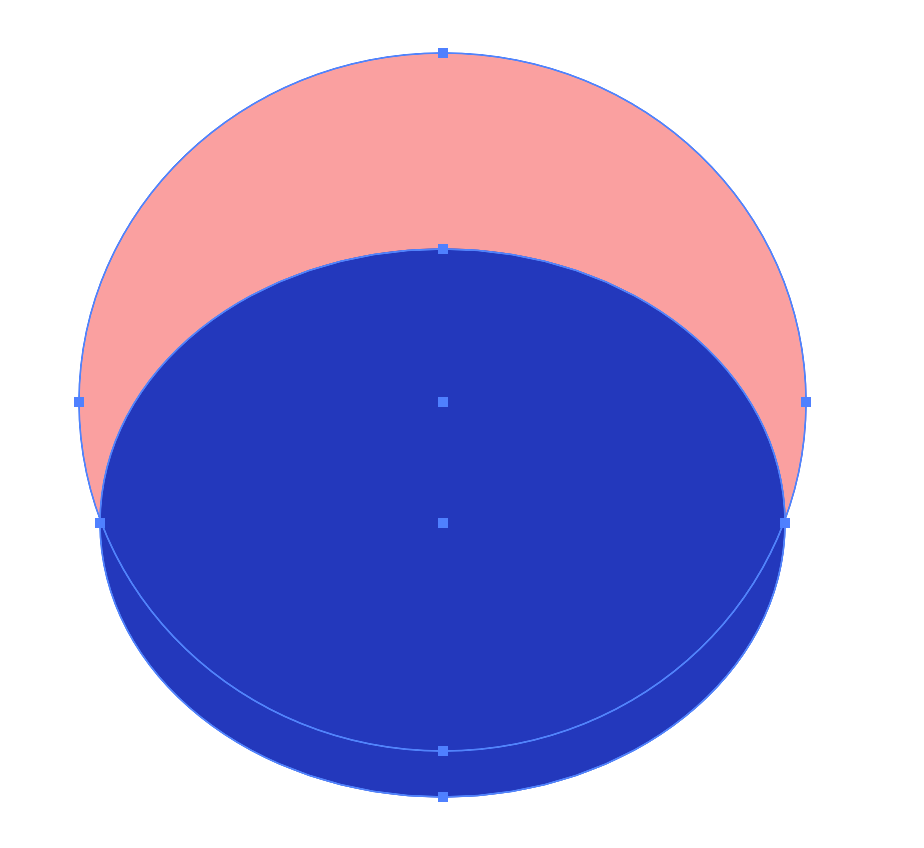
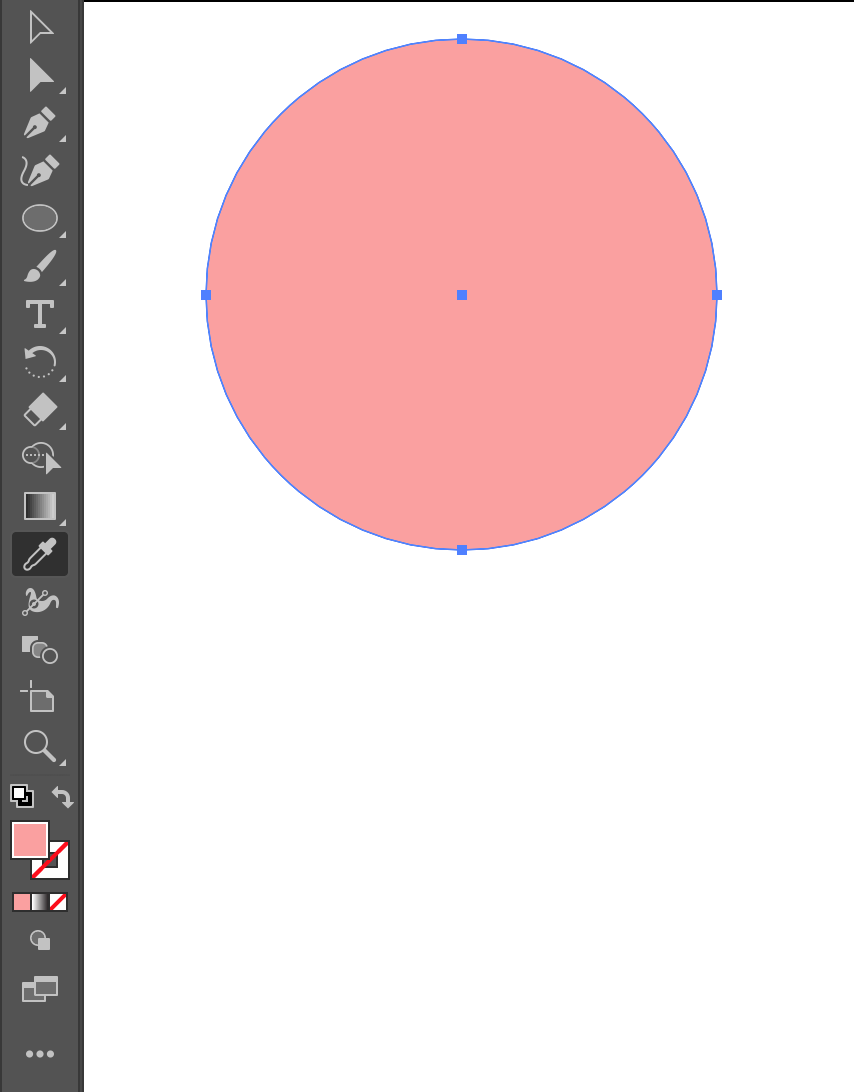
Click on the Ellipse Tool and produce a crosswise ellipse that is slightly circular.
-
Produce a horizontal ellipse then position it on the lower uncomplete of the circle. Select both shapes with the Selection Tool.
-
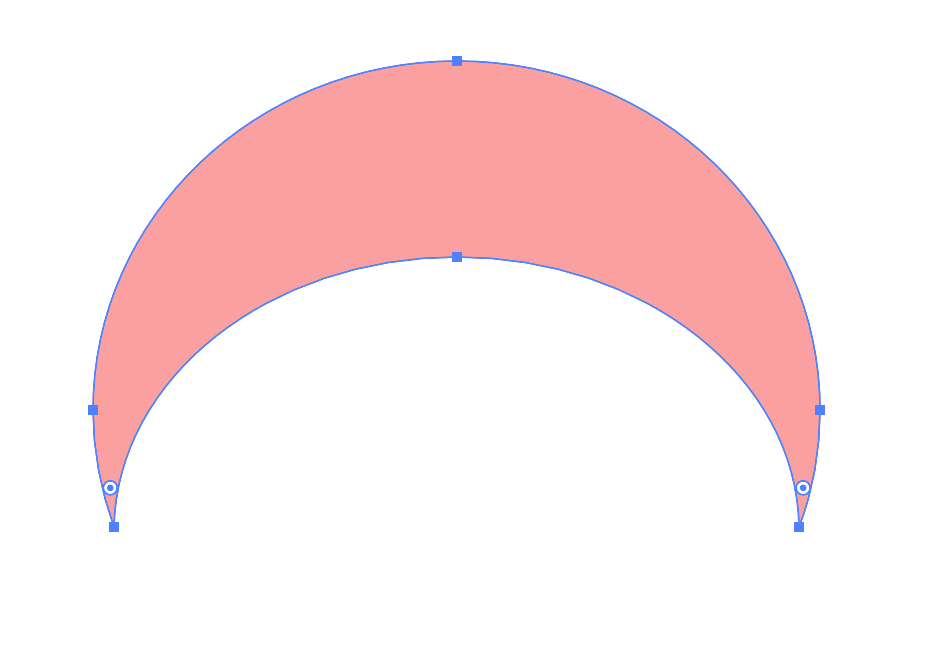
In the Applications programme Bar, a-okay to Windows > Pathfinder. From the Shape Modes, choose Minus Face to create the lunate shaped eyes.
-
While holding Shift, resize the eye using the Selection Tool around. At once position the eye on the physical structure and vary the Fill to white.
-
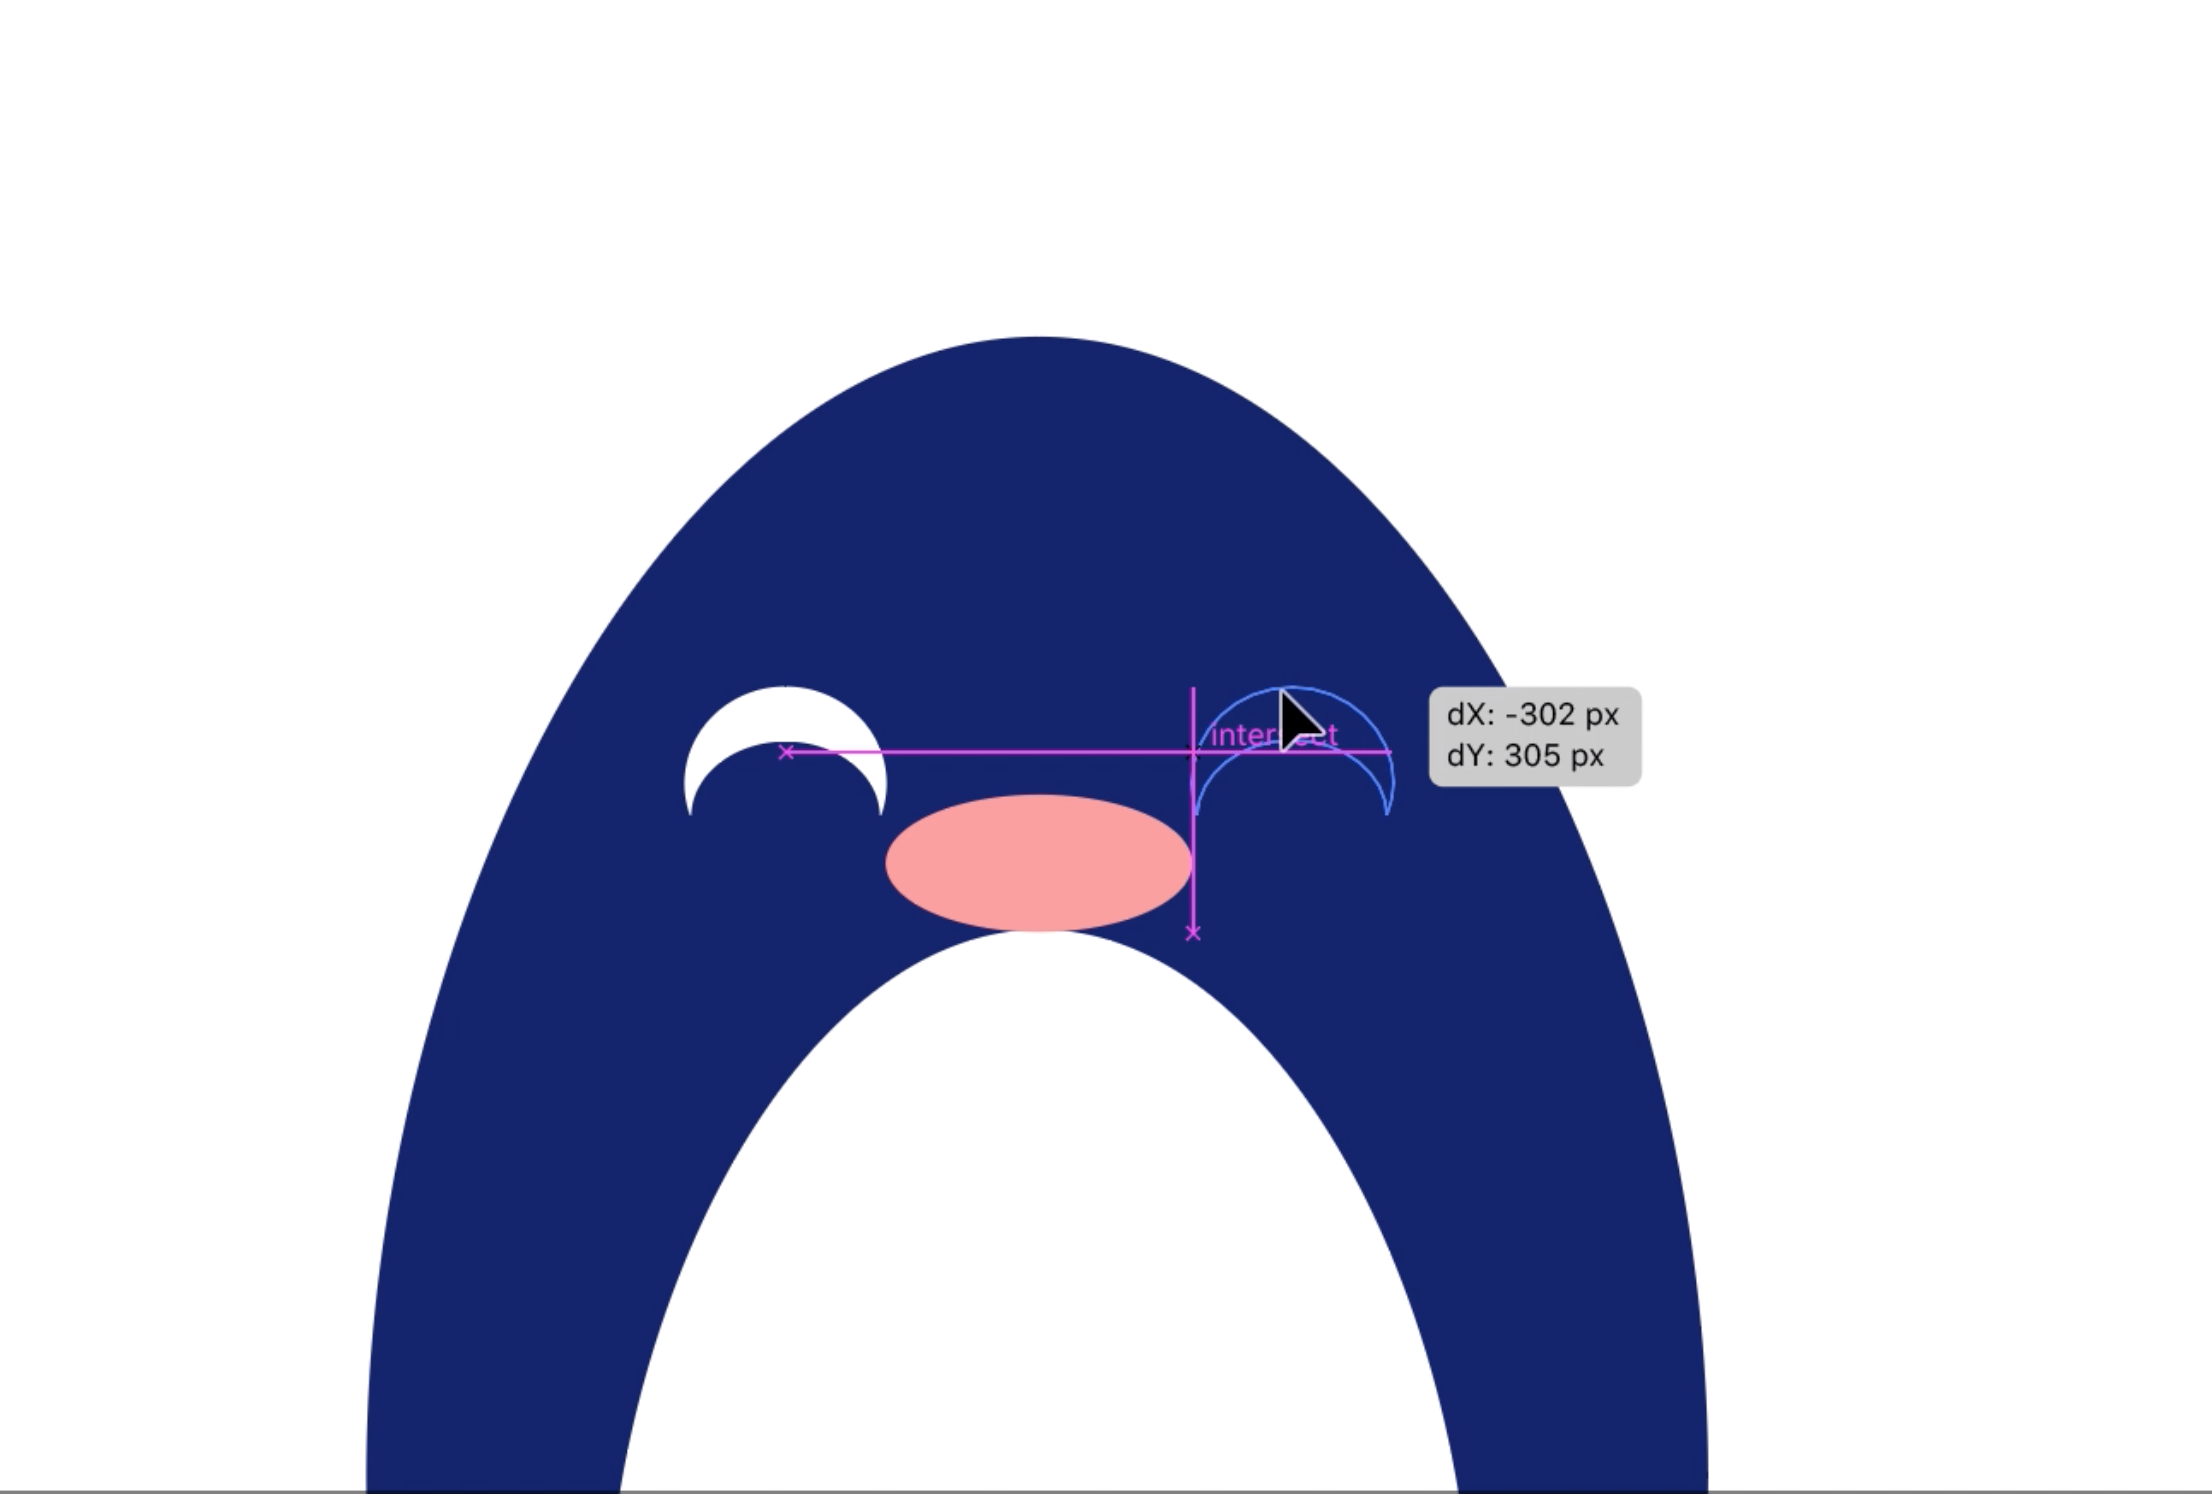
Create a copy of the eye and so view the second eye connected the trunk.
-
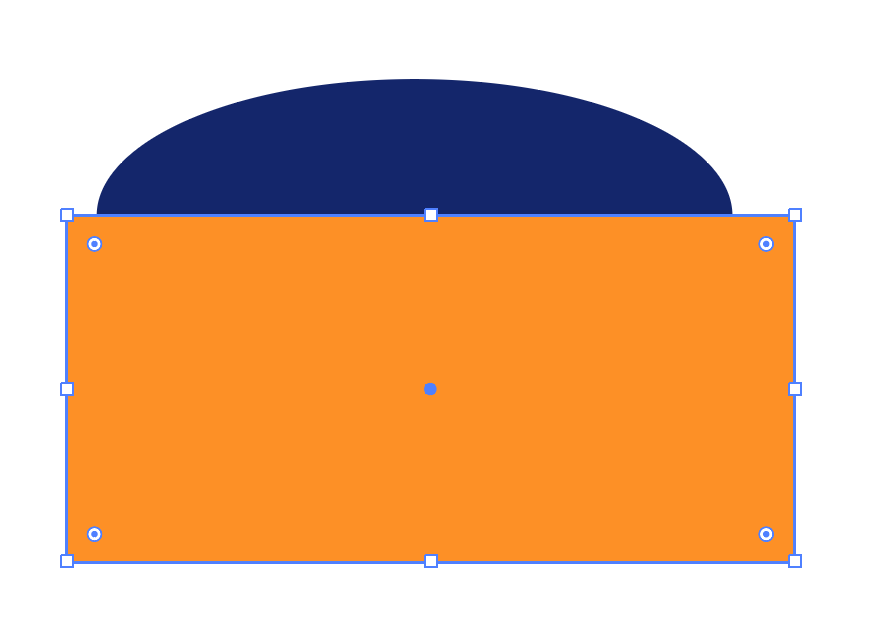
Use the Ellipse Tool to create a long horizontal ellipse. We neediness the wings to constitute the same shade of blue as the body, so select the ellipse then blend in to the Tools Venire and click on the Eyedropper Tool. Click on the body to double the color.
-
Using the Rectangle Tool, drag a rectangle upwardly to the halfway point of the ellipse.
-
With some the rectangle and ellipse selected, click on Subtraction Front from the Pathfinder options to create a half ellipse. Resize and rotate the wing then position it on the body.
-
For the 2nd wing, use the Selection Tool to prize the first wing and right-chatter. Quality Transform > Reflect. From the panel, choose Vertical axis of rotation then click Copy. Move the annex to the right position of the body.
-
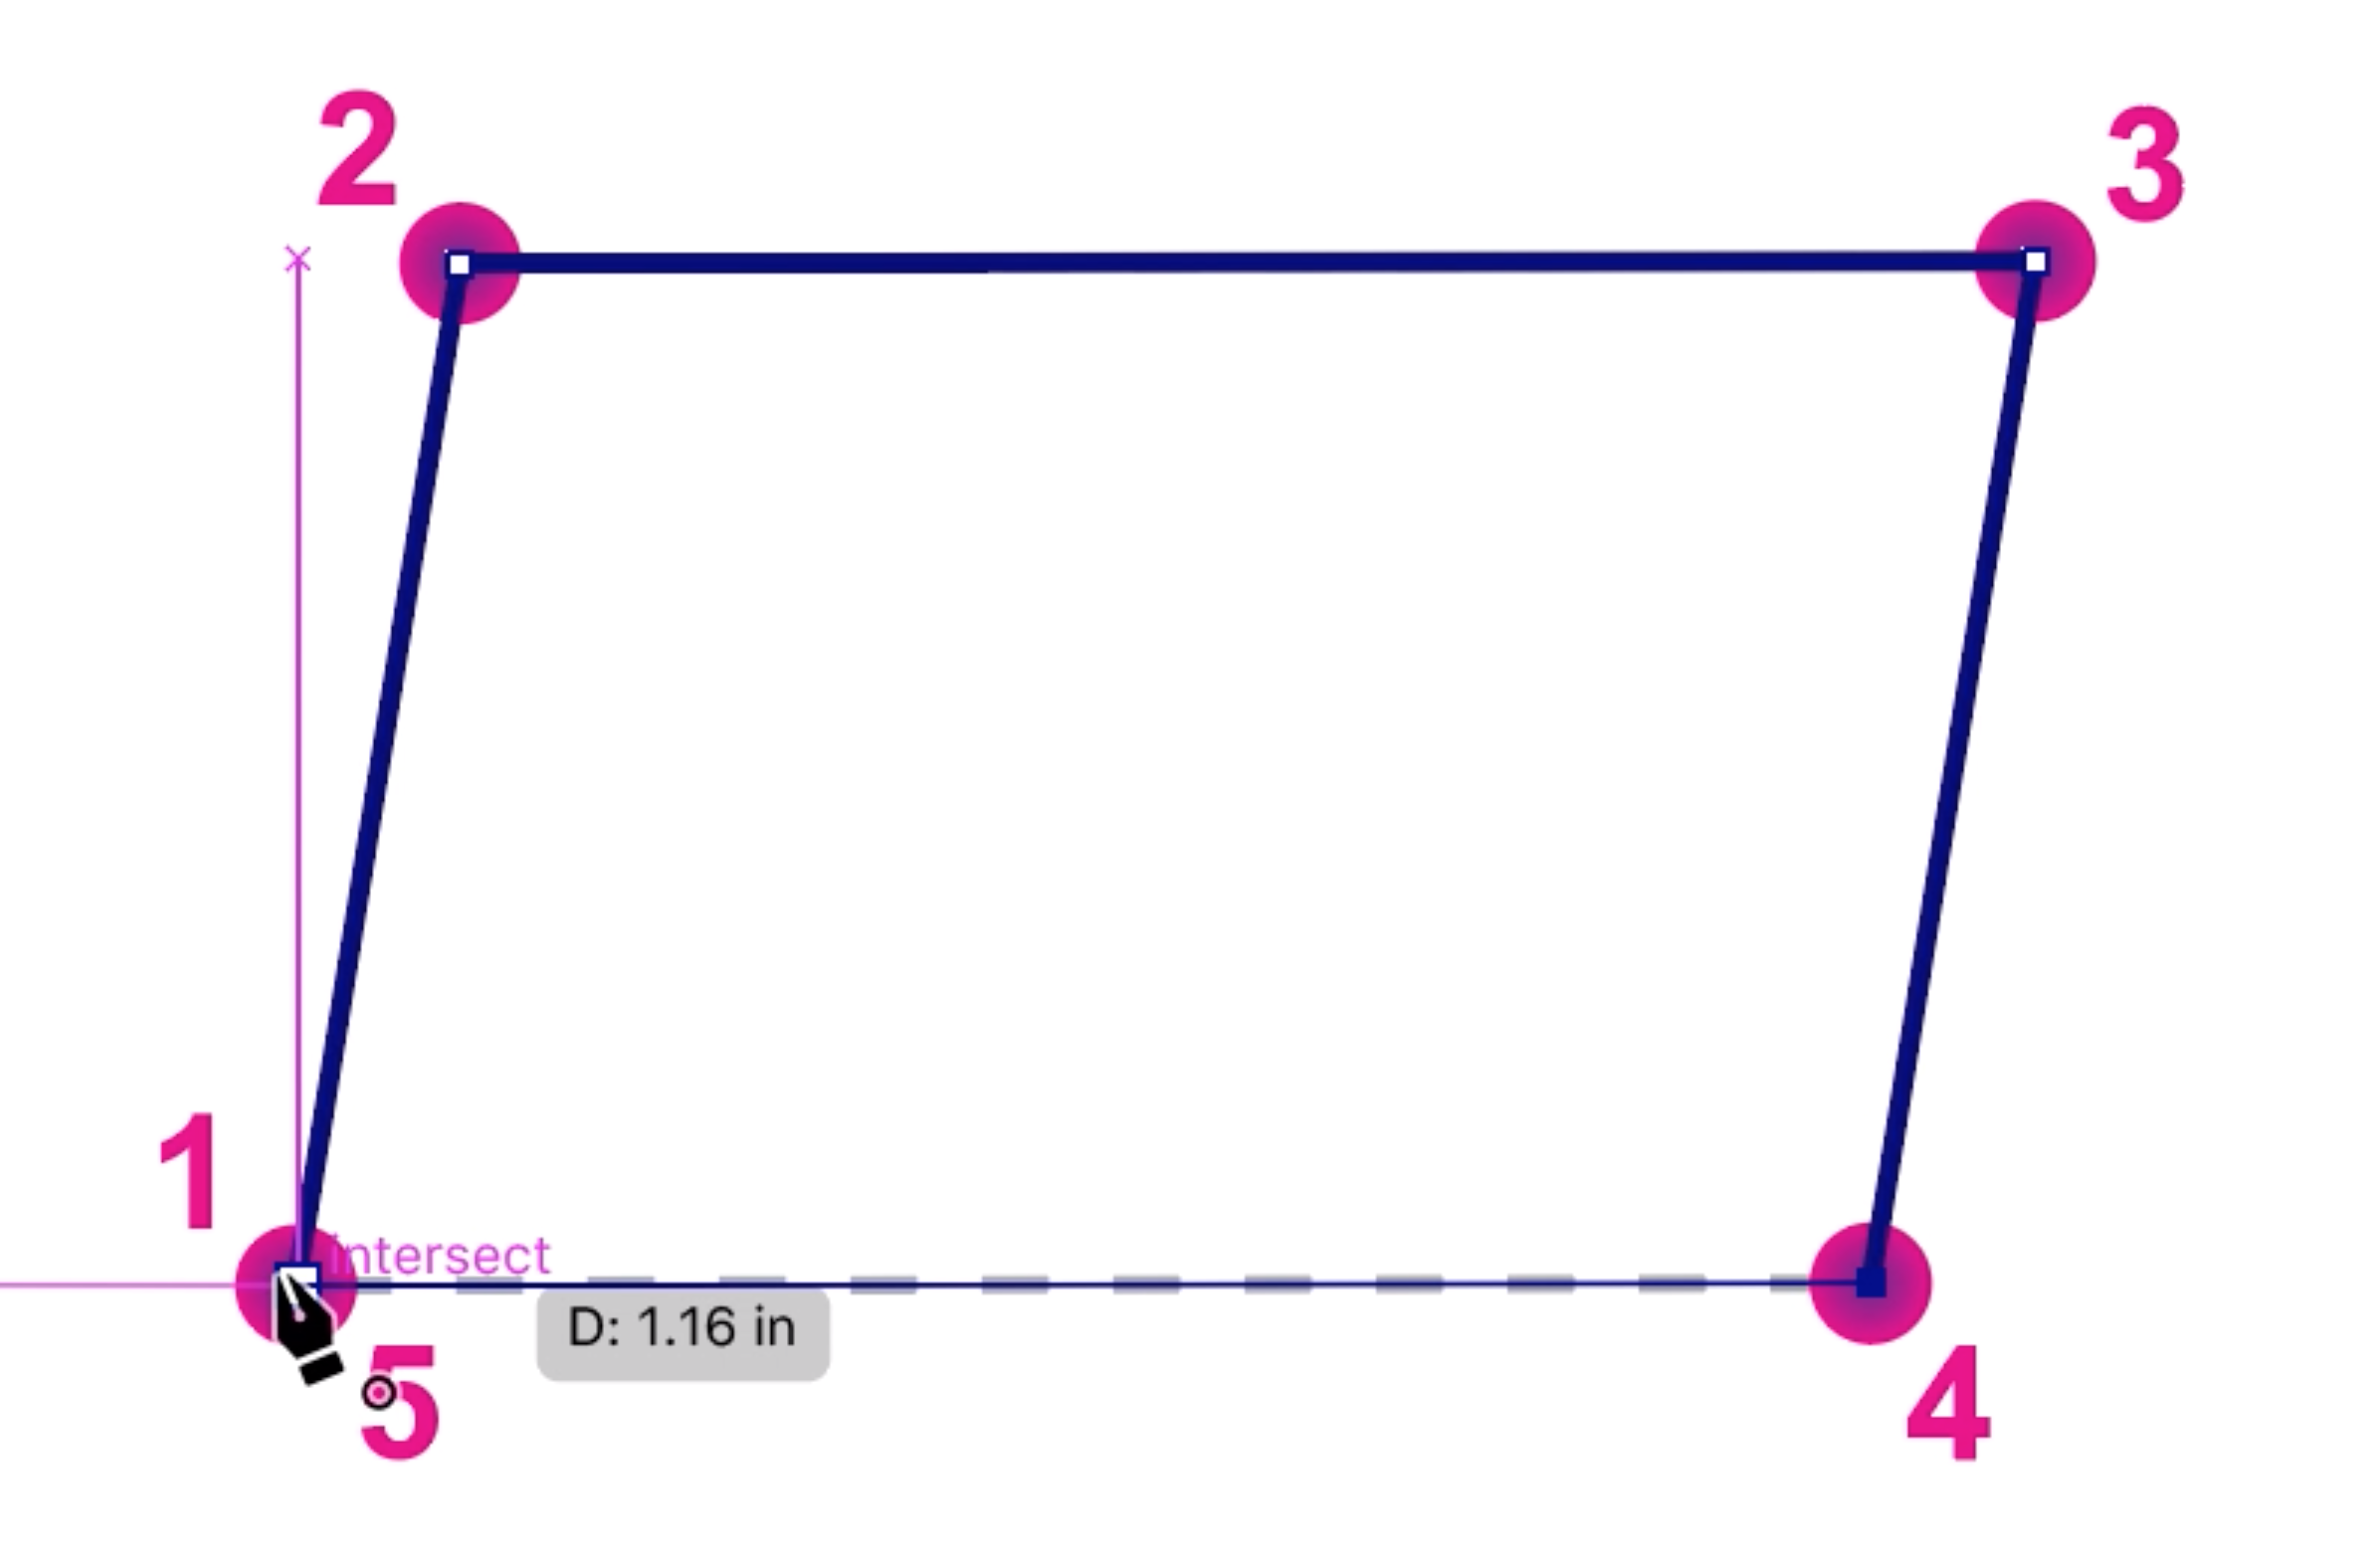
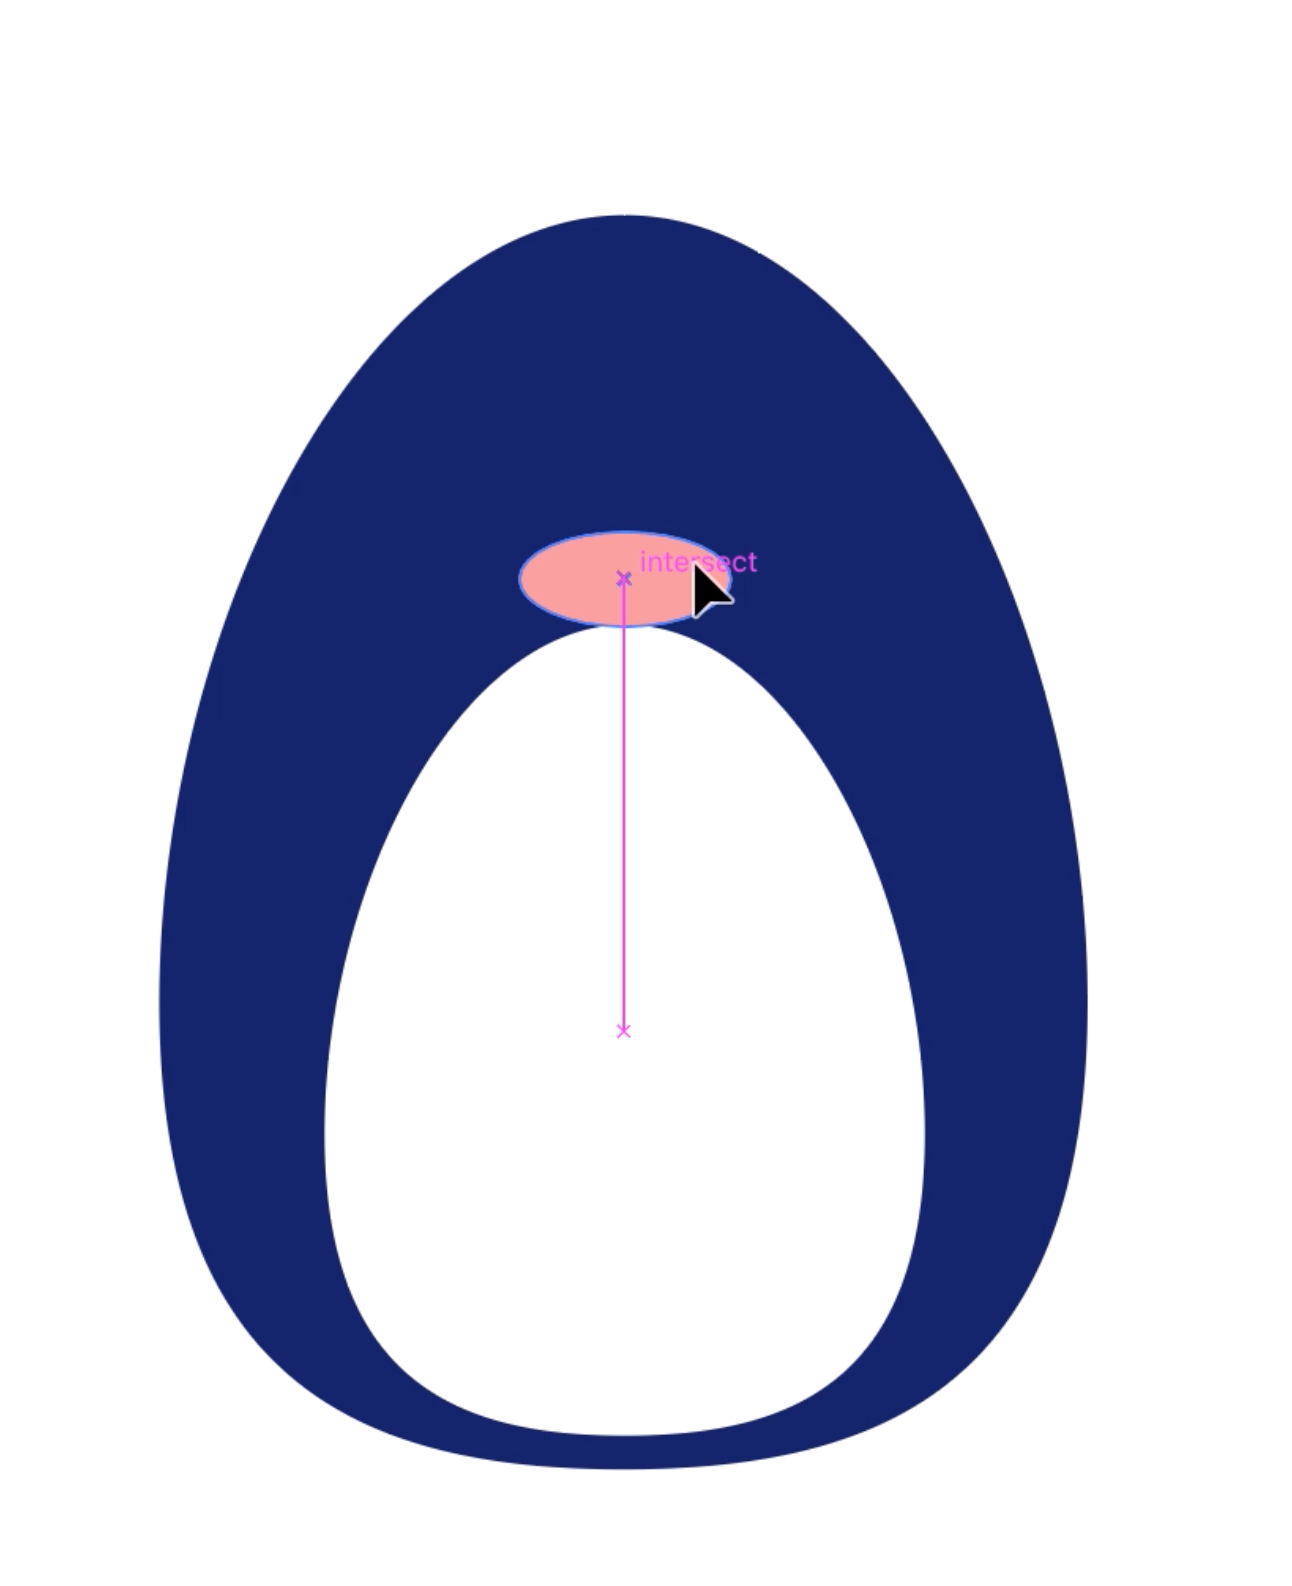
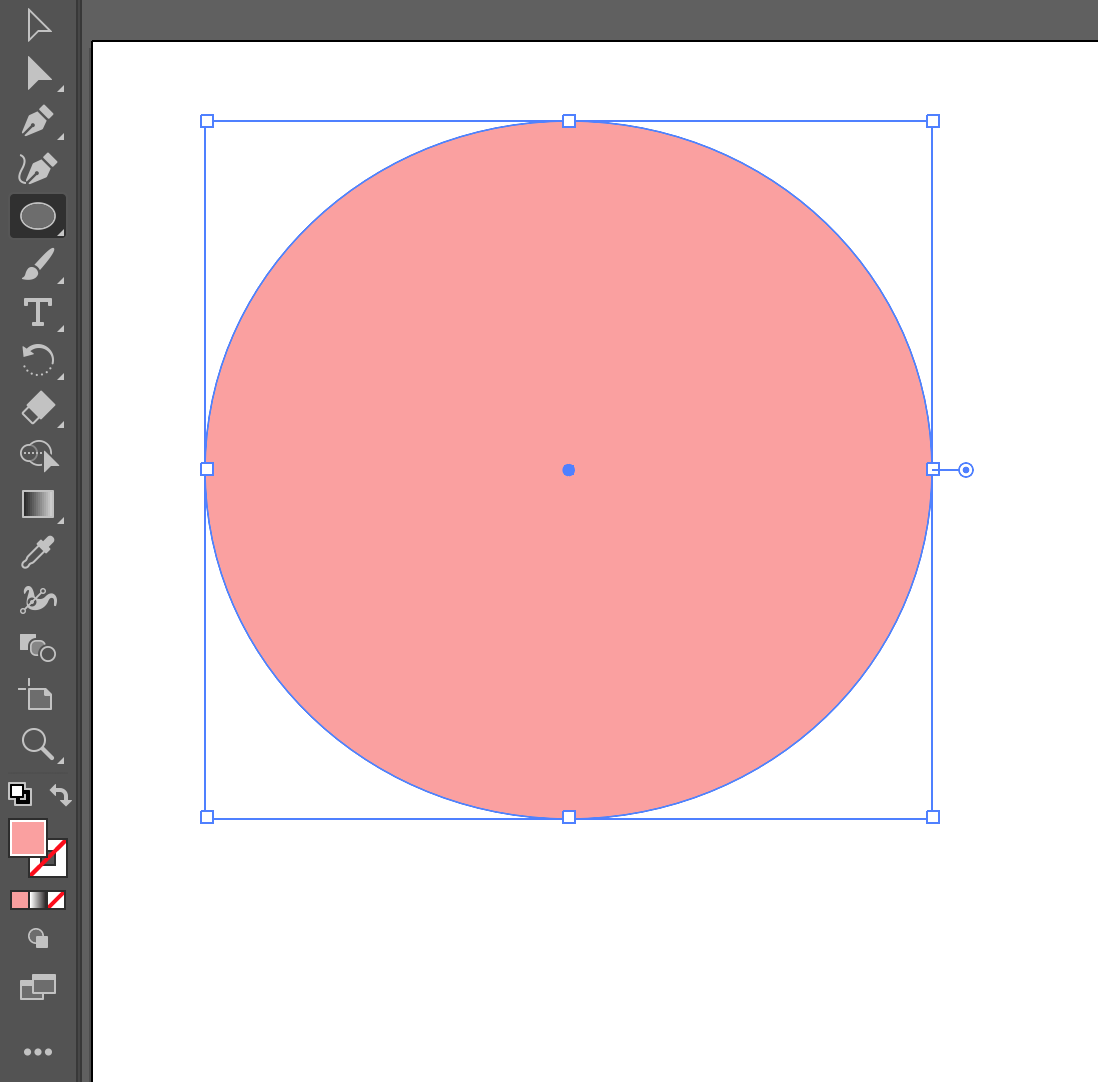
Draw a circle with the Oval Tool by holding Work shift while dragging out. Select the Eyedropper Tool and Clack on the beak to replicate the ghost of chromatic for the feet.
-
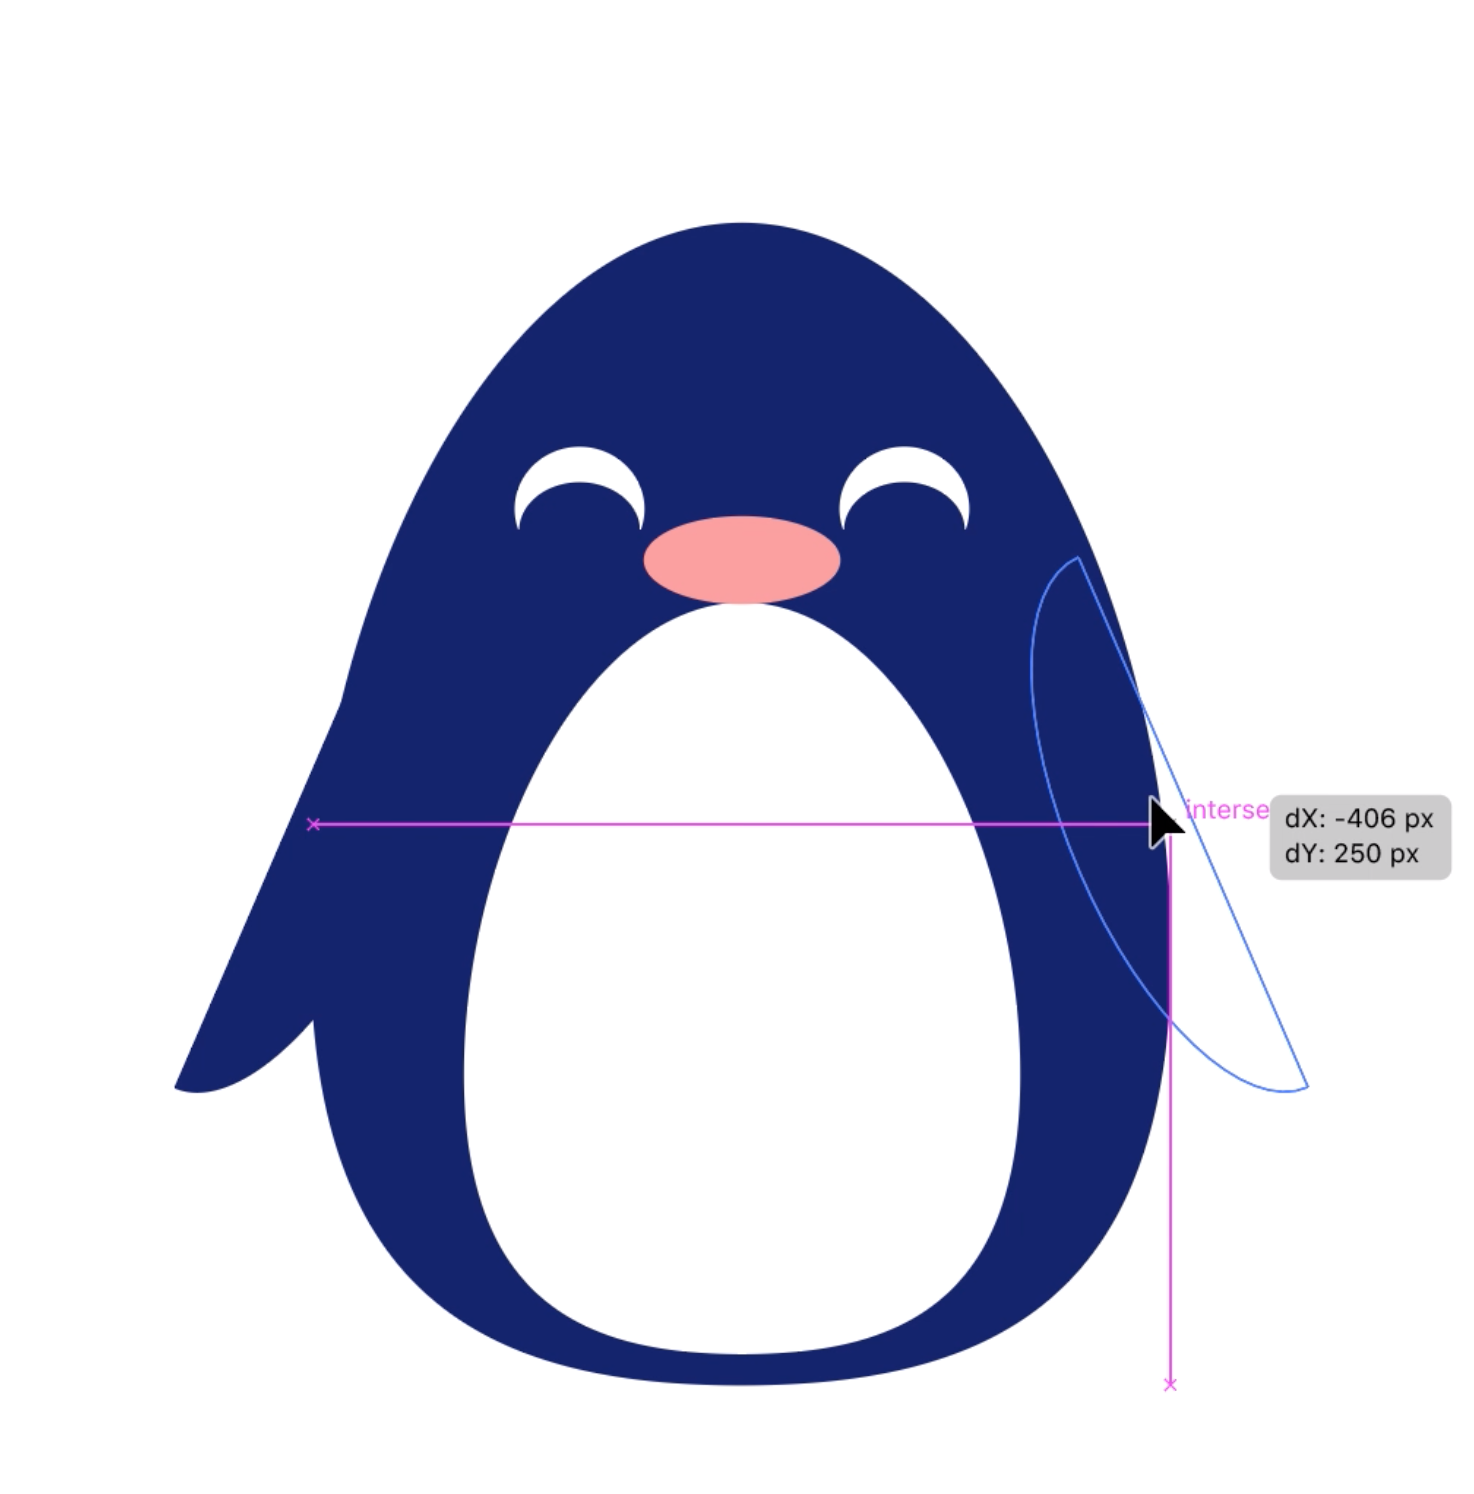
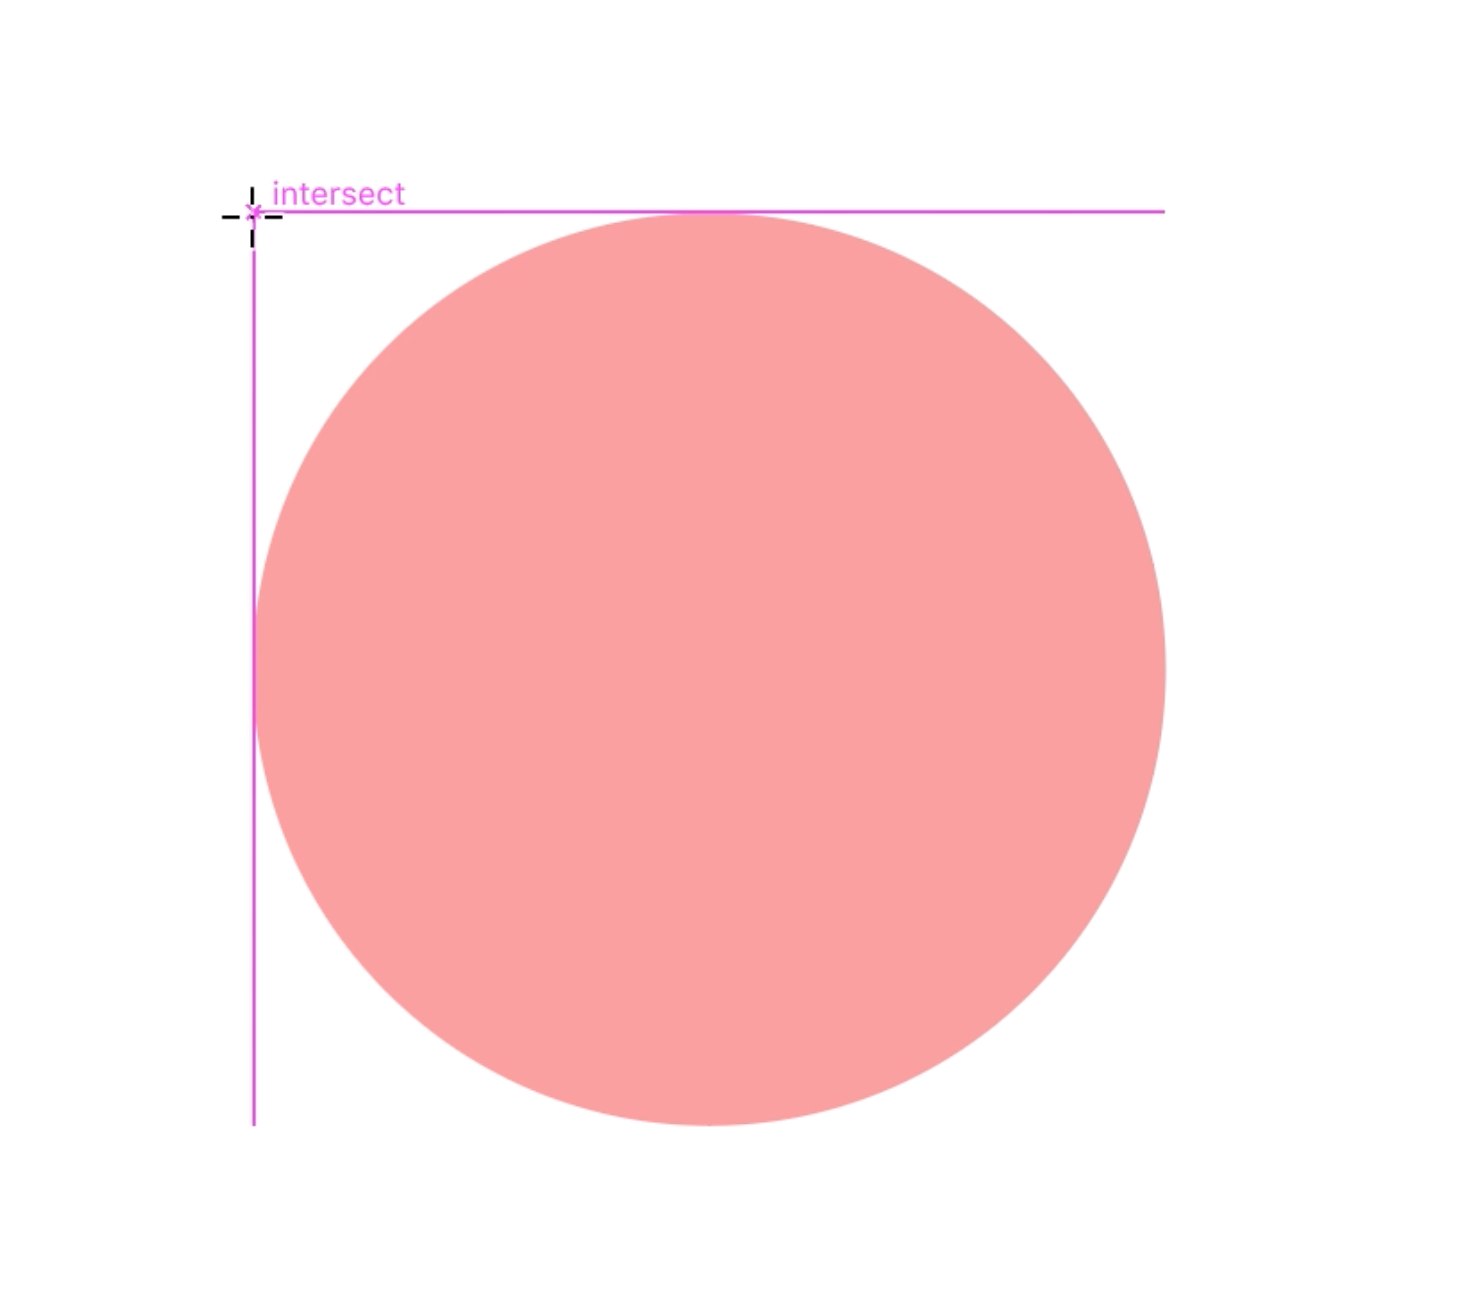
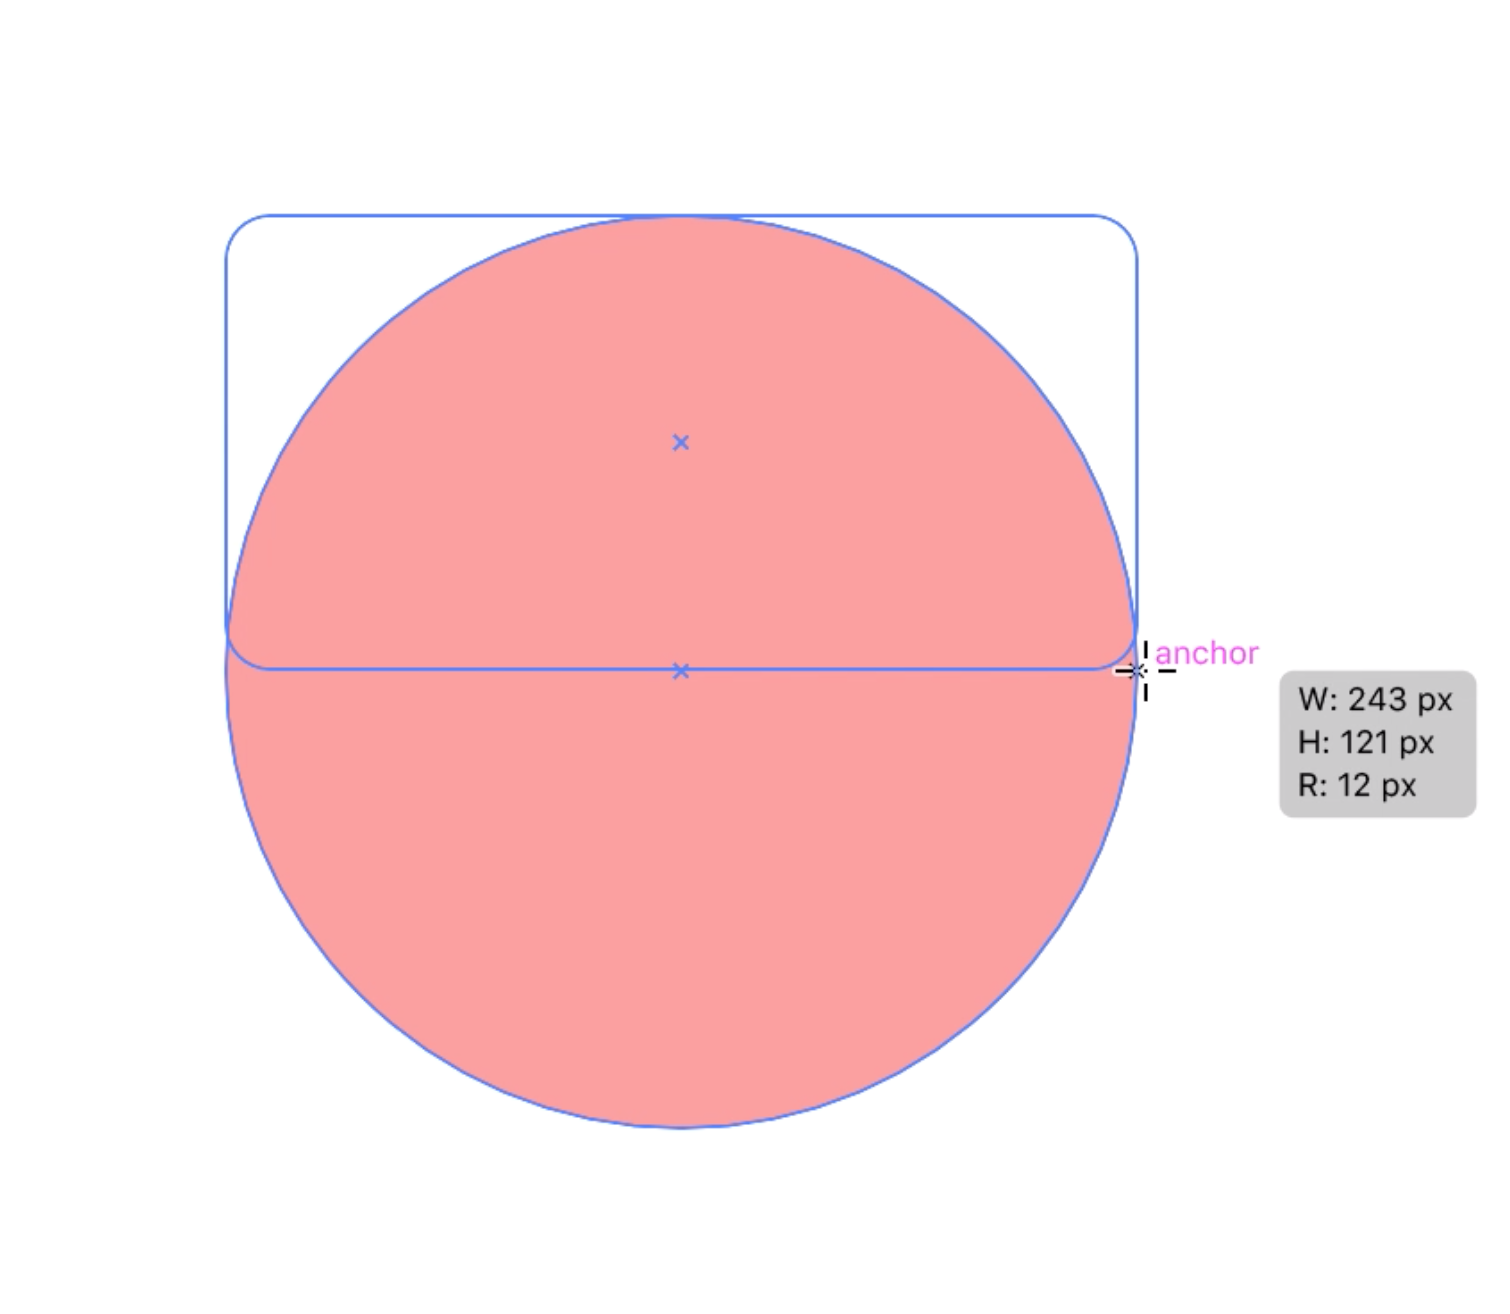
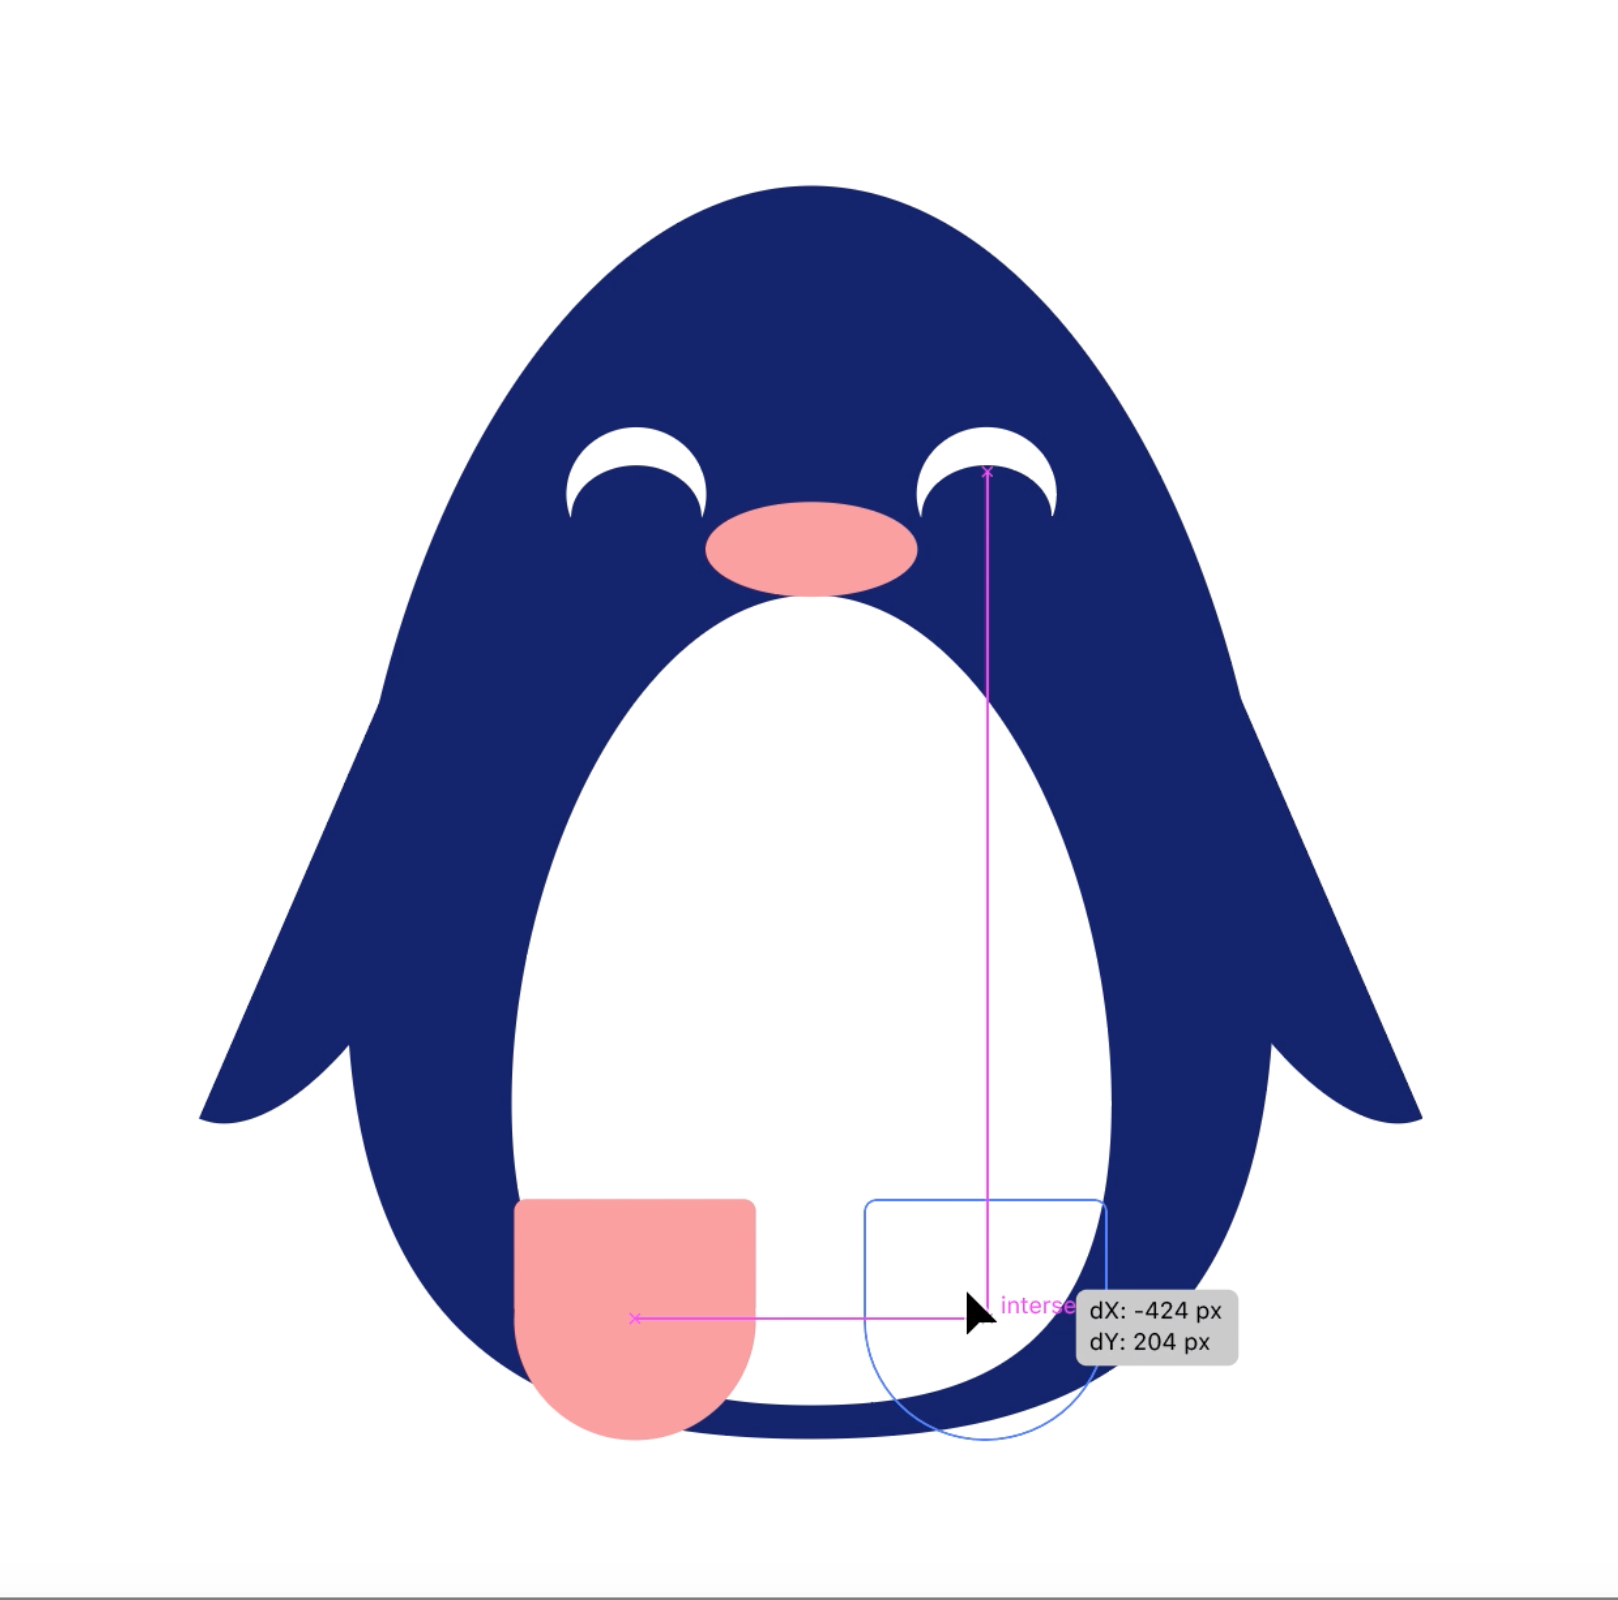
Select the Rounded Rectangle Tool. Begin moving your cursor to the upper right area to a higher place the circle until the Smart Guides indicate that your pointer is above the "intersection point" point of the lap. From that surface area, drag a rounded rectangle pertinent where the Smart Guides indicate the location of the "linchpin" point.
-
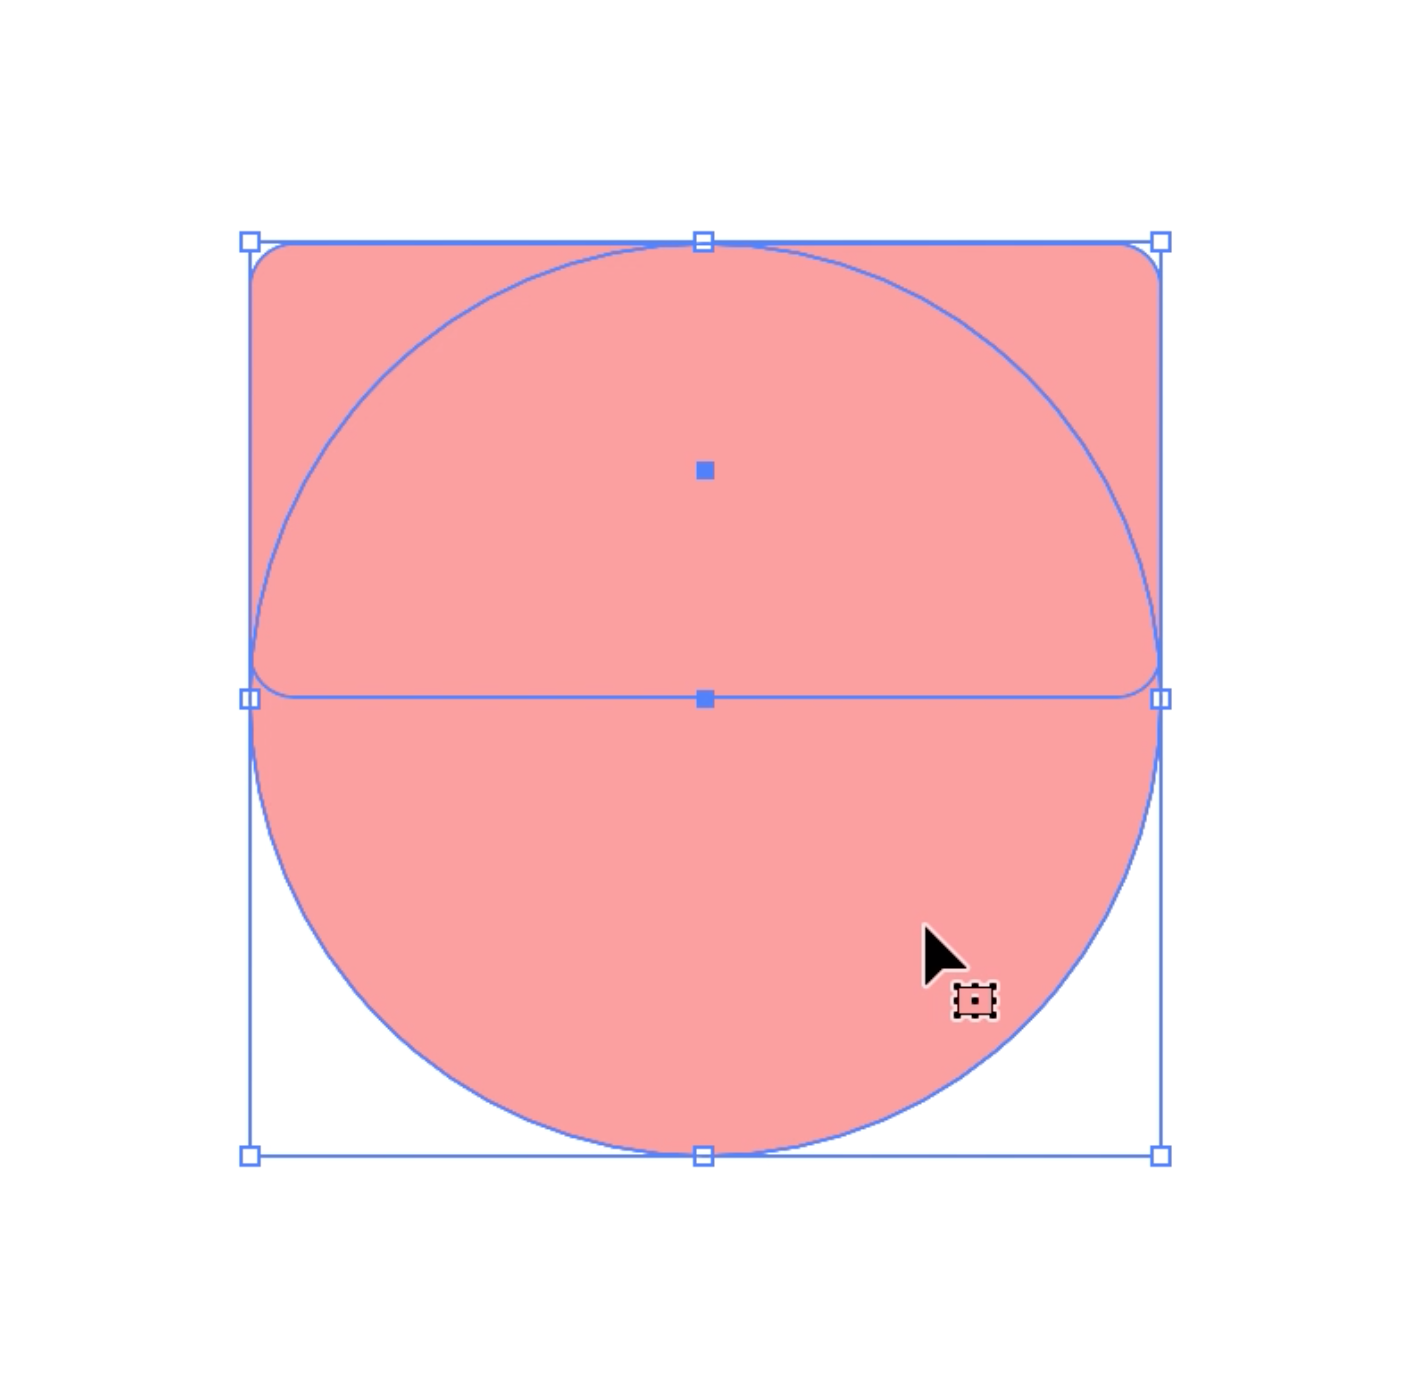
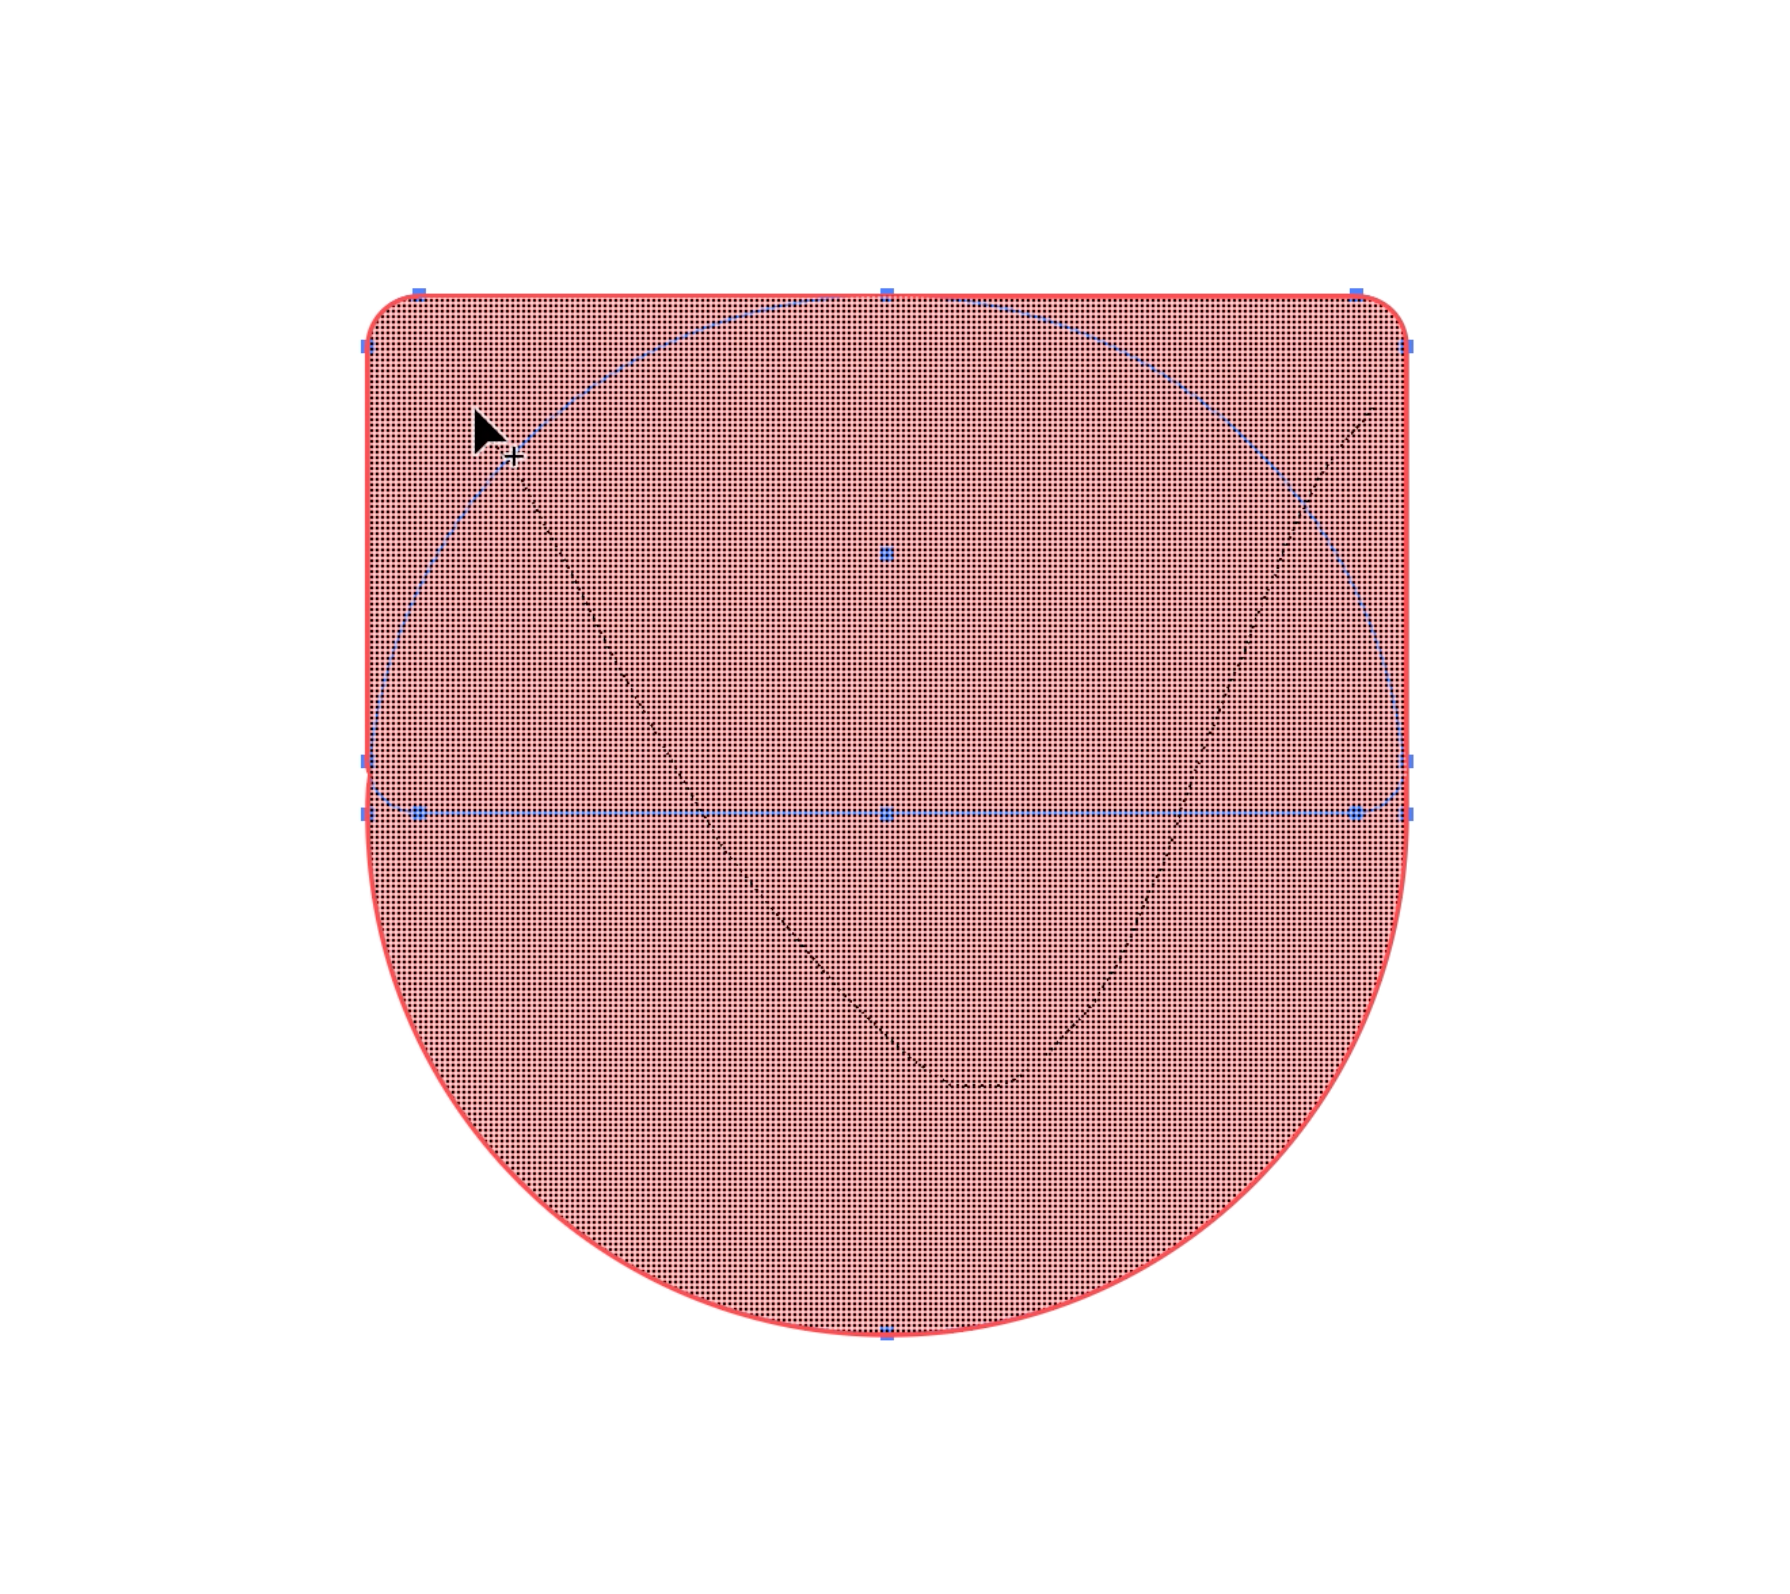
Right now, the circle and the vaulted rectangle are separate shapes, but we bottom combine some shapes using the Human body Detergent builder Tool. First, select both shapes then click connected the Shape Builder Tool. Click and hold while dragging a agate line through altogether the pieces. Resize the shape and allign the foot with the halfway point of the eye.
-
Make a replicate of the foot and position it the same mode.
-
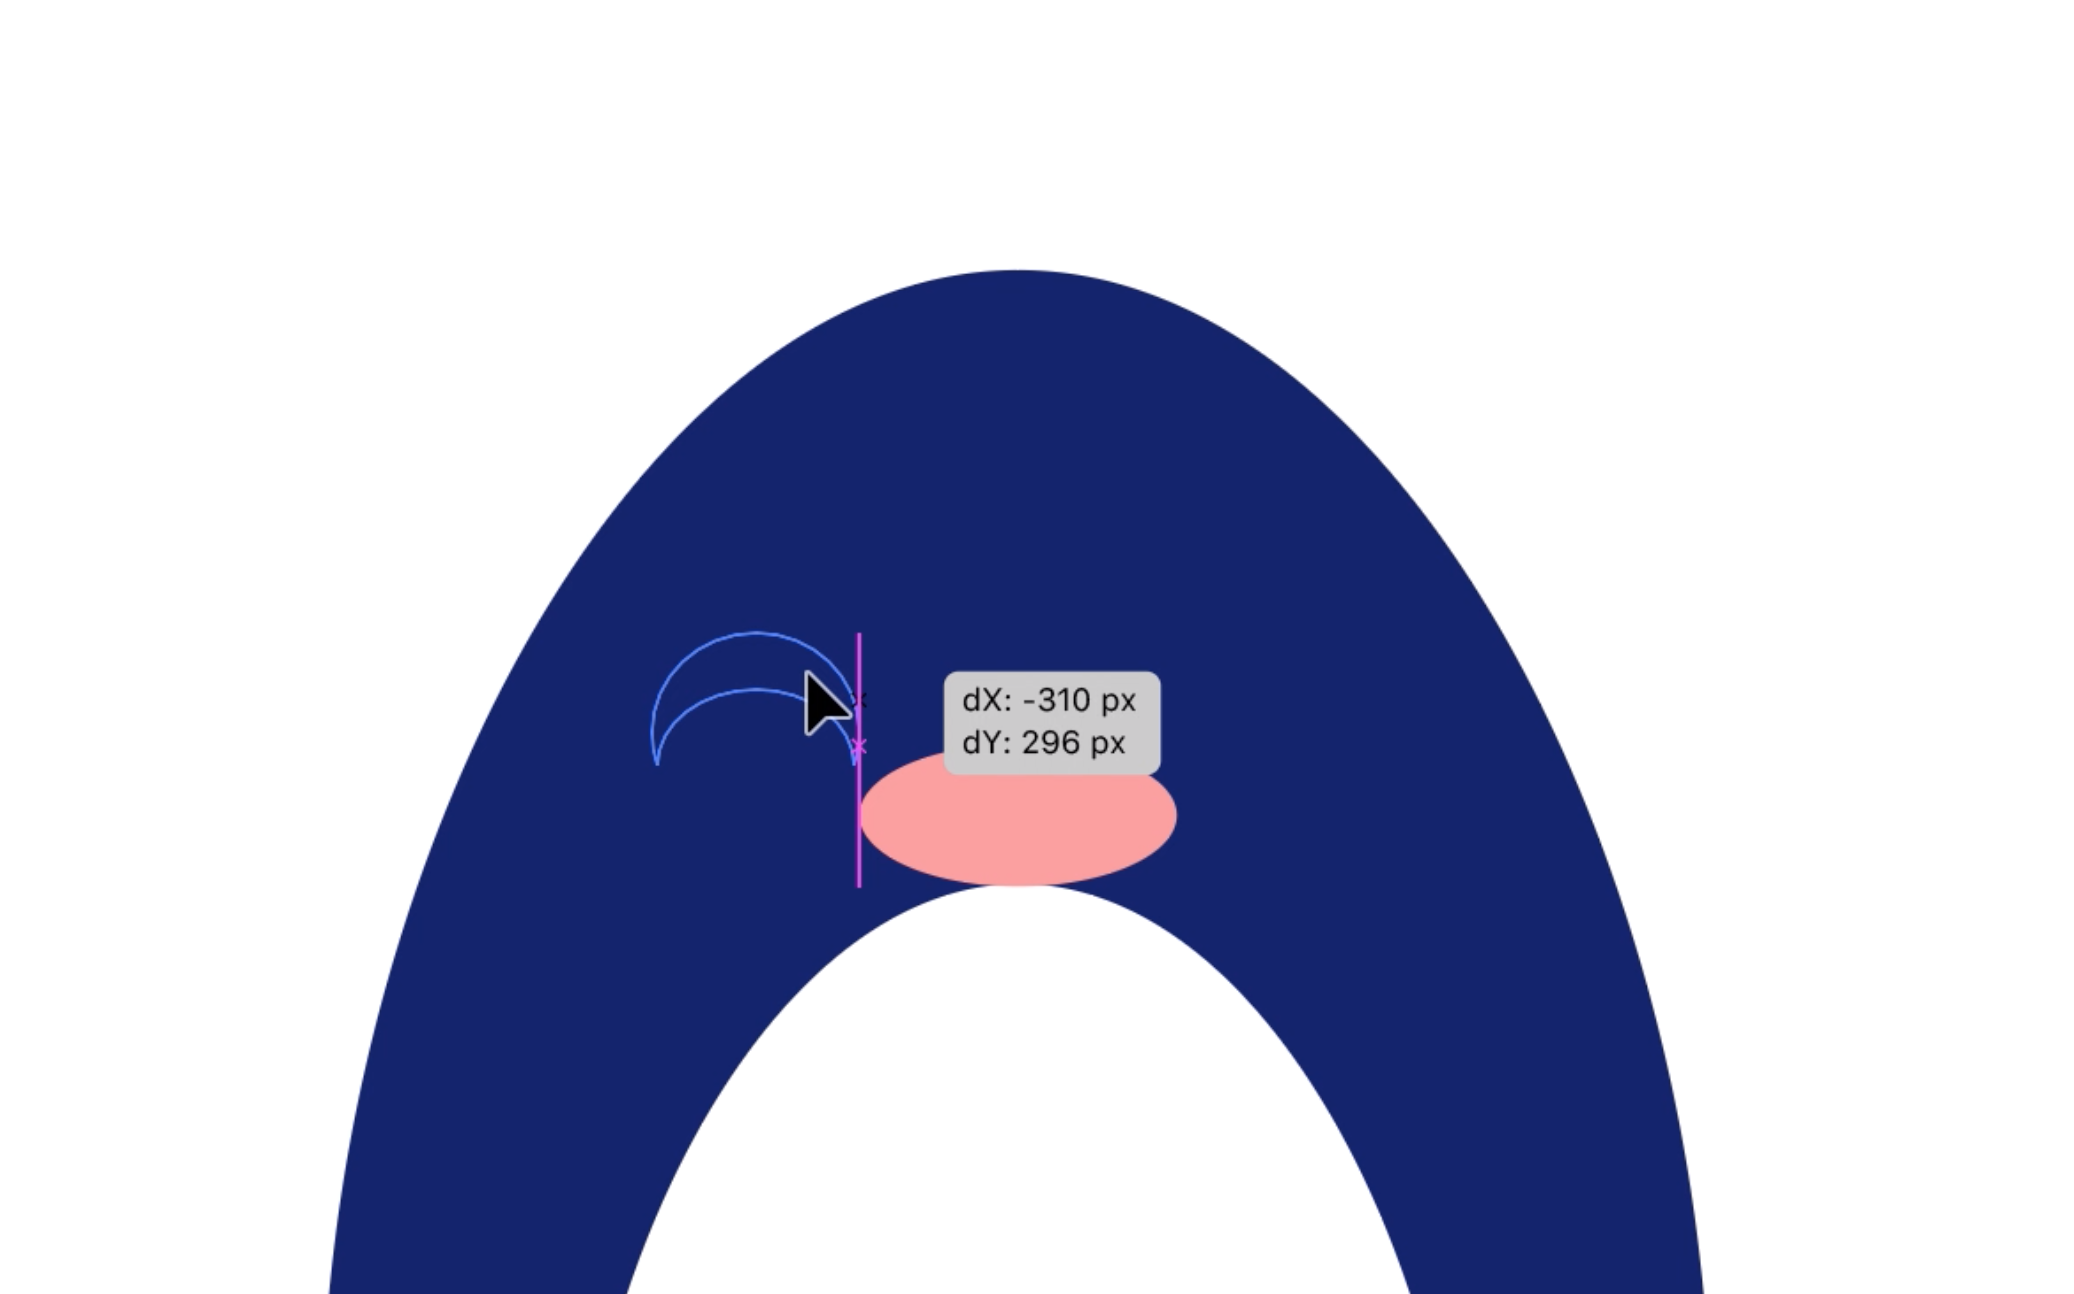
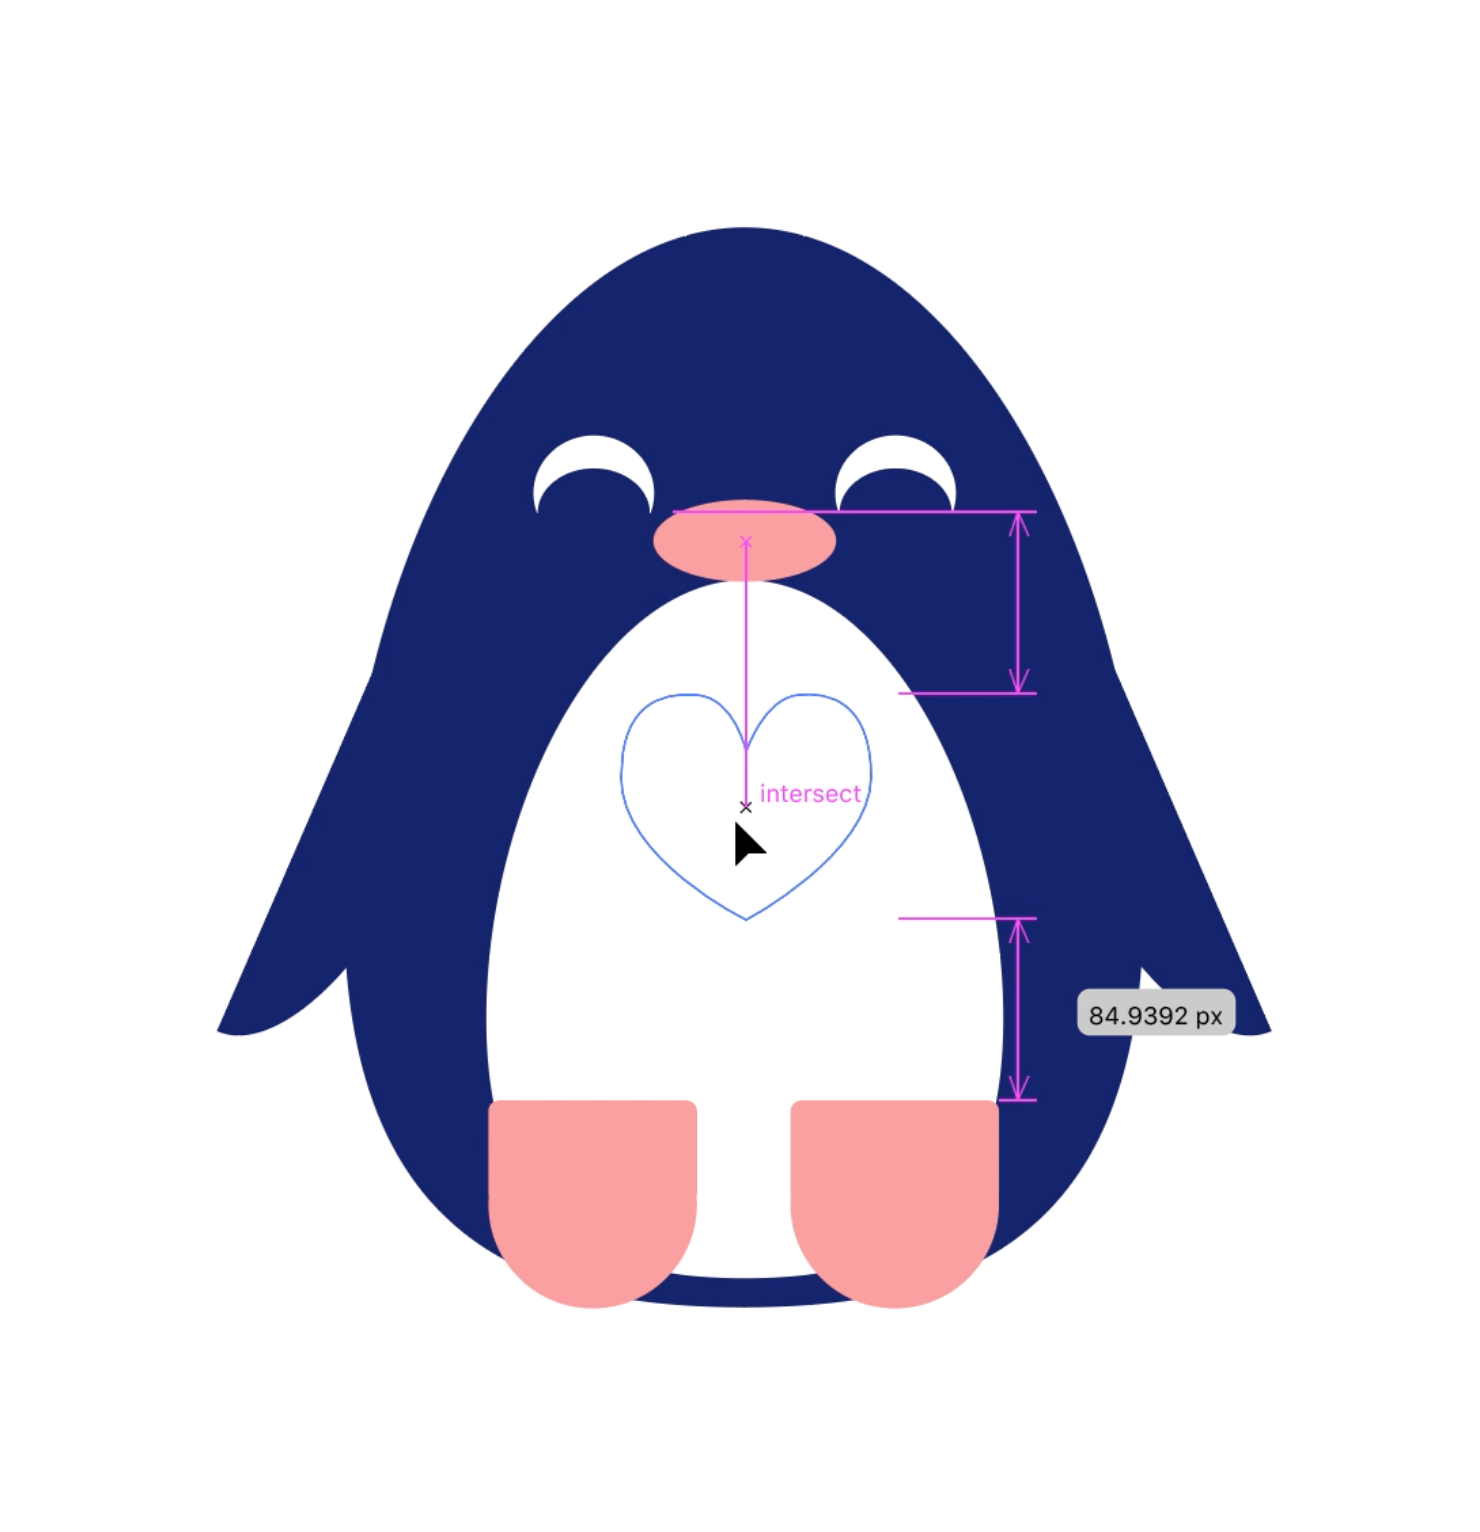
We will straight off drag the heart we created from the practice files. Click on the Illustrator Practice Files tab, and inside the Pen Tool Physical exercise, find the heart we created earlier. With the Selection Tool, cluck and hold patc dragging the warmness to the some other tab. Release once a green advantageous planetary hous appears on the Penguin E-Card document. Finally, position the heart on the abdomen.
-
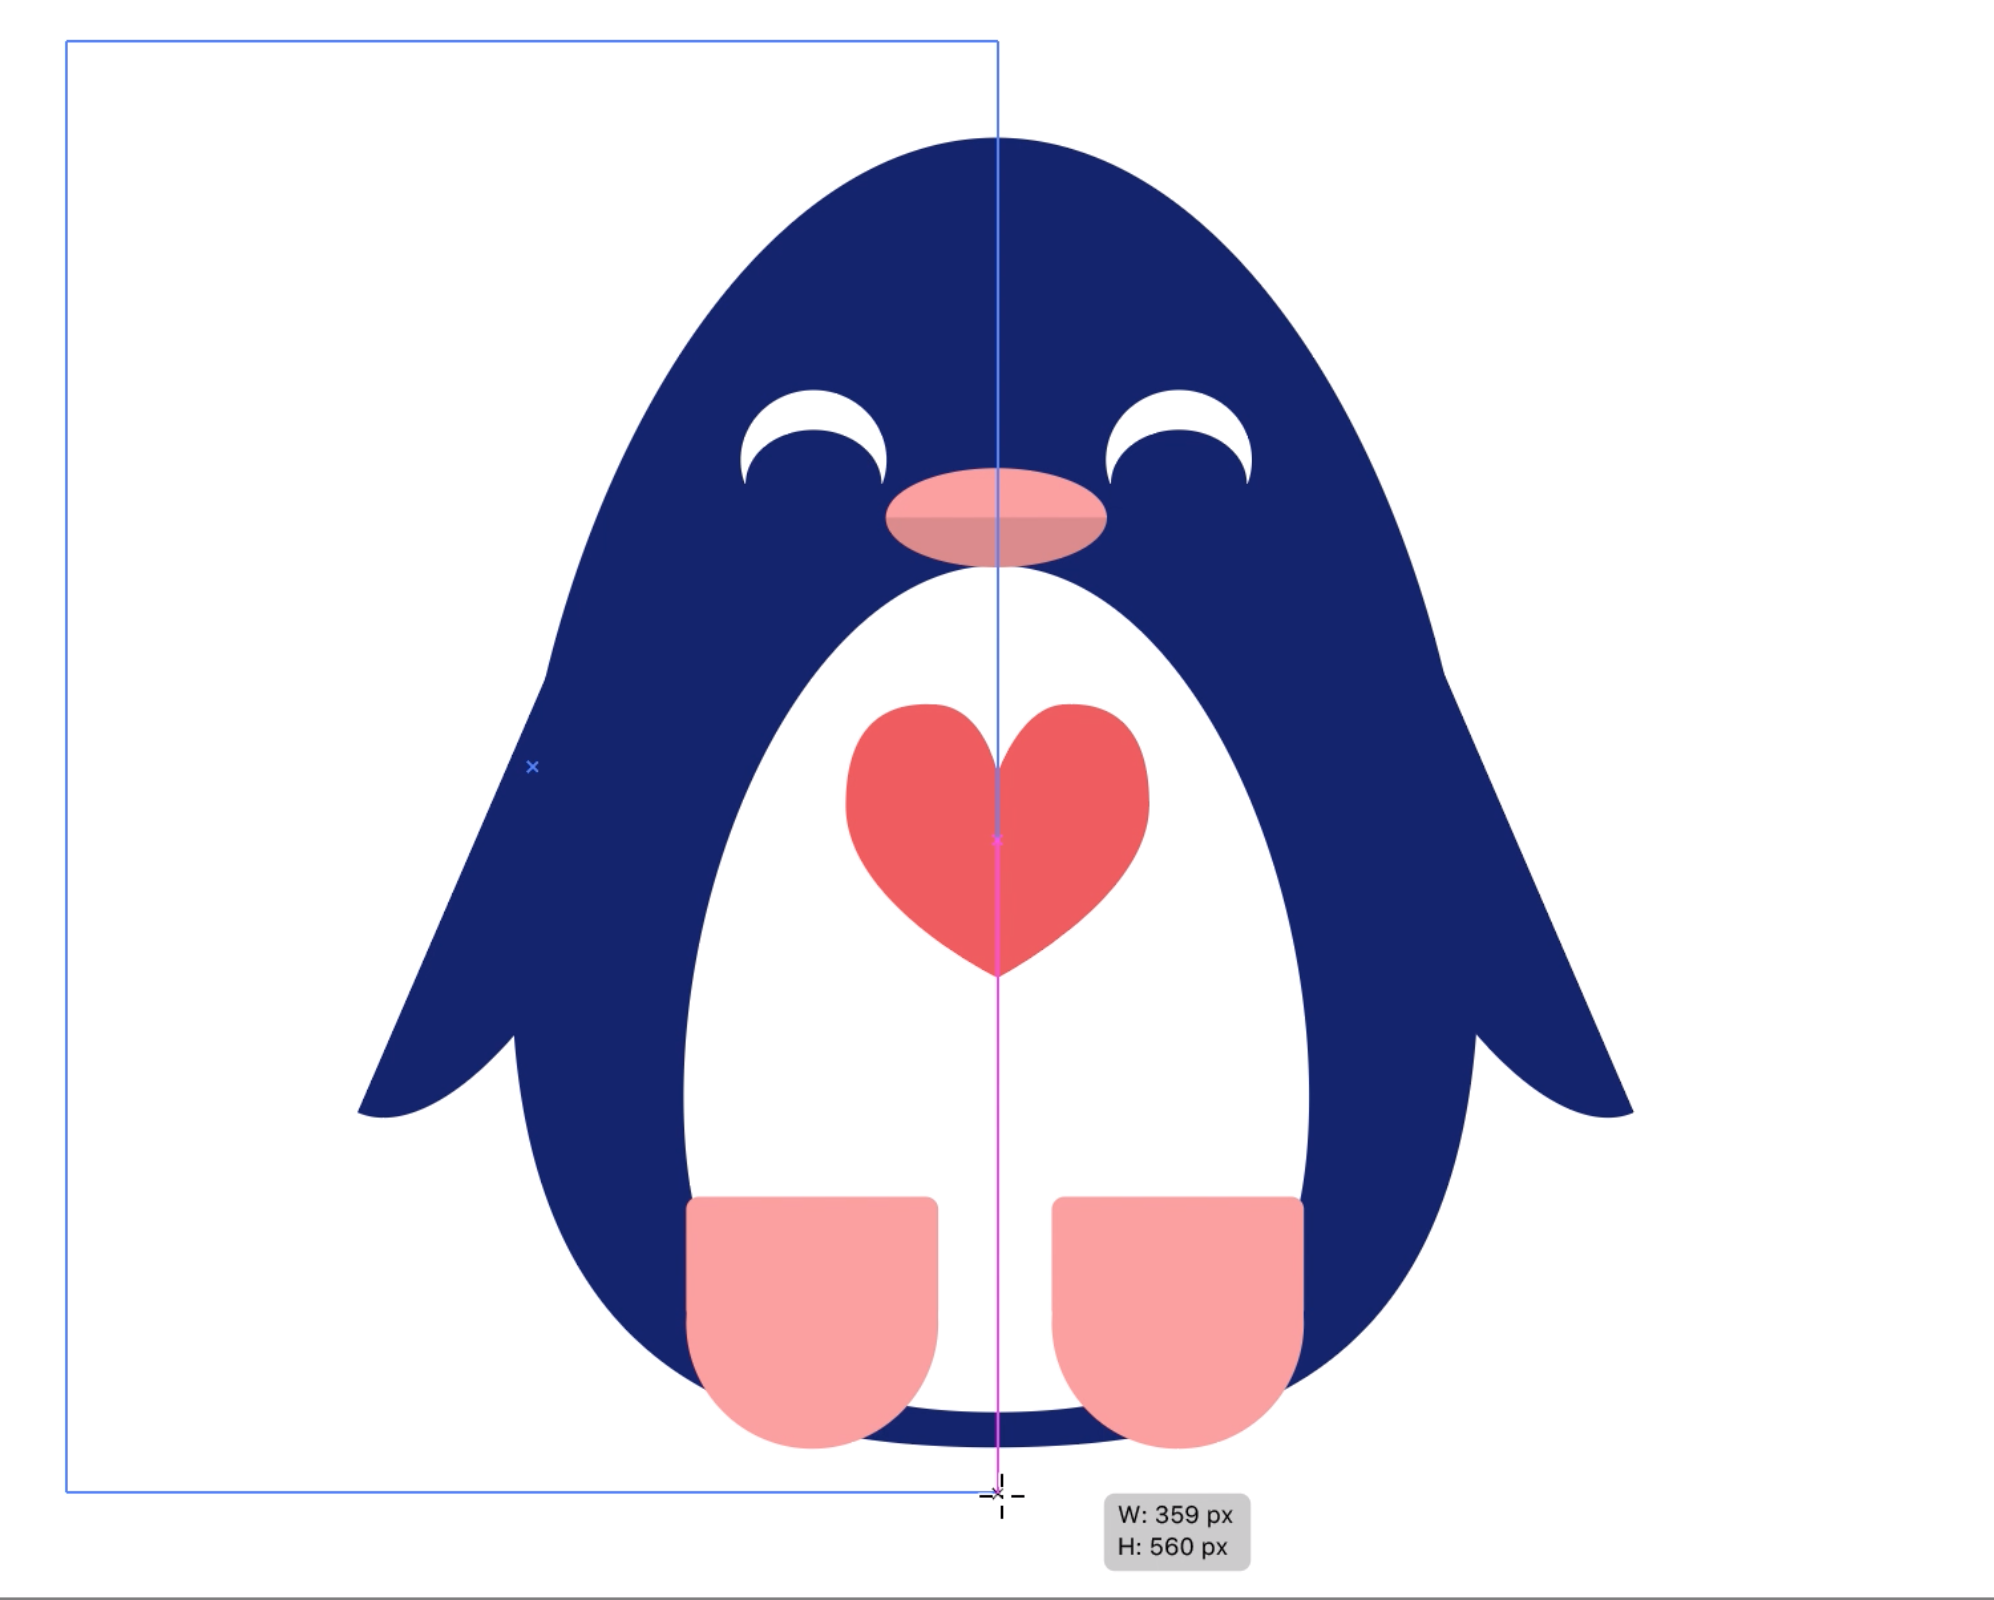
First, we will add a shadow to the beak. Drag a rectangle to the halfway point of the ellipse then change the fill to black.
-
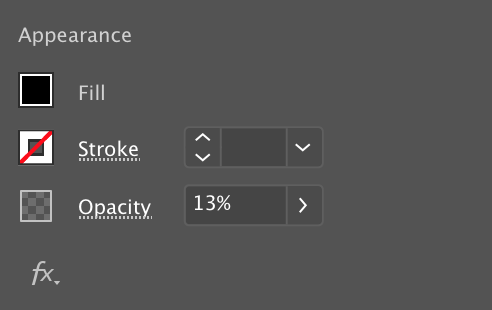
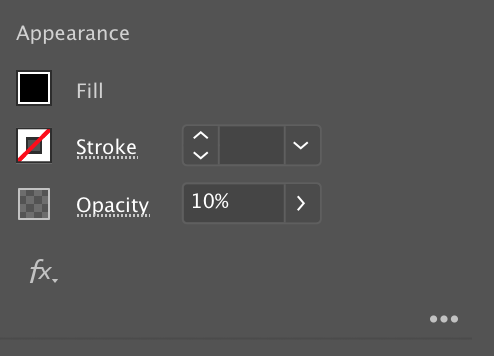
In order to have a more tail-ilk effect, go to the Properties Panel and lower the Opacity to a somewhere between 10-15%.
-
In that case, we do non want to use the rubberband method acting to select the beak and the rectangle because it will likewise choose the shapes behind it, soh we will have to use a dissimilar method. Exploitation the Selection Tool around select the gray rectangle so hold Shift while clicking on the beak. Next, click on the Shape Detergent builder Tool in the Tools Panel. Hold down the AL/Option key and click the gray area inaccurate of the beak.
-
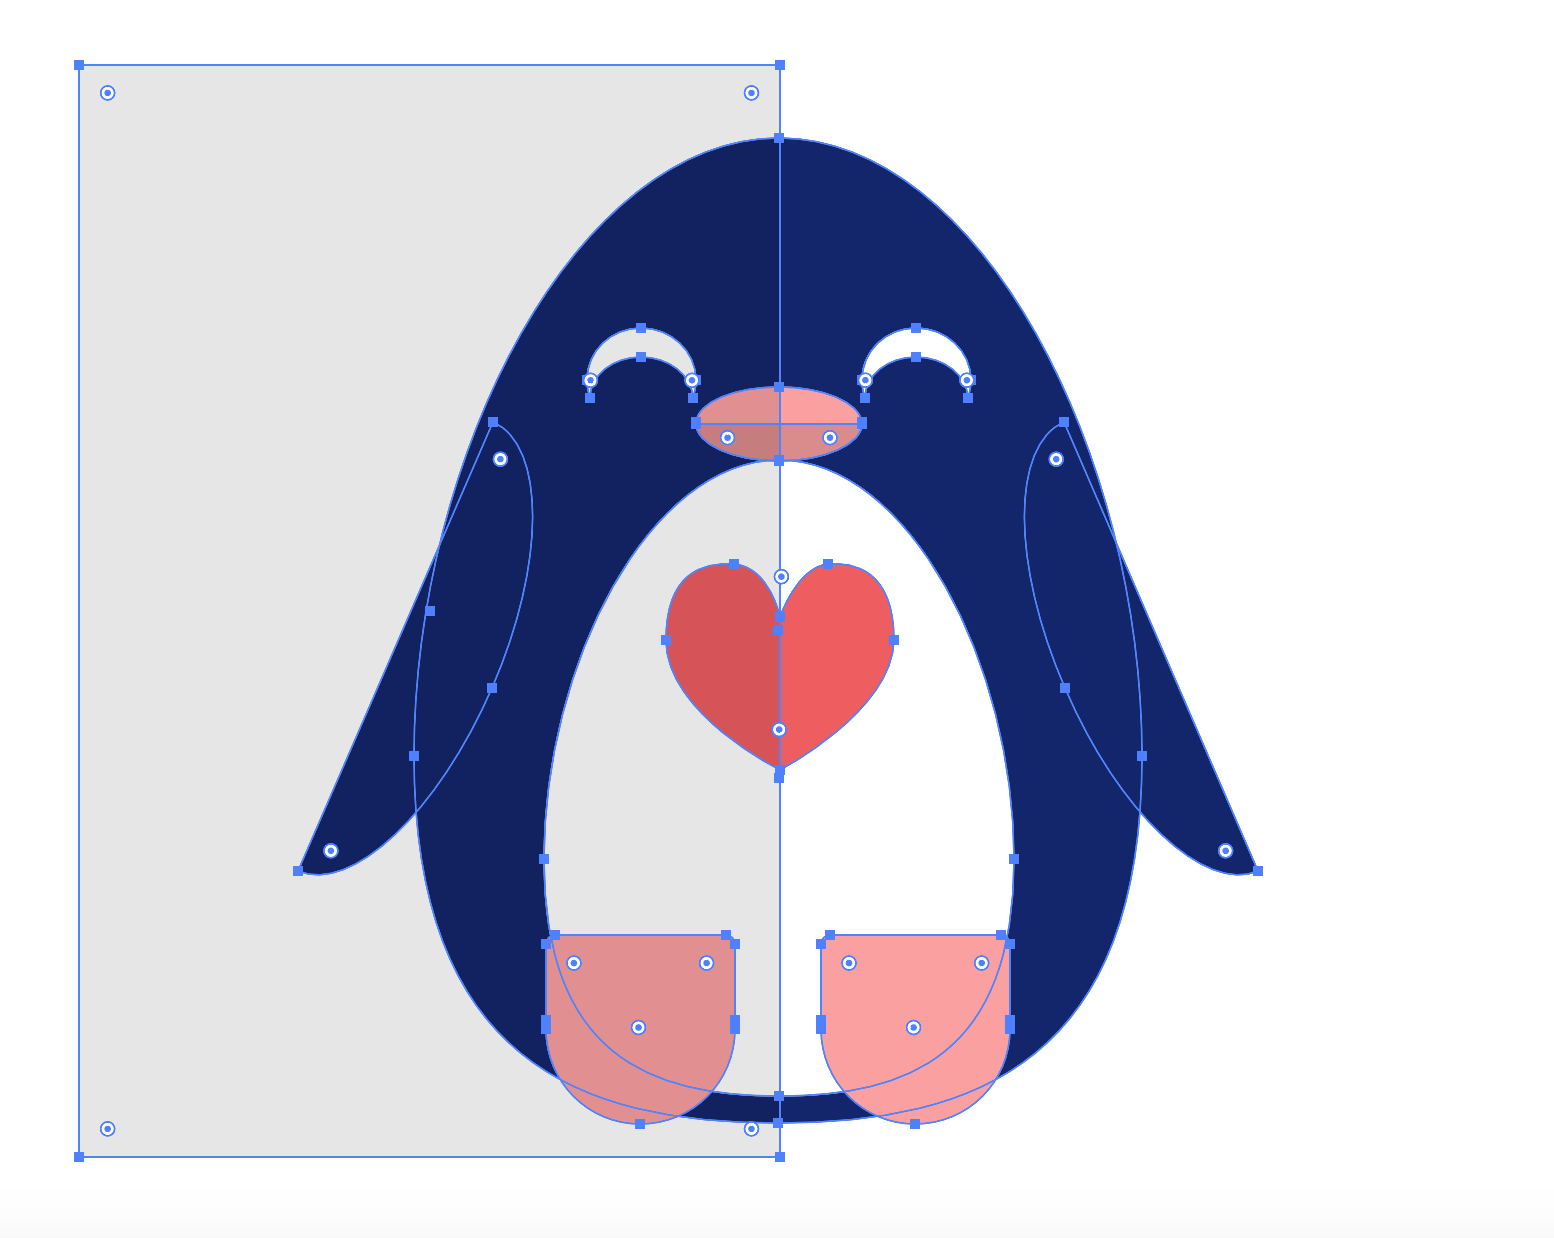
In a similar fashion, we will lend a shadow that covers half of the penguin. Drag a rectangle to the erectile intermediate point of the penguin and change the Fill to black.
-
Go to the Properties Panel and depress the Opaqueness to a somewhere between 10-15%.
-
In order to get rid of the unnecessary grey area, first use the rubberband method to select wholly the shapes. Click along the Shape Builder Tool then hold the Altitude/Option Key and get through the gray area outside of the penguin.
-
Flop now, all the parts of the penguin are idiosyncratic pieces, but you can group these shapes together. This allows you to easily move and resize the penguin without having to use the rubberband method each time. First, select the penguin victimization the rubberband method then go to Object > Aggroup. To ungroup the shapes, go to Targe > Ungroup.
-
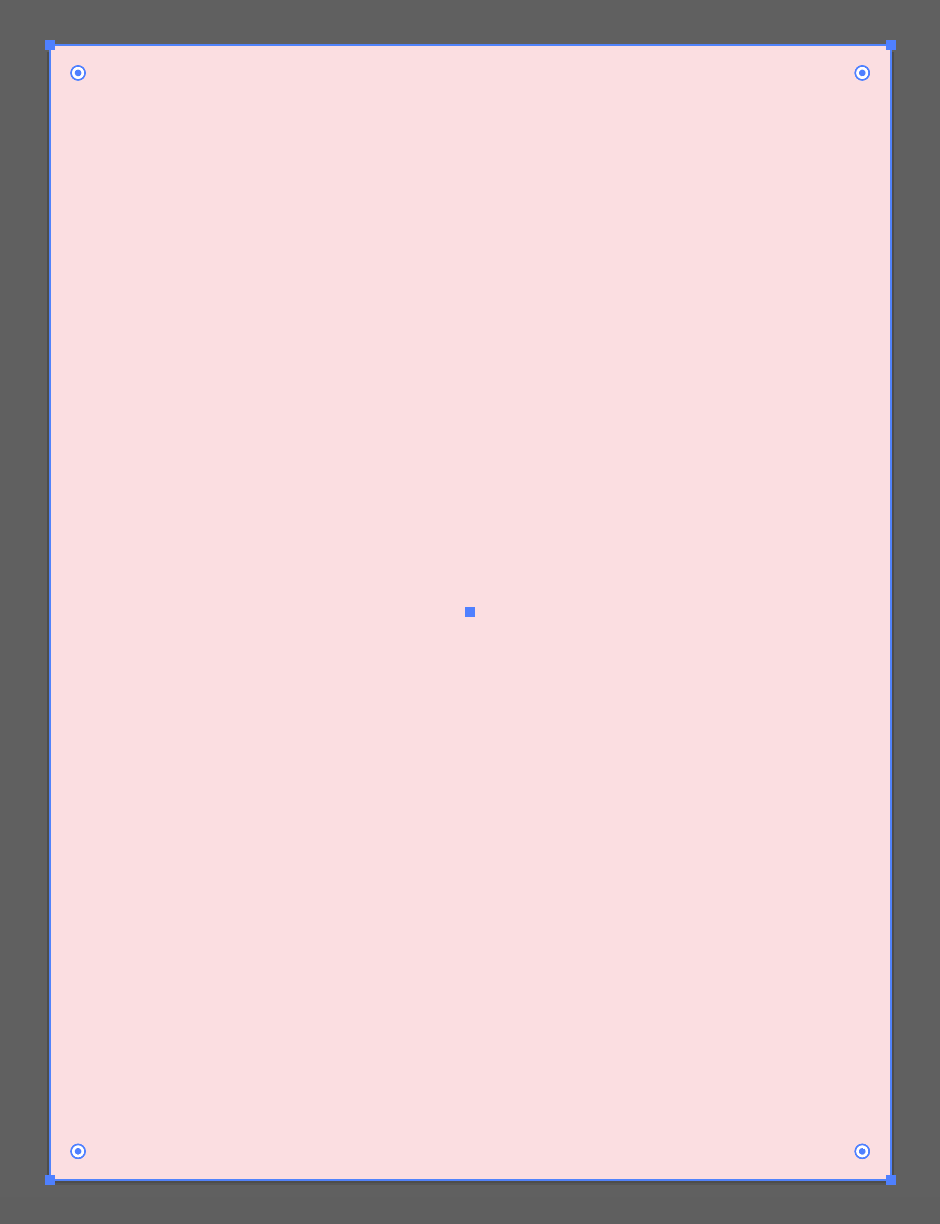
With the completed penguin, it is clock time to post a background. To start, select the Rectangle Tool and place your cursor at the corner of the document where the Smart Guides argue the "Intersect" point. Drag a rectangle to the antonym nook.
-
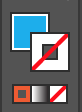
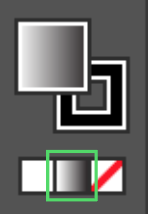
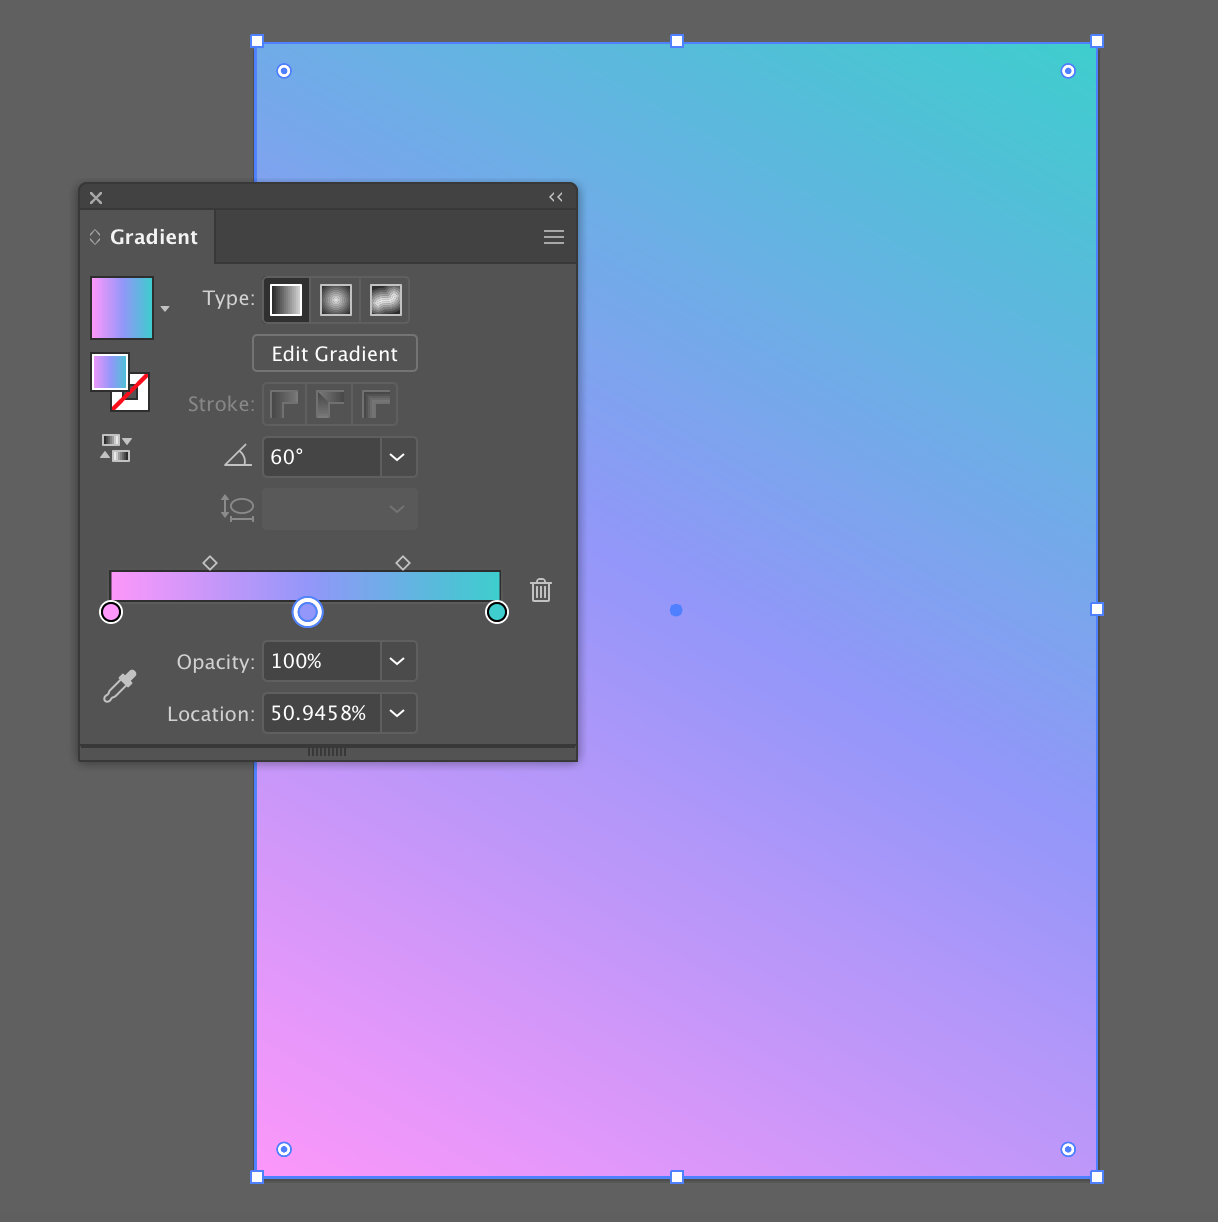
In that tutorial we end upwardly choosing a solid background, but you tin can prefer between a solid and a gradient background. With the background mold selected, click the Gradient Fill (highlighted in green in the picture) from the Tools Panel low Fill/Stroke Colour in.
-
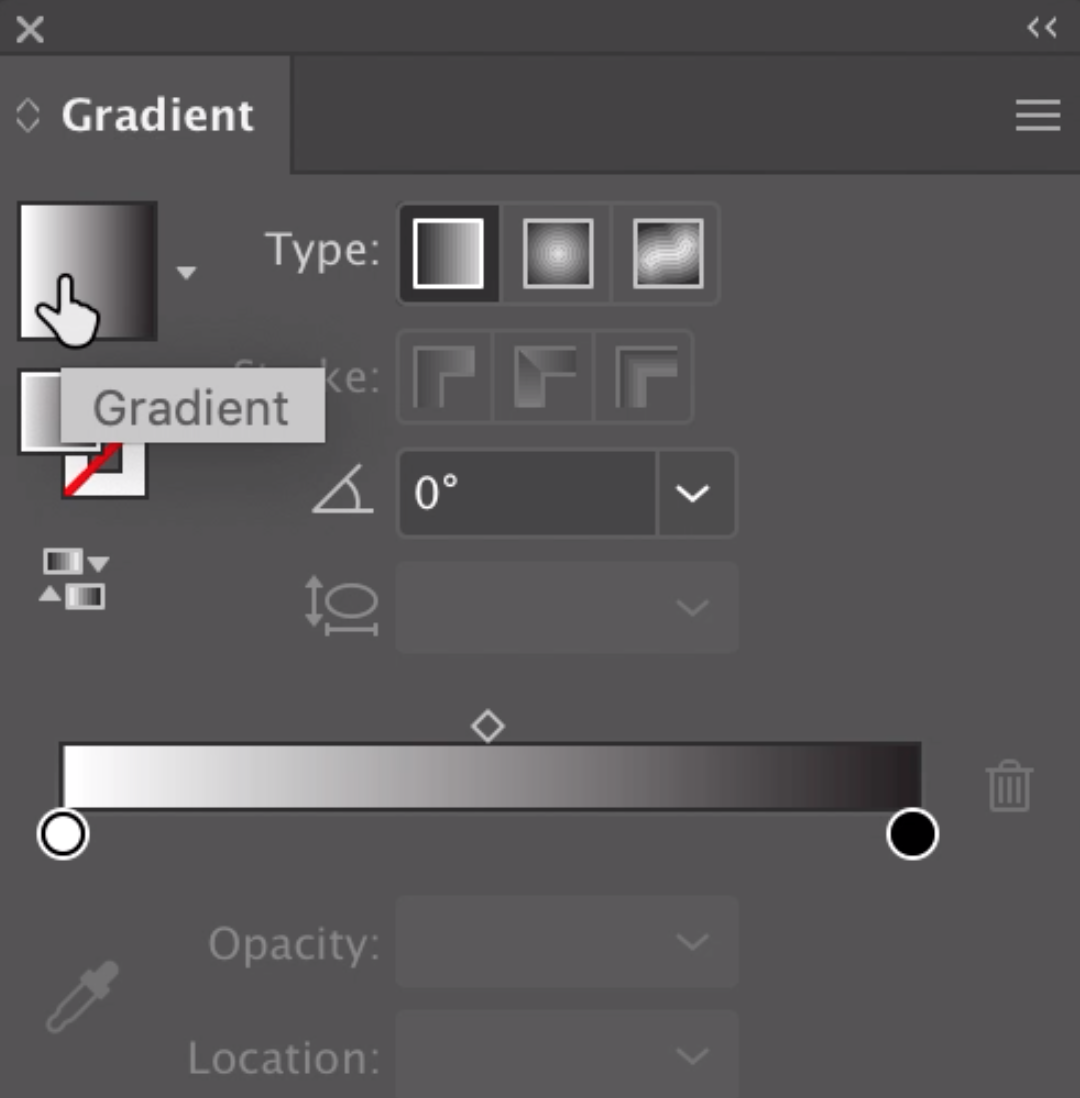
Make sure the the solid color swatch paid in on top of the hollow square (since we want to change the Fill non the Stroke), past choose a typewrite of slope.
-
Duplicate-suction stop the self-coloured color swatch in the gradient skidder legal community to change the color.
-
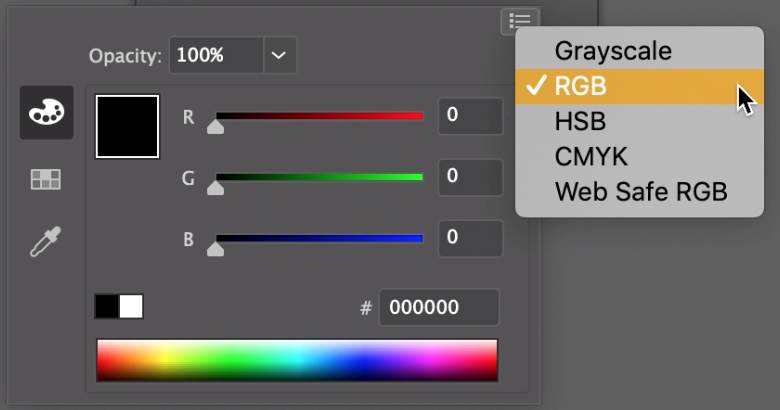
In order to change the color modality, snap the icon in the amphetamine right corner of the panel and select RGB. From on that point, choose any color that you the likes of.
-
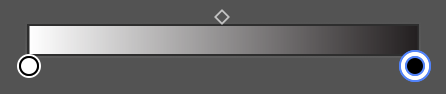
By moving the gray diamond shapes above the Gradient slider, it allows us to adjust the color transitions in the gradient. Play around with information technology until you finish with a product that you care.
-
Ready to ADD more colors to the slope, support down the Alt/Option key while clicking and dragging a swatch on the gradient slider. Change the color in the same way of life equally mentioned in steps 2 and 3.
-
Once you are chuffed with your gradient, you rump either farewell it A your background surgery change the fill of the rectangle to a pale pink color.
-
Our rectangle is presently to a higher place the penguin, but we fanny change the order of the layers. Right-click the rectangle then go to Arrange > "Send to Back".
-
We are almost shoot down with our e-card! The last break is adding text. In the Tools Panel, pick out the Type Tool. Drag knocked out a text corner and add a message.
-
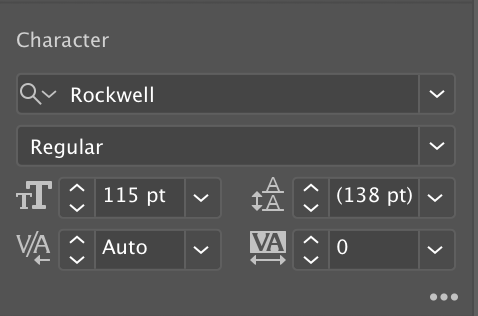
Commute the size of the text by exit to the Properties Control panel and profit-maximizing the font size of it to 115 pt.
-
In this tutorial we use the font Rockwell, but you give notice play with the style of fonts in the dropdown bar to find the font that you like.
-
With the text boxful chosen, utilize the Eyedropper Joyride and flick on the body of the penguin to retroflex the fill in of blue for the text.
-
We are finished assembling the ecard! Next, let's finish the project by exporting and saving our workplace.
Using Guide for the Eyes and Wings
For the next two trunk parts, we will be using the Scout Tool. First-class honours degree, we will make over the crescent shaped eyes.
The last body start we will be victimization Pathfinder for are the wings.
Eyedropper Tool
![]()
Eyedropper Tool
Expend this tool to prize gloss from other area of your artboard and replicate the color for an object.
Shortcut: I


Combining Shapes with the Shape Builder Tool
Rounded Rectangle Tool Not Appearance?
As of Illustrator 2022, the Rounded Rectangle Tool is invisible from the Tool Panel.
To enable this tool, attend as of the Tools Panel and clack on the icon with three dots. From the expanded panel, select the Rounded Rectangle Joyride.

Stirring Objects to Other Papers
Removing Shapes with the Shape Builder Tool
For this part of the tutorial, we will add dimension to the penguin by creating shadows with the Condition Constructor Tool.


Grouping Objects
Creating A Background


Saving/Exporting Final Artwork
When saving Beaver State exporting from Illustrator, it is important to choose file formats and settings that are appropriate for the intended use of your artwork. In this section, we'll first save and export our e-card then we will learn more about how we can save artwork properly for print and entanglement applications.
Saving/Exporting the Ecard
-
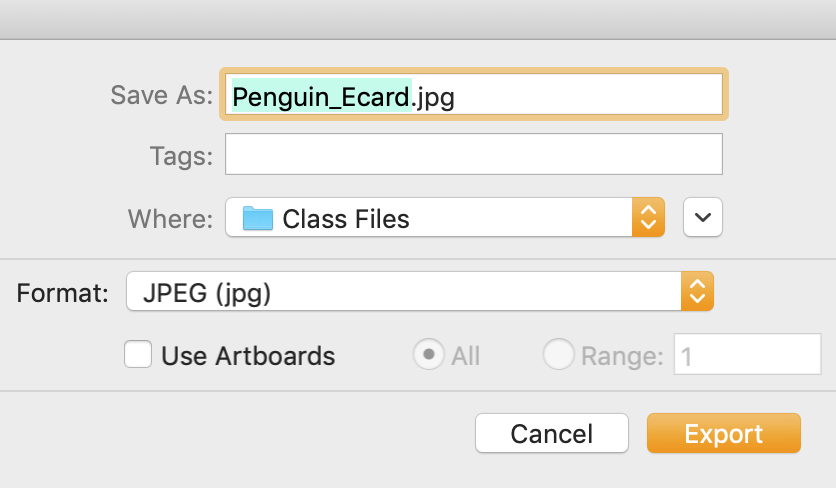
Go to File > Exportation > Export As...
-
Change the file format to JPEG because IT allows us to display millions of colours. Choose your wanted folder and click Export.
-
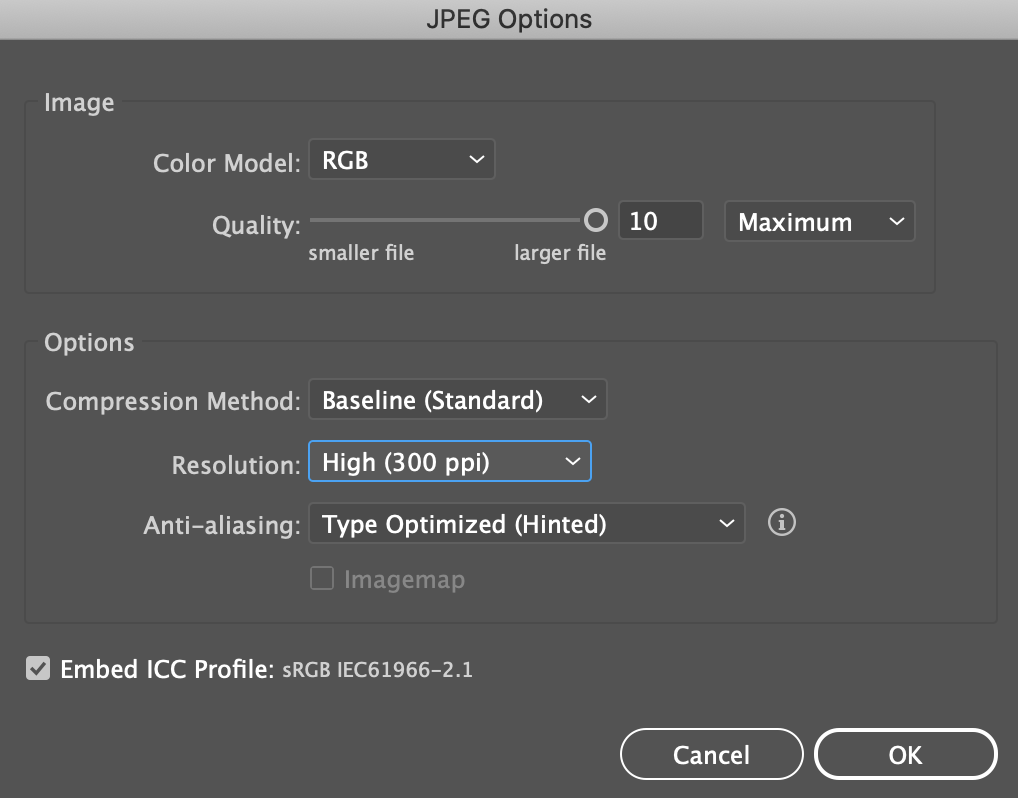
From the JPEG menu, various options look. You power notice that the color mode is set to RGB. The RGB color musical mode is suitable for artwork that will represent viewed on screens because the colors will be vibrant connected computer and phone screens. To keep the quality of the image, set the quality to 10 and the select 300 ppi for the resolution. Keep the rest of the settings the same and click OK.

Congratuations happening complemental the penguin ecard! You can send it to your friends, family, or whoever you wish to send it to. The undermentioned section volition excuse how you can save other projects.
Preservation for the Web
Images used connected the Entanglement must meet specific file format and sized requirements. For example, in order to utilise a banner graphic connected a website, we'll need to convert it to a different file format. This process is titled image optimization.
Project Size/Resolution
Since image file sizes affect the sum of time information technology takes to load a web page into a browser, IT's important to keep file sizes arsenic small as possible, while still maintaining commonsensical quality.
-
Always set image resolutions to 72ppi (pixels per inch) - this is the default resolution of most device screens.
-
Always scale images to the exact size needful - if the space on your web page is 960px x 180px, your ikon should be 960px x 180px. Spell browsers can graduated table images to fit a particular space, this results in distortion and/or image files that are larger than necessary.
Web Image Formats
Network browsers are entirely able to show a few types of images, therefore, we often need to convert original images into a vane-friendly format. Different formats are used for unusual types of images:
| Data formatting | Characteristics | Second-best for |
|---|---|---|
| GIF | Great at compressing flat color, simply can only display 256 colors. Can display simple on/off transparency. | Illustrations/text with vapid colors, and animation |
| JPEG | Rump display millions of colors; smaller file size than PNG-24 | Photographs, graded colours (ie: gradients) |
| PNG-8 | Enceinte at compressing flat color, simply can only presentation 256 colors. Can display three-needled along/off transparency. (similar to GIF) | Illustrations/text with flat colours |
| PNG-24 | Able to display partial transparency (shadows, etc) | Illustrations with Sir Thomas More complex colors, screenshots, and non-photograph images |
Optimizing Images
Fortunately, Illustrator includes features that come through easy to optimize web graphics.
-
In the top menu bar, Choose File > Export > Save for Entanglement.
-
Illustrator attempts to opt the lodge format and settings that are best for the artwork in your written document. As noted in the table higher up, GIF and PNG files are generally optimal for illustrative prowess.
-
In the Save window that opens, Change the file cabinet name and save it to your desired pamphlet.
-
Click Save
Saving for Print
You can print Illustrator files from the computer that you created them on without issue, however, if you are printing files from another computer or sending them to a print shop class, there are a few points to note:
Color Blank
For printing, Illustrator files should be in CMYK color mode. Using the Print Preset when creating a new document sets the color mode to CMYK. To swan that your document is in CMYK mode:
-
In the top bill of fare bar, Choose Data file > Document Color Mode.
-
Make sure that CMYK is selected.
Fonts
Fonts are stored on item-by-item computers - there's no guarantee that other computer or a print shop will have the font(s) you in use in your written document. To ensure that your type shows up as intended, it's a good idea to convert your type to outlines. This agency ever-changing your type from live, editable eccentric to shapes that Illustrator treats just like whatever other shape targe. To change over type to outlines:
-
Before outlining type, always Save a Copy of the file (File > Save a Copy).
-
Make sure that all objects and layers are unfastened, then select everything in your document (Edit > Select Wholly or Ctrl/Command + A).
-
In the top menu banish, Choose Typewrite > Create Outlines.
-
DO NOT save outlined type in your unconventional document - you won't embody healthy to blue-pencil it!
Links
Though we did non cover placing images into Illustrator files, you'll verisimilar encounter this sport as you mould further in Illustrator. When images are placed into Illustrator documents, they are not embedded into the file; as an alternative, a reference (link) to an foreign data file is created. In order to print files with linked images, the external envision files must be forthcoming. To avoid lacking images, do one of the following:
-
Place all of your linked files into ane folder and supply this to your pressman, along with your document file.
-
Embed your linked files into the text file:
-
In the top computer menu cake, Choose Window > Links to open the Links Panel
-
Select all of the files in the Golf links Panel, then Click the Menu Image and Click Embed Effigy.
Save your document as a PDF (see instructions downstairs); connected files will automatically be embedded into the PDF.
File Format
Most print shopes use Adobe Creative Suite software, simply they may not have got the same version that you used to create your document. To avoid file format problems, it's a worthy idea to save your final document in a universal format, such arsenic PDF. To save a PDF from Illustrator:
-
Outline your fonts first, shadowing the directions above - fonts are not embedded in PDF documents.
-
In the spinning top fare blockade, Take File > Lay aside A
-
In the Bring through As window that opens, Choose Adobe PDF, then Click Save.
-
In the Save Adobe PDF windowpane that opens, Set the Adobe PDF Present field to High Quality Print.
-
Click Relieve PDF.
Drawing a Heart With the Pen Tool in Illustrator
Source: https://sts.doit.wisc.edu/manuals/illustrator1/
0 Response to "Drawing a Heart With the Pen Tool in Illustrator"
Post a Comment